Last Updated on May 1, 2023
RV day-night shades are an excellent addition to any recreational vehicle. They provide privacy, control light entering the RV, and add a touch of elegance to the interior. But, just like any other part of your RV, they require cleaning to maintain their beauty and functionality.
Now the question arises of how to clean RV day-night shades.
Cleaning RV day-night shades may seem challenging initially, but it’s a breeze with the proper techniques and tools. First, you must remove the shades from their track, dust them off, and start spot cleaning.
You can deep clean the shades with water and mild detergent. After cleaning, you should dry them off completely before reinstalling them in the track or motorhome.
Let’s discuss the entire process of cleaning RV day-night shades in detail.
How to Clean RV Day Night Shades: DIY Steps
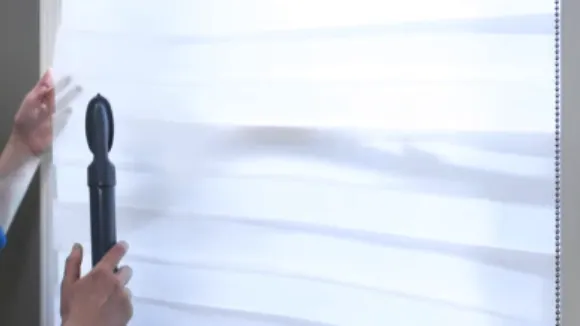
Cleaning RV day night shades is crucial to maintaining a clean and comfortable environment in your RV. Follow these steps to ensure that your shades are thoroughly cleaned and well-maintained.
Step 1: Remove the Shades
To properly clean your RV day night shades, the first step is to remove them from their brackets. This will allow you to have a better reach and clean them more effectively.
To remove the shades, gently pull down on the bottom rail until it clicks out of place. Then, tilt it towards you and lift it out of the bracket. Repeat this for each shade in your RV.
It’s important to handle the shades with care during removal and cleaning to avoid damaging them. Be gentle when pulling them down and lifting them out of the brackets to prevent bending or breaking.
Once you have removed all the shades, place them on a flat surface such as a table or countertop covered with a clean towel or cloth to protect them from scratches.
Now that you have successfully removed your RV day night shades, you can move on to dusting off any loose dirt or debris before spot cleaning and deep cleaning.
Step 2: Dusting Off the Shades
Dusting off RV day night shades is fundamental to keeping them clean and in good condition. Over time, dust and debris can accumulate on the shades’ surface, making them look dull and dingy. Dusting also helps to remove any allergens that may have accumulated on the shades, making your RV a healthier place to be.
You will need a soft-bristled brush or a microfiber cloth to start cleaning your RV day night shades. Avoid using abrasive materials like steel wool or rough sponges as they can scratch the surface of the shades.
Begin by gently brushing or wiping down each shade individually. Start at the top of the shade and work your way down to avoid pushing dirt further down onto the shade. Use a gentle back-and-forth motion to remove any dust or debris from the surface.
If you notice any stubborn spots or stains on your RV day night shades while dusting, don’t worry; we will address those in step 3. For now, focus on removing all visible dirt and debris from each shade.
Once you have finished dusting off all of your RV day night shades, take a moment to inspect them for any signs of damage or wear and tear. Look for cracks, tears, or discoloration that could indicate that it’s time to replace your shades.
Step 3: Spot Cleaning
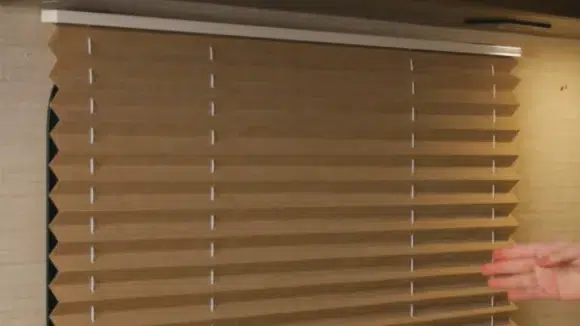
Spot cleaning is essential to the RV day night shades cleaning process. It involves removing stains and spots that are not easily removed by dusting alone. Some common causes of spots on RV day night shades include food spills, pet accidents, and oil smudges.
To effectively spot clean your RV day night shades, you will need a few tools and materials. These include a clean cloth or sponge, mild detergent or vinegar solution, and warm water. It is important to note that harsh chemicals such as bleach should be avoided as they can damage the fabric of the shades.
To begin spot cleaning, dampen the cloth or sponge with warm water and gently apply it to the affected area. If the stain persists, add a small amount of mild detergent or vinegar solution to the cloth or sponge and repeat the process. Be sure to rinse off any soap residue with clean water.
It is important not to oversaturate the fabric with water during spot cleaning as this can cause watermarks and damage to the material. Once you have removed the stain, use a dry cloth or towel to blot away any excess moisture.
If you are dealing with particularly stubborn stains, specialized cleaning products are available for RV day night shades that can help remove even tough stains without causing damage.
Step 4: Deep Cleaning the Shades
Deep cleaning is crucial in maintaining their quality and prolonging their lifespan. Dust and dirt can accumulate on the shades, causing them to look dull and unappealing. Here are the steps to deep clean your RV day night shades:
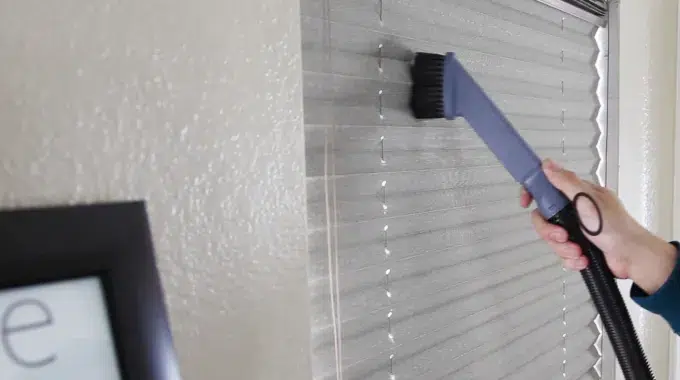
- Start by brushing the shades with a soft-bristled brush or using a vacuum cleaner with a brush attachment to remove any dust. This will help prevent any scratches or damage to the fabric.
- Next, mix a solution of warm water and mild detergent in a bucket. Dip a soft cloth into the solution and wring it out until it’s damp.
- Test the solution on an inconspicuous area of the shade first to ensure it doesn’t cause any discoloration or damage to the fabric.
- Once you’re confident that the solution is safe for your shades, use the damp cloth to wipe down each shade panel from top to bottom gently.
- Use a soft-bristled brush dipped in the cleaning solution for tough stains or spots to scrub the affected area gently.
- Rinse off any soap residue with a clean, damp cloth.
- Finally, hang up your shades to air dry completely before reinstalling them in your RV.
It’s important not to use harsh chemicals or abrasives when cleaning your RV day night shades as they can damage or discolor the fabric. Stick with mild detergents and gentle cleaning tools like soft cloths and brushes.
Step 05: Drying and Reinstalling your RV Day Night Shades
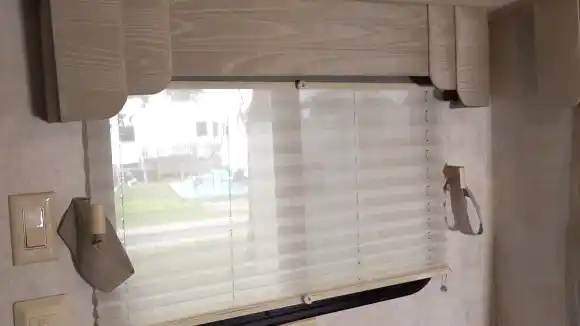
After cleaning your RV day night shades, it’s time to dry and reinstall them. This step is crucial to ensure that the shades are in good condition and function properly.
To start, lay the shades flat on a clean surface, such as a table or countertop. Use a clean towel or cloth to blot any excess water from the shades gently. Be careful not to rub too hard, which can damage the fabric.
Next, hang the shades back up in their original position. Make sure they are straight and level before securing them in place. You may need someone to help you hold the shades while reinstalling them.
Finally, test the shades by opening and closing them a few times. This will help ensure they are functioning properly and that the cords have no kinks or tangles.
It’s important to note that you should never put your RV day night shades in the dryer or use high heat to dry them. This can cause shrinkage or damage to the fabric.
Maintenance Tips for Your RV Day Night Shades
Maintaining your RV day night shades is essential in keeping them in good condition and prolonging their lifespan. Here are some maintenance tips that you can follow:
- Regular cleaning: Regularly dust off your shades to prevent the buildup of dirt and grime. This will also prevent the need for deep cleaning too often.
- Avoid harsh chemicals: Avoid using harsh chemicals or abrasive cleaners when cleaning your shades. These can damage the fabric and cause discoloration or fading.
- Handle with care: When removing or installing your shades, handle them with care to avoid any tears or damage to the fabric.
- Protect from sunlight: Protect your shades from direct sunlight when not in use, as prolonged exposure can cause fading and discoloration.
- Store properly: Store your shades properly when not in use. Roll them up neatly and store them in a dry, cool place to prevent any mold growth or damage.
How do you clean an RV day night motorized shade?
- Start by removing loose debris or dust from the shade using a vacuum cleaner with a brush tool. Be sure to get into all the crevices and corners.
- Next, mix a mild soap solution in a bucket of warm water. Dip a soft cloth or sponge into the solution, and gently wipe down the shade, taking care not to scrub too hard, as this may damage the fabric.
- If you encounter any stubborn stains or dirt, spray water on the affected area and let it soak for a few minutes before wiping it away with the cloth.
- Rinse the cloth or sponge frequently in clean water to avoid spreading dirt and grime around the shade.
- Once you have cleaned the entire shade, use a clean cloth or towel to dry it thoroughly. If the shade is still damp, leave it open to air dry altogether before retracting it.
How Often Should You Clean RV Day Night Shades?
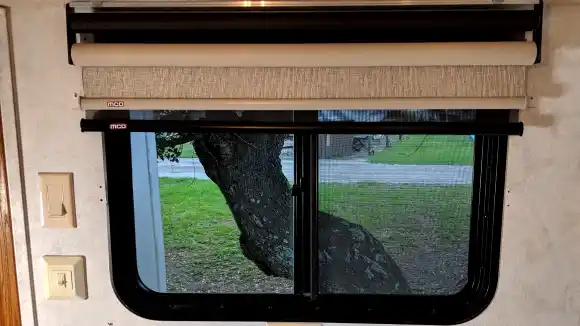
Just like any other part of an RV, day-night shades need to be cleaned regularly. Neglecting them can lead to a buildup of dirt and dust which can cause health problems for the occupants of the RV.
It is generally recommended that RV day night shades be cleaned at least once every three months. But, this frequency can vary depending on factors such as the amount of use, dust and dirt accumulation, and personal preference.
RV owners should monitor their day night shades and clean them as needed to ensure they remain at their best.
Pro Tips to Keep Your RV Day and Night Shades Spotless and Pristine
Cleaning your RV day night shades is not difficult as long as you have the right tools and follow the proper steps. Understanding your shades and pre-cleaning tips are essential to prevent damage or discoloration.
Having the necessary materials, such as a vacuum, microfiber cloth, and gentle cleaning products, will ensure that your shades are cleaned effectively without causing any harm.
Remember to remove the shades before cleaning and dust them off first. Spot cleaning any tough stains with a gentle cleaner is recommended before deep cleaning the entire shade. Once cleaned, allow them to dry completely before reinstalling them back onto your RV windows.
Maintenance is key to keeping your RV day and night shades looking great for years. Regularly dusting them off and spot cleaning as needed will prevent the buildup of dirt and stains that can be difficult to remove later on.

