Last Updated on April 11, 2023
Without an RV garbage disposal unit, you must manage all waste by hand. Depending on the area where you’re camping, this could mean burning or burying organic matter or carrying non-organic items, such as containers, back home with you. Either way, it is inconvenient and likely time-consuming.
So you may ask yourself, can you put a garbage disposal in an RV to manage organic waste while camping? Yes, you can easily install a separate garbage disposal in your RV sink with some essential tools by following some easy steps & can manage your waste.
A low-maintenance compact garbage disposal system eliminates the need for trips outside vehicles to dump trash or deal with smelly food waste. Please continue reading to find out the steps involved in installing a garbage disposal in an RV & the pros of mounting an RV garbage disposal system.
How Can You Put a Garbage Disposal in an RV?
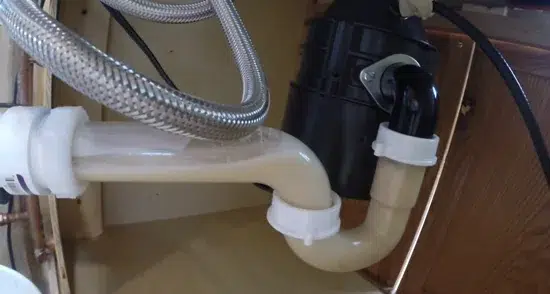
A garbage disposal unit, specially designed for RVs, can be purchased & installed inside your RV. Installing a garbage disposal in your RV is easier than you might think.
To get started, go ahead and follow these steps:
Step 1. Gather All Necessary Parts and Tools to Install
Before beginning the garbage disposal installation in an RV, you must collect all the necessary parts and tools used in the process. This includes:
- Pliers,
- Wrenches,
- Screws,
- A mounting bracket,
- A garbage disposal unit.
Depending on the size of the RV sink cabinet, it is recommended to purchase a compact or mini-sized garbage disposal model that fits comfortably within the space provided.
Step 2. Cut Out Space in RV’s Sink Cabinet:
An RV garbage disposal can be installed by cutting a hole in the sink cabinet. This can be done using either a cordless reciprocating saw or a cordless speed saw rotary cutter tool, depending on the type of material being cut through.
Ensure to measure out enough room for the mounting bracket and garbage disposal unit before beginning this step so they fit correctly when installed. Also, ensure any sharp edges are smoothed out with aluminum oxide sandpaper after cutting out space so there are no sharp edges that could injure someone during use.
Step 3. Assemble and Secure Mounting Bracket to Sink Base:
A mounting bracket is typically included with most garbage disposals intended for residential use. But if it isn’t included, an EZ mount garbage disposal sink flange kit must be purchased separately before assembly and installation.
Once obtained, carefully assemble all pieces according to the manual’s instructions before attaching them and securing them tightly against the base of the RV sink cabinet with screws or bolts provided with the kit (if applicable).
Make sure everything is secured tightly so there is no potential for movement once power is supplied from below during later installation steps.
Step 4. Place and Secure Garbage Disposal over Mounting Bracket:
After assembling and securely fastening down all components of the mounting bracket beneath the underside of the sink cabinet, place and secure a compatible garbage disposal model over top of it by inserting bolts through its bottom side into pre-drilled holes located at different points across its perimeter (or along its sides depending on model).
Use pliers or a wrench to tighten each bolt until firmly secured. Ensure not to overtighten since this could lead to damage down the line. Before connecting power cables running beneath the sink cabinet with their respective terminals located at the lower backside of the unit itself (depending on model).
Step 5. Construct the Drain Assembly
For most RV garbage disposals, you may construct the drain assembly before using it. A discharge pipe should be run from the discharge outlet on the disposal unit to a point where it can be vented safely on the RV’s exterior, after which the sink drain line should be connected to the waste outlet of the disposal unit.
Start by attaching a garbage disposal drain elbow fitting to your RV’s existing sink line using plastic epoxy or metal clamps. This fitting should have one end for your current sink drain and the outlets that face 90 degrees apart.
You can then attach the end of your waste pipe to the outlet of your garbage disposal and thread the other end through a hole in the floor or wall of your RV so that it connects with any existing venting system outside.
Make sure this pipe is securely attached with epoxy or metal clamps and sealed against weather conditions using caulk or insulation tape before finally connecting it to an appropriate exterior vent.
Step 6. Connect Electrical Wires from Power Cord
You can easily connect your garbage disposal unit to an available power outlet in your RV if there is one near the location where you want to install it. But if not, you may need to run new wiring for it first.
Start by plugging one end of each wire from your power cord into their respective terminals on top of your garbage disposal unit (black and white). Then run these wires through a strain relief bushing on either side of where you plan to mount your disposal unit and secure them with metal clamps.
Now, insert one end of each wire into its corresponding terminal on top of a junction box near where you plan to mount your garbage disposal unit and tighten them down with screws provided by the manufacturer’s instructions.
Step 7. Make Final Check on All Connections
Before running any tests on your garbage disposal system, ensure all connections have been properly made and do not pose any safety hazards, such as exposed electrical wiring or leaks from any part of the assembly process, before testing anything else out.
Use a multimeter to check for continuity between each connection point. If there is no continuity or resistance at any point, then go back over all connections until everything reads correctly before continuing.
Now test run the unit as per the manufacturer’s instructions ensuring that no water is entering anywhere it shouldn’t be while also checking for noise levels within an acceptable range.
What Types of Garbage Disposal are Available For an RV?
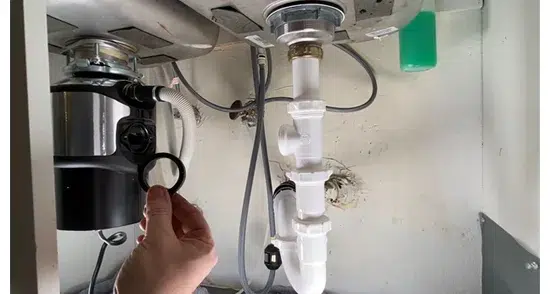
Regarding garbage disposal options for an RV, there are two main types available: Batch feed garbage disposal or Continuous-feed garbage disposal. Both types have advantages and disadvantages depending on the user’s needs.
Continuous Feed Garbage Disposal
RV users often prefer continuous-feed garbage disposals because they tend to be more powerful and efficient than the batch feed type. This type has a high-speed motor with significantly higher RPMs than a batch feed unit.
Because of its faster motor speed, the machine can grind continuous food waste in a shorter period than a batch feed machine.
Aside from this, continuous-feed garbage disposal units generally have smaller chamber capacities, making them even better suited for quickly dealing with endless amounts of food waste without emptying the chamber multiple times while running the unit.
They are also known for being less prone to clogging due to their considerable power, so users don’t have to worry about frequent clogs when using one in their RV. But it may consume more energy than batch-feed garbage disposal.
Batch Feed Garbage Disposal
Batch-feed garbage disposal is great for those who want to conserve water and electricity while disposing of food waste. It requires the user to place food scraps into the chamber before activating it, allowing them to dispose of only what they need without wasting any excess electricity or water.
As far as garbage disposals go, this type tends to have a smaller motor than other types, with high RPMs (revolutions per minute), to ensure efficient grinding. Batch-feed garbage disposals typically have larger chambers than other types, allowing users to dispose of more food waste at once.
Also, this type is known for being more prone to clogging than other types. This is because it utilizes a single water source & chamber to grind the accumulated garbage at once. Thus, users must always keep an eye on their unit’s performance when using one in their RV.
Ultimately, the decision comes down to personal preference and your usage needs. You should consider continuous-feed garbage disposal to eliminate food waste quickly. Otherwise, a batch-feed unit may be the most appropriate choice if you want something more energy-efficient.
What are the Benefits of Installing an RV Garbage Disposal?
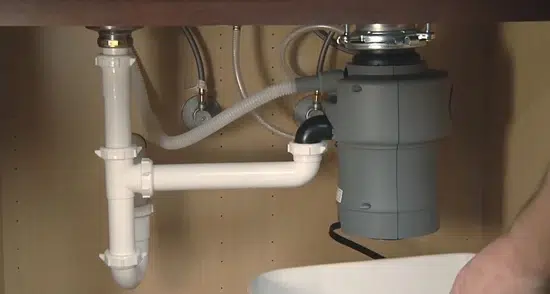
Installing an RV garbage disposal system can make the garbage disposal a messy job much more manageable. Not only is it more convenient for disposing of kitchen scraps, but it also reduces odors, prevents pests, and makes cleaning up after meals a breeze.
Here are some of the benefits of installing an RV garbage disposal:
1. Easier Waste Management:
Installing an RV garbage disposal allows more efficient use of time and energy because all the solid waste can be quickly disposed of without manually emptying an RV trash can or other containers.
By grinding up the solid kitchen waste, there is less mess and clutter around the RV, which makes it easier to keep clean.
2. Save Time for Waste Management:
Installing an RV garbage disposal in an RV can save owners a significant amount of time when it comes to RV waste management. By grinding up the solid matter, owners can avoid manually emptying trash cans or containers, which can be time-consuming and tedious.
Also, the speed at which organic matter breaks down with garbage disposal is much faster than without one, so owners will have to empty their tanks or containers less often and with reduced frequency.
3. Less Smell and Flies:
One significant benefit of installing an RV garbage disposal in an RV is that it helps reduce foul odors caused by rotting food scraps or other organic material inside the vehicle.
This reduces fly populations around RVs because foul odors are reduced drastically. Fly larvae are attracted to places that smell good, like trash bins or piles that get left out in the open for a long time without being attended to too often, creating a perfect breeding ground for flies over time if left unattended.
4. Less Waste Buildup in Tanks:
When RVs are fitted with RV Garbage Disposals, large amounts of solid waste will not accumulate in tanks or containers. This prevents clogs resulting from physical blockages and impeding wastewater flow away from plumbing fixtures.
Grinding these oversized items into smaller particles that quickly pass through pipes keeps sewage systems functioning correctly. This avoids expensive repairs such as replacing pipes due to blocked-off sections leading away from fixtures caused by the bigger particles accumulating over time before RV occupants notice.
Maintenance and Care For an RV Garbage Disposal System
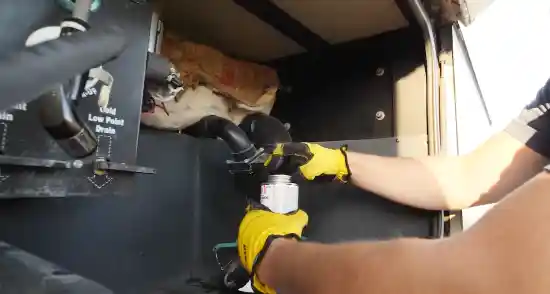
After installing an RV Garbage Disposal system, owners must take a few steps to ensure it works properly and efficiently. This involves:
Cleaning the Interior of the Component Regularly:
Regular interior cleaning is essential when it comes to maintaining and caring for an RV garbage disposal system. This includes wiping the disposal unit’s sides, bottom, and top with a damp cloth or sponge.
It is essential to clean away any food particles or grease residue that has accumulated to prevent clogs. You can use a stiff, bristled brush to help remove any stubborn debris from hard-to-reach spots.
Avoid Putting Grease, Bones, or Fibrous Materials:
You must keep hard bones, grease, and fibrous materials away from your RV garbage disposal system. While these items may seem innocuous enough, they can cause significant clogging issues if introduced into the system through your drain lines.
Grease and oil should also never be poured into your drains as they can solidify once cool within the pipes causing blockages over time. Bones are not recommended either due to their hardness which can cause damage to blades within your RV garbage disposal system.
Passively Monitor the Unit for Leaks, Corrosion, or Other Issues:
It is also essential to regularly check for leaks, corrosion, or other issues that might occur with an RV garbage disposal system; this should be done periodically throughout its lifespan.
Look for signs of water pooling around where the unit connects with pipes or drainage lines, as this could indicate a leakage point somewhere in those areas.
Also, inspect for rust spots or worn areas that could indicate corrosion caused by exposure to moisture over time. If found, replace it immediately, as it could lead to further water damage if left unchecked.
Check Disposal Hoses Periodically:
The hoses that connect directly to an RV garbage disposal system are one of its most essential components in maintenance and care. Thus, inspecting them regularly for leaks, cracks, or any other visible signs of deterioration is necessary.
If any issue appears, then immediately replace the sewer hose before further water damage occurs, which could lead to costly repairs down the line. Also, consider investing in better quality hoses explicitly designed for use with disposal systems.
Create a Regular Schedule to Perform Maintenance Checks:
To make sure all components associated with an RV garbage disposal system stay in good condition over time, it is recommended that owners set up a regular schedule for maintenance checks on all parts, including hoses, blades, and motors, at least twice per year (ideally more).
This allows you to find problems early and take preventive measures so they don’t become more significant issues down the road.
How Much is Motor Power Needed to Run an RV Garbage Disposal?
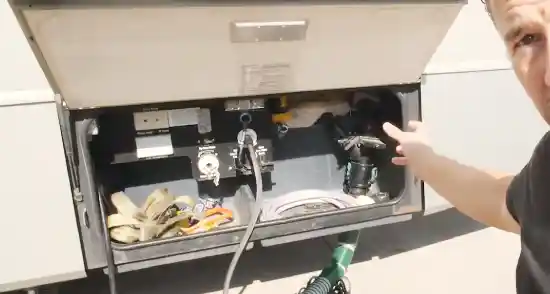
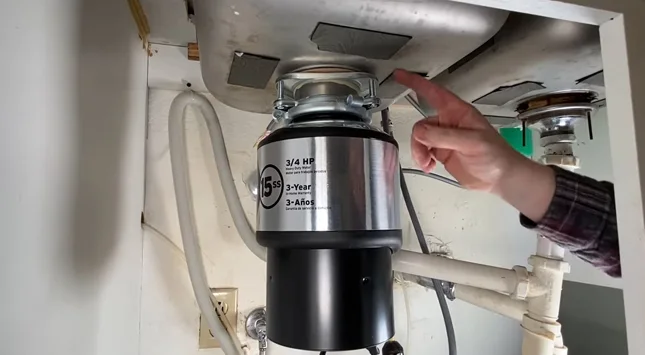
The amount of power required to run an RV garbage disposal can vary depending on the size and type of motor used. Generally, an RV garbage disposal requires a motor between 3/4 HP and 1 HP power.
This motor needs to handle the garbage disposal’s grinding capabilities while also bearing in mind that it is running on an RV’s electrical system. It’s essential to choose a motor with enough power but won’t draw too much electricity from the RV, as this could create issues with other appliances or systems in the vehicle.
Do You Need a Separate Drain Assembly For an RV Garbage Disposal?
Yes, you will need a separate drain assembly for your RV garbage disposal. An appropriate drain assembly includes a special sink adapter that fits into your sink and a trap for preventing waste from backing up into your kitchen.
Additionally, having a separate drain assembly helps ensure water stays within the sink when using the food disposer. The drain should also be connected to your existing sewer line or septic system, so any waste the disposer generates is correctly disposed of away from your RV.
Should You Always Run Water When Using the RV Garbage Disposal?
It is generally recommended to run water when using an RV garbage disposal to prevent any blockages or clogs that can occur. It also helps to reduce the amount of residue on the blades and keeps them sharp for longer.
Running cold water while the RV garbage disposal is in use will also help move food down the drain more quickly and effectively. That being said, running water when using an RV garbage disposal is always optional since it can be used without running water, depending on the type of material being disposed of.
Can You Put Lemons Down an RV Garbage Disposal System?
Slice lemons can safely be put down an RV garbage disposal as long as you are running cold water with it but do not put a whole lemon down the disposal system. Lemons are acidic and have natural disinfecting properties, making them an excellent addition to cleaning and deodorizing your RV’s disposal unit.
When cutting up lemons, ensure the pieces are small enough to fit down the drain before proceeding. As with any other food item, it’s essential to follow up by flushing a generous amount of cold water through the unit afterward to prevent buildup or blockages from occurring over time.
Is Adding a Garbage Disposal to an RV Worth it?
Adding a garbage disposal to an RV can be a great convenience worth the effort and cost. One of the main benefits of having a garbage disposal in your RV is that it will make cleanup significantly easier.
Instead of taking out all the food waste each time you need to empty the trash, you can just grind it up and send it down the drain. This reduces mess and allows for quick cleanup after meals.
This is especially beneficial for those living in their RV full-time or for extended periods, as it makes kitchen duties much more straightforward.

