
Last Updated on September 28, 2024
To bend RV corner trim, start by creating a bending jig that matches your desired radius. Mark the bending area clearly with a sharpie. Heat the aluminum trim at the marked spot using a map or propane torch until the sharpie ink disappears, ensuring uniform heating.
Apply gradual pressure to one end of the trim, using band clamps to hold it in the desired shape. As you bend, monitor the temperature closely to avoid damage. After bending, inspect for inconsistencies and make light taps with a hammer to correct any imperfections. There’s more essential information to take into account for a successful installation.
Key Takeaways
- Create a bending jig that matches the desired radius, ensuring it’s slightly tighter for flexibility during the bending process.
- Heat the marked bending area with a torch until the sharpie ink disappears, maintaining uniform softness without overheating.
- Gradually apply pressure at one end of the trim while using band clamps to secure the molding in place.
- Lightly tap any small kinks or imperfections with a hammer while the aluminum is still malleable for smoother results.
- Inspect the final shape closely for consistency and ensure all edges are smooth for safe installation.
About Aluminum Molding
Regarding camper repairs, aluminum molding is essential in maintaining structural integrity. Specifically, Lumina molding, which extends from the backup tire to the sill of Galilee hats, is vital for reinforcing your camper’s structure. Over time, the original molding may become bent or damaged during removal. This can complicate repairs, as kinking must be avoided to guarantee effective reinstallation.
You’ll encounter various types of molding, including base molding at the wall base and roof molding connecting roofs to walls. Proper preparation is key when working with brand new aluminum molding. Start by creating a jig that matches the desired bending radius. This will help you achieve clean, precise bends without compromising the material’s integrity.
Before bending, it’s important to mark the bending area clearly with a sharpie. Heating the aluminum to the annealing temperature is also necessary, making bending easier. You’ll know the aluminum is ready when the sharpie ink disappears, indicating the right temperature for manipulation.
Preparing for Bending
How can you guarantee a smooth bending process for your RV corner trim? Start by creating a bending jig that matches your desired radius. Ascertain it’s slightly tighter than the actual curve to account for the molding’s flexibility. This precision will help you achieve the desired shape without overextending the aluminum.
Next, drill multiple holes in the jig to facilitate clamps. These clamps will firmly secure the molding during the bending process, preventing unwanted shifts or misalignments. Before you begin, use a Sharpie marker to clearly identify the bending area on the aluminum. Make certain your markings are sufficiently visible, as this will guide your bending efforts.
Heating the Aluminum
To successfully bend the aluminum for your RV corner trim, you’ll need to heat it properly. Use a map or propane torch, specifically directing heat at the marked bending area. Heat the aluminum until the sharpie ink disappears; this indicates it has reached the annealing temperature. Monitoring the heating process closely is essential, preventing overheating and ensuring the aluminum is uniformly soft across the bending area.
To achieve even heating, move the torch in a circular motion or back and forth to avoid creating hot spots, which can lead to warping. Always wear heavy-duty gloves to protect your hands during this process. Below is a table summarizing important heating tips:
| Heating Tips | Details |
|---|---|
| Torch Type | Use a map torch or propane torch |
| Target Area | Focus on the marked bending area |
| Temperature Indicator | Wait for sharpie ink to disappear |
| Heating Technique | Move torch in circular or back-and-forth |
| Safety Precautions | Always wear heavy-duty gloves |
Bending Process
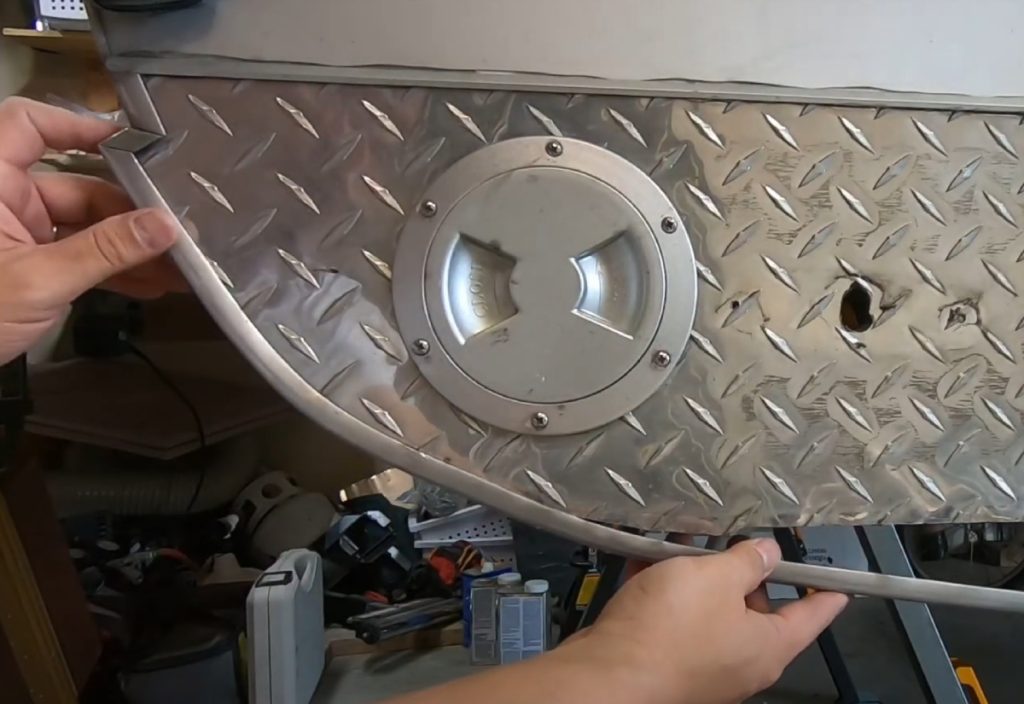
Starting with one end of the RV corner trim, apply gradual pressure to initiate the bending process. This method prevents kinking the aluminum, which can compromise the integrity of your molding.
Use band clamps to secure the trim in place during bending; these will help maintain the desired radius and prevent any unwanted movement.
As you bend, monitor the aluminum’s temperature closely. Overheating can damage the material, leading to weak spots or breaks.
If you notice any small kinks or imperfections as you work, lightly tap them with a hammer while the aluminum is still malleable. This technique helps achieve a smoother finish and guarantees the trim looks professional.
Once you’ve shaped the molding correctly, take a moment to inspect it thoroughly. Check for any inconsistencies in the bend and verify it fits well for installation. Proper inspection is critical, as a well-fitted trim will enhance the overall appearance of your RV.
Finalizing the Molding
Finalizing the molding is essential to guarantee that your RV corner trim looks great and fits perfectly. After bending the trim, inspect it closely to make sure it matches the desired shape. Look for any imperfections or kinks that may have occurred during the bending process. If you find any, gently correct them with light taps using a hammer while the aluminum is still soft.
Next, verify that the final shape aligns with your RV’s specific construction and installation needs. It’s important that all areas of the molding are smooth and devoid of sharp edges. This prevents potential damage during installation and guarantees safety during use.
Once you’re satisfied with the molding’s shape and finish, prepare for installation. Clean the area where the trim will be applied, removing any dirt, grease, or debris. A clean surface ensures proper adhesion and sealing, which is critical for long-lasting results.
Frequently Asked Questions
What Tools Do I Need for Bending RV Corner Trim?
To bend RV corner trim, you’ll need a heat gun for softening the material, a bending tool or jig for shaping, and protective gloves to guarantee safety. A ruler and marker help with precise measurements.
Can I Bend Aluminum Trim Without a Jig?
Yes, you can bend aluminum trim without a jig. Use a heat source to soften the metal, carefully apply manual pressure, and maintain a steady, consistent motion to achieve the desired curve without causing damage.
Is There a Maximum Radius for Bending Trim?
When bending trim, think of it like shaping clay; there’s a limit. Generally, you shouldn’t exceed a radius of about three times the material’s thickness to avoid kinks or breaks. Always test first!
How Do I Know When the Aluminum Is Too Hot?
You’ll know the aluminum’s too hot when it becomes overly pliable or starts to discolor. Use a thermometer to monitor the temperature; ideally, it should stay below 350°F to maintain its structural integrity.
Can I Reuse Aluminum Trim After Bending?
Yes, you can reuse aluminum trim after bending, but check for any cracks or signs of fatigue. If it’s still structurally sound, you can carefully reshape it or reattach it without compromising its integrity.
The Role of Band Clamps: Securing Your Trim in Place
To summarize, if you thought bending RV corner trim was as easy as bending your will to a Netflix binge, think again! You can transform that stubborn aluminum into a masterpiece with the right tools, a bit of heat, and a dash of finesse.
So, roll up your sleeves, channel your inner metal artist, and remember: if it doesn’t bend, you’re probably just trying too hard—like convincing your dog to fetch the newspaper! Happy bending!

