
Last Updated on September 5, 2024
To build an RV septic system, start by selecting a durable septic tank that meets local regulations. Use reinforced concrete or polyethylene materials. Position the tank for maximum gravity flow and install a 3-inch PVC pipe for drainage. Guarantee proper venting to allow gas escape.
Design a drain field with at least 30 feet of perforated pipe, maintaining a slope for effective drainage. Regular inspections and maintenance are essential to prevent clogs or backups. By following these steps, you’ll set up a functional system, and there’s much more to explore about promoting its efficiency and compliance.
Key Takeaways
- Ensure compliance with local regulations for septic tank size, material, and installation methods before starting the project.
- Use durable materials like reinforced concrete or polyethylene for constructing the septic tank.
- Install a 3-inch PVC pipe from the RV to the septic tank, incorporating proper slope for effective drainage.
- Size the drain field according to septic system capacity, performing soil percolation tests to inform the design.
- Conduct regular inspections and maintenance to ensure system functionality and prevent clogs.
Knowing about RV Setup Requirements
Setting up your RV properly is crucial for efficient waste management and longevity. First, make sure you have a protective cover for your RV to shield it from environmental elements, which can greatly prolong its lifespan.
Next, focus on waste management by installing a septic tank that adheres to local regulations regarding size and specifications.
A key aspect of this setup is the drainage system. Use a 3-inch PVC pipe for effective drainage from your RV to the septic system. This diameter guarantees maximum flow, minimizing the risk of clogs.
It’s also important to incorporate effective venting. Proper venting allows gases to escape from the septic system, preventing pressure buildup and guaranteeing smooth operation.
Constructing the Septic Tank
When constructing the septic tank, you’ll need to carefully select appropriate materials to guarantee durability and compliance with local regulations.
Begin with a clear overview of the installation steps, focusing on proper positioning of the T fitting and sanitary tee for maximum efficiency.
Tank Materials Selection
Selecting the right materials for constructing your RV septic tank is essential for guaranteeing durability and functionality. For ideal performance, choose reinforced concrete or polyethylene, as both materials are resistant to corrosion and can withstand soil pressures effectively.
Your septic tank should have a minimum capacity of 500 gallons, which is the standard for residential systems and sufficient to accommodate the waste produced by your RV.
It’s important to incorporate a side outlet with a T fitting to guarantee proper drainage while preventing backflow into the tank.
Inside the tank, position a sanitary tee vertically to separate solids from liquids efficiently, facilitating effective waste processing. This design will help maintain the tank’s overall functionality.
Don’t overlook the importance of proper venting in your septic tank design. Adequate venting allows gases to escape, which is essential for maintaining ideal operating conditions and preventing pressure build-up.
Installation Steps Overview
The installation of your RV septic tank requires careful attention to detail and systematic execution to guarantee proper functionality. Start by positioning the septic tank so that the inlet pipe runs directly into the top, assuring ideal gravity flow for waste drainage.
Next, install a side outlet using a T fitting to facilitate efficient drainage from the tank to the drain field.
Follow these essential steps:
- Utilize a sanitary tee positioned vertically inside the tank to separate solids from liquids.
- Ascertain proper settling and scum formation within the tank for effective waste management.
- Properly vent the tank to allow gases to escape, preventing pressure buildup and assuring ideal operation.
- Conduct a thorough inspection post-construction to confirm all connections are secure and the system operates as intended.
After confirming everything functions correctly, you can proceed to backfill the area.
Regulatory Compliance Considerations
Adhering to regulatory compliance is vital for constructing an effective RV septic system. Local regulations often dictate the specifications for septic tank size, material, and installation methods to guarantee safety and environmental compliance. Before you begin construction, obtain any necessary permits, as these requirements can vary by municipality or state.
When designing your septic tank, consider the minimum capacity mandated by local regulations, typically based on the number of occupants and expected wastewater production, often calculated in gallons per day. Compliance with health department guidelines is essential; these guidelines set standards for wastewater treatment and discharge to protect public health.
Additionally, your septic system may be subject to regular inspections mandated by local authorities. These inspections confirm the system functions correctly and doesn’t pose a risk to the environment.
Designing the Drain Field
When designing your drain field, you’ll need to carefully size it based on your septic system’s capacity and the soil type at your site.
Proper placement of perforated pipes is essential for effective liquid dispersion, ensuring the system functions efficiently.
Consider these factors to create a drain field that meets your RV’s waste management needs.
Sizing the Drain Field
Sizing the drain field is essential for guaranteeing your RV septic system operates effectively. The size is usually determined by the number of bedrooms in your RV, following a general guideline of 300 square feet per bedroom.
To achieve ideal drainage, consider the following key points:
- Minimum Length: Install at least 30 feet of perforated pipes in the drain field for adequate water absorption and distribution.
- Additional Length: Incorporate another 30 feet of capped drain field below the primary system to boost absorption capabilities.
- Soil Testing: Conduct soil percolation tests to evaluate the drainage capacity of your site, which will directly affect the size and design of your drain field.
- Proper Slope: Design your drain field with a slope of 1-2% to guarantee gravity flow, promoting effective drainage.
Perforated Pipe Placement
After determining the appropriate size of your drain field, the next step involves the strategic placement of perforated pipes.
Begin by installing 30 feet of perforated pipe in one direction, ensuring it has a proper slope for gravity flow. This slope is critical for effective drainage, allowing wastewater to disperse evenly into the surrounding soil.
To enhance the absorption capacity, consider placing an additional 30 feet of capped perforated pipe underneath the main run. This setup will improve the system’s overall efficiency, as the capped sections can provide extra space for water retention and filtration.
Once your pipes are in place, cover the entire drain field with a fabric overlay. This overlay is essential; it prevents dirt from infiltrating the system while still allowing water to pass through.
Soil Type Considerations
How can the type of soil impact your RV septic system’s performance? The soil type plays an essential role in your septic system’s effectiveness, primarily influencing drainage and absorption rates. For ideal performance, you should identify well-draining soil that meets specific criteria.
- Sandy soils allow faster absorption, making them ideal for septic systems.
- Clay soils may necessitate additional design considerations due to their slower drainage capabilities.
- Loamy soils strike a balance, retaining moisture while ensuring adequate drainage and aeration for essential microbial activity.
- Conduct a percolation test to gauge the soil’s absorption rate, informing you about the appropriate size for your drain field.
Ensure there’s at least 24 inches of permeable material above bedrock or the water table to facilitate effective wastewater treatment.
Avoid soil compaction near the drain field, as it hinders water movement, jeopardizing system functionality.
Step-by-Step Installation Process
To successfully install an RV septic system, you’ll want to start by digging a level hole for the septic tank. Confirm this hole is positioned to allow for gravity flow to the drain field.
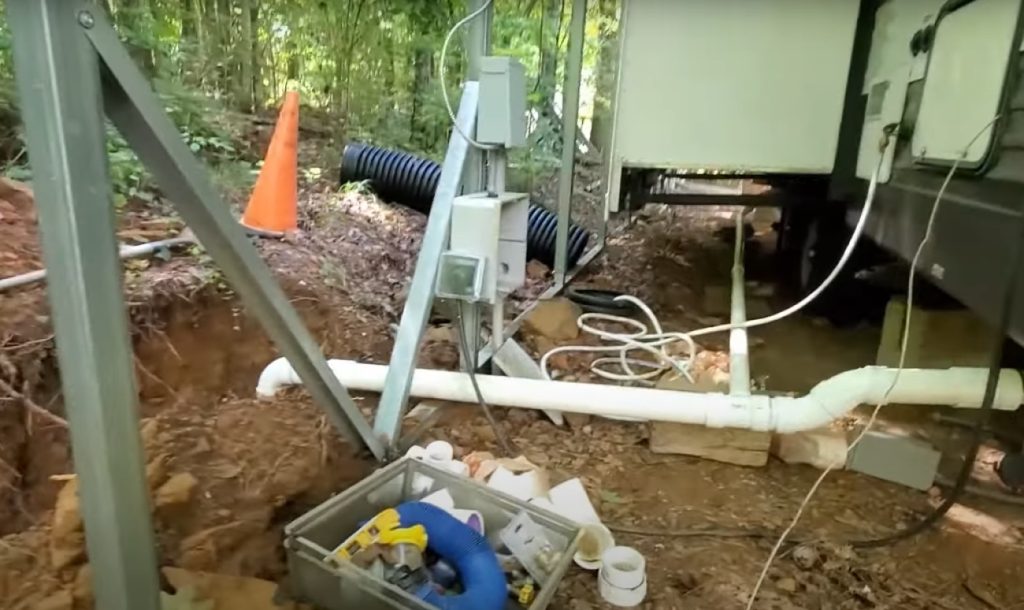
Once the hole is ready, install a 3-inch PVC pipe directly from the RV to the top of the septic tank, utilizing PVC elbows for any necessary directional changes.
Next, construct the drain field by laying perforated pipes at a slope. Install 30 feet of pipe in one direction and cap an additional 30 feet underneath for enhanced absorption. This design helps distribute the effluent evenly and promotes proper drainage. After positioning the pipes, cover the drain field with a fabric overlay.
Essential Maintenance Tips
Maintaining an RV septic system is essential for its longevity and efficiency, and regular inspections every 1-3 years can prevent costly repairs.
During these inspections, assess the levels of sludge and scum in your septic tank to guarantee effective waste management.
To keep your system functioning at peak performance, consider these essential maintenance tips:
- Clear the drain field area: Keep it free of debris and vegetation to promote ideal drainage and prevent blockages in the perforated pipes.
- Monitor for clogs: Be vigilant for signs like slow drainage or unpleasant odors, addressing these issues promptly to avoid system failure.
- Replace fabric overlay: Change the fabric overlay on the drain field as needed to minimize dirt infiltration and maintain system integrity.
- Engage with community forums: Participate in online discussions for troubleshooting advice and maintenance tips, helping you stay informed on best practices.
Troubleshooting Common Issues
Regular inspections of your RV septic system can help you catch potential issues before they escalate. Start by checking the septic tank for signs of clogging, such as slow drainage or backups. These symptoms often indicate that it’s time for pumping or maintenance.
Confirm the drain field area is free from debris, as obstructions can impede effluent flow and potentially lead to system failure.
Pay attention to any unusual odors or wet spots around the septic system. These could signal leaks or over-saturation in the drain field that must be addressed promptly.
If you notice that the fabric overlay on the drain field is damaged or clogged with dirt, consider replacing it. This action is crucial to maintain proper drainage and overall system function.
Community Resources for Assistance
A wealth of community resources is available to assist you in building and maintaining your RV septic system. Utilizing these resources can streamline your project and guarantee compliance with local regulations.
Here are some valuable options:
- Local Community Forums: Engage with individuals who’ve tackled similar projects. They often share practical tips and troubleshooting advice.
- Municipal Authorities: Check with local authorities for regulations regarding septic system installation. They provide guidance on necessary permits and compliant practices.
- Online Resources: Use platforms like YouTube or DIY websites for detailed tutorials and visual aids that guide you through each installation step.
- Home Improvement Stores: Visit local stores like Home Depot, where knowledgeable staff can help you select the right materials and answer your questions about septic system components.
Frequently Asked Questions
How Do You Make Homemade RV Septic Tank Treatment?
To make homemade RV septic tank treatment, mix one cup of baking soda with one cup of vinegar in a container. Add a few drops of essential oils, then pour the mixture into the tank monthly for maintenance.
What Kind of Septic Do You Need for a Camper?
When transforming your camper into a home on wheels, you’ll need a robust septic system. Opt for a 750-gallon tank with proper venting and a drain field featuring perforated pipes for ideal waste management.
Can You Hook up an RV to a Septic System?
Yes, you can hook up your RV to a septic system. Confirm proper installation with a 3-inch PVC pipe connecting to the septic tank, and maintain regular inspections for effective operation and to prevent clogs.
What Is the Smallest Septic System You Can Put In?
The smallest septic system you can install typically requires a 500-gallon tank. Local regulations may dictate minimum sizes, so check with your local health department to verify compliance with specific requirements for your area.
DIY RV Septic System: Simplified Steps for Long-Term Success
Building your RV septic system doesn’t have to feel overwhelming; it’s a matter of following systematic steps and understanding your requirements. By constructing a reliable septic tank and designing an effective drain field, you guarantee both functionality and compliance.
Remember, just like a well-oiled machine, your system thrives on regular maintenance and troubleshooting. So, equip yourself with knowledge and resources, and you’ll not only safeguard your investment but also enhance your RV experience for years to come.

