
Last Updated on September 25, 2024
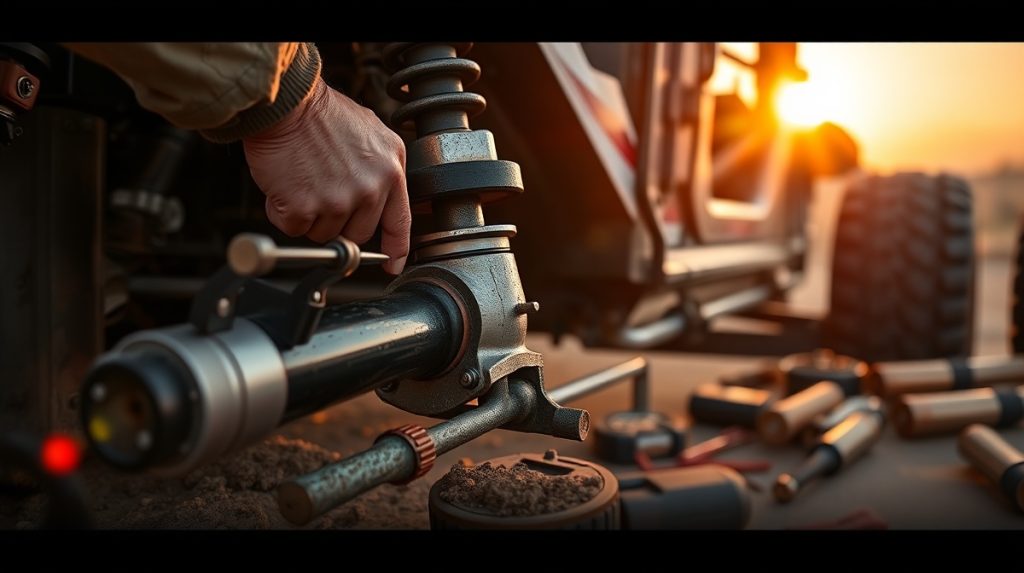
To install a steering stabilizer, first gather your tools: an impact wrench, socket set, and shock stabilizer tool. Elevate your vehicle securely with jack stands for safety. Begin by loosely attaching the first bracket to the steering rod using a u-clamp, ensuring the shock’s damping side faces upward.
Apply silicone-based grease to the bushings for smooth operation. Tighten all components snugly and check the alignment and clearance. After installation, verify the full range of tire motion and adjust if necessary. Following these steps will improve handling and stability, and you’ll discover additional insights for best results.
Key Takeaways
- Gather all necessary tools and components, including brackets, bushings, and a shock stabilizer tool, before starting the installation process.
- Loosely attach the first bracket to the steering rod with a u-clamp, ensuring the shock’s damping side faces upwards.
- Apply silicone-based grease to bushings to reduce noise and improve performance during operation.
- Verify the steering range by turning the wheel fully left and right to check for any obstructions or interference with tire motion.
- After installation, snugly tighten all components and utilize a torque wrench to meet the manufacturer’s specifications for stability and safety.
Steering Stabilizers Explained
Steering stabilizers play a vital role in enhancing the handling of your vehicle, especially if it’s lifted and fitted with larger tires. These components are specifically engineered to reduce vibrations in the steering wheel, allowing for smoother and more controlled driving.
Additionally, installing a quality stabilizer can lead to notable improvements in driving stability and comfort, particularly during challenging driving conditions, as reported by many users who’ve experienced reduced over-steering and road wandering after installation. While steering stabilizers can greatly improve tracking and straight-line stability after installation, it’s essential to recognize that they aren’t a fix for pre-existing steering issues.
When considering a stabilizer, the Rancho brand is a popular choice among off-road enthusiasts, often sourced through retailers like EMU Offroad. The installation process typically involves several key components, including shock absorbers and mounting brackets.
These must be securely attached to both the steering rod and the vehicle frame to guarantee effective performance. For peak performance, consider products such as the best steering stabilizers for Class A motorhomes that enhance driving comfort and safety.
Tools and Preparation
Before you start installing the steering stabilizer, gather all the required tools and components to streamline the process.
Make certain your vehicle is elevated for better access, and check that you have a stabilizing tool for the shock to guarantee accurate positioning.
Required Installation Tools
To guarantee a smooth installation process, gather all components from the steering stabilizer kit, including the shock, mounting brackets, bushings, and necessary hardware. Having everything on hand before you start assures you won’t waste time searching for tools or parts midway through the installation.
Here’s a list of essential tools you’ll need:
- Impact Wrench: This will speed up the process by quickly loosening and tightening bolts.
- Socket Set: A variety of socket sizes will help you work with different sizes of nuts and bolts effectively.
- Shock Stabilizer Tool: This tool assists in keeping the shock steady during installation, assuring proper alignment for secure attachment.
Additionally, elevate your vehicle to provide better access and clearance. This makes installing the stabilizer much easier and helps maintain safe working conditions.
As a final note, make sure to attach all components loosely initially. This allows for adjustments before final tightening, which is critical for achieving the correct fit and function of your new steering stabilizer.
Vehicle Preparation Steps
Having gathered all the necessary components and tools for the installation, it’s time to prepare your vehicle for the process. Start by elevating your vehicle using jack stands, guaranteeing it’s stable and secure. This elevation provides better access and clearance, allowing for easier installation of the steering stabilizer and minimizing unnecessary strain.
Next, position the steering stabilizer shock and mounting brackets loosely in place. Don’t tighten them yet; this will allow you to make adjustments later for proper alignment and fit. It’s vital to have a tool ready to stabilize the shock during this initial setup.
As you work, verify that there’s sufficient clearance for all steering components and tires. This confirms that the stabilizer will function correctly once installed.
Using impact tools can facilitate quicker assembly, but keep basic hand tools on hand to complete the installation. Verify that you have all necessary hardware and bushings from the steering stabilizer kit within reach.
Component Check List
Gathering all necessary components and tools is essential for a successful steering stabilizer installation. Before you start, verify you have everything required for the job. This preparation will help you avoid interruptions and streamline the installation process.
Here’s a quick checklist to guide you:
- Steering Stabilizer Kit Components: Collect the shock, mounting brackets, bushings, and all necessary hardware from the kit. Verify that all parts are in good condition.
- Tools: Gather basic hand tools, such as wrenches and sockets, along with impact tools like a ratchet or impact wrench. These will expedite your installation and help secure parts effectively.
- Silicone-Based Grease: Obtain silicone-based grease for the bushings. Applying this lubricant minimizes noise and improves the smooth operation of the stabilizer post-installation.
Once you have these components ready, elevate the vehicle to improve access.
Installation Steps
Starting with the installation, you’ll want to loosely attach the first bracket to the steering rod using a u-clamp and locking nut. Make certain the long side of the frame bracket faces away from the wheel to prevent any interference. Next, sequentially bolt the remaining brackets and the stabilizer onto the vehicle. Tighten each component evenly to guarantee proper fit and stability.
| Step | Details |
|---|---|
| Positioning the Shock | Confirm the damping side of the shock faces upwards for maximum protection. |
| Greasing Bushings | Apply silicone-based grease to the bushings to minimize noise during operation. |
| Range of Motion Check | Verify the full range of tire motion, confirming no obstructions during steering turns. |
After you’ve completed these steps, snugly tighten all components. Confirm alignment and clearance with the tires, making adjustments as necessary.
Document the installation process to help with any future maintenance or reference. Following these precise steps will guarantee your steering stabilizer functions effectively, enhancing your vehicle’s handling and stability.
Finalizing the Setup
As you finalize the setup, guarantee all components are snugly tightened to secure the stabilizer’s function and stability.
Next, verify that the steering aligns properly and check for any obstructions during full tire turns to confirm an unobstructed range of motion.
Ensuring Component Tightness
Tighten all components of the steering stabilizer, including brackets and the shock, to guarantee maximum stability and functionality during operation. This step is essential for ensuring your steering system operates smoothly and effectively.
To achieve this, follow these important guidelines:
- Use a Torque Wrench: Make certain to utilize a torque wrench to tighten all hardware according to the manufacturer’s recommended torque specifications. This prevents over-tightening, which can damage components, or under-tightening, which may lead to instability.
- Double-Check Alignment: After tightening, double-check the alignment of the stabilizer and brackets. Verify that everything is in the correct position without any obstructions that could interfere with the steering mechanism.
- Lubricate Bushings: Confirm that the bushings are properly lubricated with silicone-based grease. This minimizes noise and friction, enhancing the overall effectiveness of the stabilizer.
Once you’ve completed these steps, conduct a final inspection to confirm that all components are secure and functioning correctly.
Verifying Steering Range
After verifying all components of the steering stabilizer are tightly secured, it’s time to check the steering range to confirm proper functionality. Begin by turning the steering wheel fully left and then fully right. This process allows you to check for any obstructions caused by the stabilizer or surrounding components.
As you perform this check, pay close attention to the stabilizer’s position to guarantee it doesn’t interfere with the tires’ full range of motion. Proper clearance is essential for maintaining handling and safety while driving. Additionally, observe the alignment of the tires to affirm they remain symmetrical throughout the steering motion.
If you notice any binding or restrictions during the steering range check, you might need to adjust the stabilizer’s position or the mounting brackets. This adjustment guarantees smooth operation without any hindrance.
Maintenance and Upgrades
Regular maintenance and timely upgrades are essential for maximizing the performance and lifespan of your steering stabilizer and overall vehicle handling. To guarantee peak function and safety, you should follow these guidelines:
- Inspect for Wear and Leaks: Regularly check your steering stabilizer for signs of wear, including leaks. Addressing minor leaks in axle seals and oil pan gaskets promptly helps maintain engine performance and prevents further complications that could impact steering.
- Upgrade Components: Consider upgrading control arm bushings, clutch assemblies, and ABS sensors. These enhancements can greatly improve vehicle stability and handling, complementing the benefits gained from your steering stabilizer.
- Monitor Tire Condition: After installation, monitor your tire tread depth and symmetry closely. Uneven wear can severely affect steering response and the overall driving experience.
Frequently Asked Questions
Are Steering Stabilizers Easy to Install?
Yes, steering stabilizers are generally easy to install. You can attach mounting brackets to your steering rod and vehicle frame with basic hand tools. Just remember to check alignment and clearance for ideal performance afterwards.
What Does a Steering Stabilizer Attach To?
A steering stabilizer attaches to the steering rod and the vehicle frame. You secure it using specific mounting brackets, ensuring the first bracket connects firmly to the rod, while the second affixes to the frame properly.
Does It Matter Which Way a Steering Stabilizer Goes?
Yes, it matters which way a steering stabilizer goes. Position it with the damping side facing up to guarantee peak performance. Incorrect orientation can lead to reduced effectiveness and potential steering issues, so proper installation is essential.
Do You Really Need a Steering Stabilizer?
You might need a steering stabilizer if your vehicle experiences excessive vibrations or handling instability. It enhances control, especially in lifted vehicles with larger tires, but won’t fix existing mechanical issues in the steering system.
Boost Your Vehicle’s Performance with Proper Steering Stabilizer
Installing a steering stabilizer enhances your vehicle’s handling, reduces steering fatigue, and improves overall ride comfort. By following the outlined steps, preparing your tools, and ensuring proper maintenance, you not only optimize your vehicle’s performance but also extend its lifespan.
As you engage with the community for insights and upgrades, you foster a deeper understanding of your vehicle’s dynamics. Remember, a well-installed stabilizer leads to a smoother ride, better control, and increased safety on the road.

