Last Updated on September 25, 2023
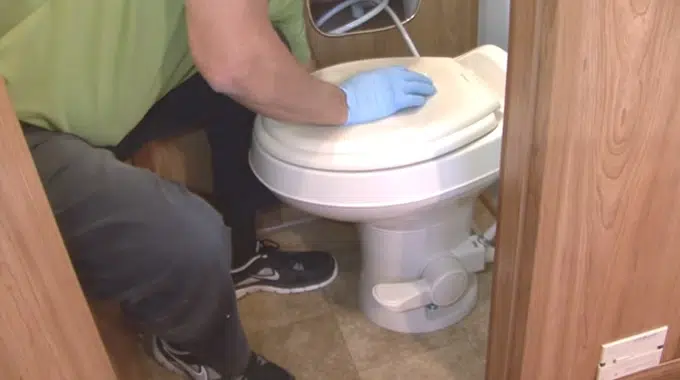
Relocating an RV toilet can be a formidable undertaking that requires careful planning and precision. Understanding all the elements involved is key to a successful move on how to relocate an RV toilet. This includes understanding the existing framework, components, and any necessary modifications that need to be done.
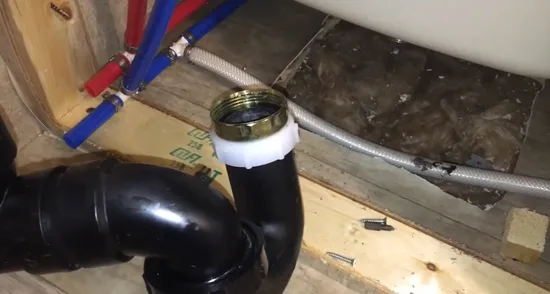
One particular component to consider when relocating an RV toilet is the black holding tank which may require additional attention due to its connected PVC pipe and removable flange. And depending on the existing flooring, there may be a need to cut an access hole for the new location of the toilet.
With proper research, preparation, and knowledge of what is needed, relocating an RV toilet can be easy and with minimal disruption to your RV’s interior. Let’s walk you through the process step-by-step.
How to Relocate an RV Toilet: Step-By-Step Process
Many RV owners choose to undertake this project because of the potential cost savings when compared to replacing their toilets altogether. It’s essential to remember that relocating a toilet requires more than just removing the existing unit and installing it elsewhere.
You’ll need to consider ventilation, access for maintenance, and safety for others who may use the restroom. Here are some essential steps to successfully relocate an RV toilet in your recreational vehicle.
Step 01: Gathering Supplies for Relocation of RV Toilet
Before beginning any relocation project, you must ensure that you have all the necessary tools and supplies needed for the job. When relocating an RV toilet, several items must be gathered to make the process easier and faster.
First, a screwdriver or Allen wrench will be necessary to remove the mounting bolts which hold the toilet in place. A socket set with a ratchet wrench, hammer, and pliers may also be necessary, as some nuts and washers will need to be removed. It is also a good idea to have a level and tape measure on hand to properly fit the toilet in its new space.
Then replacement parts, such as new mounting bolts, nuts, washers, etc., should also be purchased before starting the relocation project. These parts can usually be purchased at most hardware stores or online retailers.
Finally, it is always wise to keep on hand some hand towels and/or newspapers so you can protect your work area from dirt or mess during the relocation process. Depending on the specific model of a toilet being installed, you may need special equipment or tools.
Be sure to consult your manufacturer’s manual prior to beginning this process so that you can gather any additional materials that may be needed for installation success.
Step 02: Preparing the Area Where the New Toilet Will Be Installed
Accurately measuring the space and properly preparing the area for the new toilet are vital steps when relocating an RV toilet.
To begin, make sure that all measurements of the space are accurate so that you can plan accordingly. If any measurement is off, it might cause issues during installation or cause the toilet not to fit properly. For example, if a wall is not straight or level, it could present a challenge in setting up the toilet correctly.
Once measurements have been taken and double-checked, proceed to clean the area before beginning installation. Cleaning using appropriate materials for each surface type is essential for ensuring a successful installation process.
For example, wood flooring would require a vacuum cleaner and mop, while tile flooring would need cloth rags and cleaning solutions specific to tiles.
After cleaning, mark the area with a permanent marker such as a felt tip pen or similar marker for reference throughout the installation process. This marking will provide a helpful guide on where exactly to place components associated with installing an RV toilet, such as screws, brackets, and other hardware pieces.
Step 03: Removing the Old Toilet from its Current Location
Shutting off the water supply: Before moving the old toilet, the first step is to shut off the water supply and any water valves that might be connected to it. To do this, you must locate the main water valve in your RV and turn it off.
If you cannot locate it, check behind or under cabinets, near faucets, or around the perimeter of your RV. Once all of the valves have been shut off, you can begin disconnecting the supply hose from the back of your toilet.
Disconnecting the water supply hose: Unscrew any fittings or connections that are attached to the back of your toilet with a wrench, and then gently pull away any hoses that connect to them. Make sure to keep track of which hoses go where so they can easily be reattached when reinstalling your new toilet system.
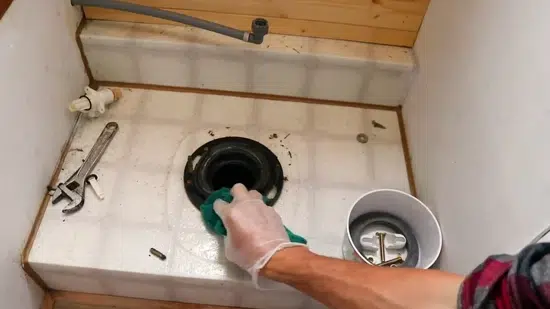
Loosening mounted bolts: Use a screwdriver or an adjustable wrench to loosen and remove any bolts or nuts attaching your old toilet to its pedestal base and flooring surface. You should also remove all mounting hardware, such as screws, washers, and clips, before attempting to lift up your old toilet bowl for removal purposes.
Carefully remove the old toilet by using your hands: Once all of the items mentioned above have been disconnected, unmounted, and removed from their original locations, carefully use both hands (one on either side) to lift up on each side of your old toilet bowl until it is free from its current location.
Be sure not to drop any pieces of equipment during this process, as the general rule with plumbing repairs is that gravity is never a friend.
Removing tank lid: After successfully removing your old RV toilet from its original spot, use a flat-head screwdriver or pliers to carefully unscrew and take out any retaining clips that hold down its tank lid into place before proceeding with the further steps below in this guide.
Setting aside all removed parts: Place them into a designated storage container, so they do not become lost during the relocation process. Whether it’s plastic bowls, metal bases/bolts/nuts, etc., make sure they find themselves safe homes until needed again.
Putting old parts in a temporary storage container: Depending on how far away you plan on relocating your new toilet system, make sure any detached parts are placed safely where they won’t interfere with plans, such as having enough space for installation procedures outlined here today. Choose wisely when picking a spot for temporary storage containers.
Thoroughly clean out the inside of the black tank: Now that everything has been taken apart. Grab some household cleaners (preferably those specifically designed for toilets) & get ready for some serious scrubbing action.
Take extra precaution towards hard-to-reach corners & areas inside black holding tanks since these tend to accumulate dirt & debris over time. It makes them prime targets for unwanted germs & bacteria buildup.
Wipe down the black holding tank’s outside: Cleanliness tends to be key when dealing with plumbing issues. No matter what type they may happen, come across.
So make sure every outer surface area black holding tank gets wiped down prior to transport. This includes the sides as well the bottom portion too. Especially if there are any signs of rust present beforehand.
Protecting the black holding tank during transport: After cleaning up outside surfaces, grab some old blankets, rags + wrap them around the entire black holding tank (be sure to cover the top part too) and tightly secure protective material.
Then place using bungee cords and canvas straps, whatever available means necessary to complete preparations transporting the said item(s) to one respective destination(s).
Take extra care when removing the pedestal portion: Use caution when deciphering between separating pedestal portion existing toilet systems depending on RV model being utilized.
Whether small or large sizes, as these tend to vary greatly product brand manufacturer specifications instructions manual handbook provided along with purchase order transaction document(s).
Step 04: Installing New Toilet in Desired Location
i) Carefully place the tank lid on top of the backside portion of the bowl, being extra cautious not to scratch or chip it in any way. Make sure it is firmly settled onto both pieces and not just resting on one side for better stability.
Also, consider which side will face outwardly when installed; this should be considered when placing it, as it may have different decorative designs on each side.
ii) Connecting a water supply hose from a nearby source to the RV toilet is another crucial step in its relocation process. The water supply connection may vary depending on whether you are connecting directly to a pipe or using an external water source such as a bucket or container filled with water.
In either case, ensure all connections are secure and waterproof before moving forward with installation.
iii) Reattaching the tank lid onto the backside portion of the bowl can now be done once all previous steps have been completed correctly with exact measurements and secure connections made beforehand.
To do this correctly, simply place both parts together again (including gaskets where needed) and screw them together firmly but without over-tightening them too much; otherwise, they could break off easily under pressure from future use of the RV toilet itself.
iv) Attaching a flush handle is then necessary for proper operation and usage by guests or users of your RV space later down the line. This component connects directly to an internal mechanism within the tank lid itself, so make sure these pieces fit together securely yet not too tightly to avoid damage during operation later on down-road trips and adventures alike.
v) Replacing a flapper valve gasket is an additional step that should be considered when installing or relocating an RV toilet due to its role in regulating water flow between tanks when it comes time for flushing away waste products later on down their journeys ahead.
Taking out old washers (if needed) and replacing them with brand new ones ensures that no leakage occurs throughout said operations while also extending its life span indefinitely.
vi) Turning on your water supply valve afterward should not be overlooked during this process either. Especially if coming from a different source than what was initially connected, since failure in doing so may result in improper functioning for future usages and possible flooding accidents occurring at worst case scenarios.
vii) Flushing your newly installed RV toilet several times afterward serves multiple purposes.
- It allows you to test out whether no issues have occurred during setup leading up till now. Such as leaking pipes, amongst other things.
- This also helps clear out any debris trapped inside, which could easily lead to clogged wastewater lines further down your travels if left unchecked, ultimately guaranteeing better performance later.
Viii) Cleaning up after finishing all tasks mentioned above helps give one peace of mind knowing everything has been adequately taken care of.
Taking extra precautions such as picking up any tools used during installation (and throwing away loose components like old gaskets safely) can help alleviate stress levels post-installation whilst also ensuring no debris remains behind afterward.
Can I Use the Same DIY Steps to Build an RV Porch to Relocate an RV Toilet?
Yes, you can use the same DIY steps to build an rv porch to relocate an RV toilet. By following the instructions on how to build an RV porch, you can effectively customize the space for your specific needs, including relocating an RV toilet if desired. With proper planning and execution, you can transform your RV’s interior layout while maintaining functionality and comfort.
How can Relocate an RV Toilet Benefit You?
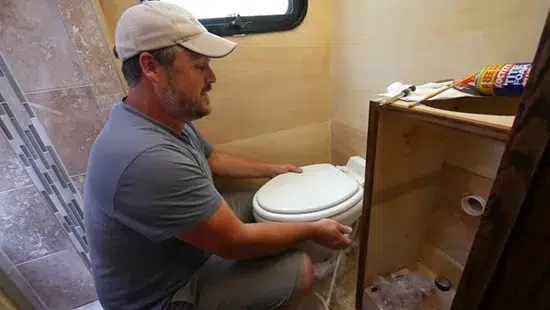
For starters, relocating an RV toilet can help you save on installation costs, as you don’t need a professional to do the job for you. You can also save money because you won’t have to purchase any supplies or other tools.
And relocating your RV toilet will allow you to use the same space for multiple purposes. This means that if you have limited storage space in your RV, relocating the RV toilet is a great option for freeing up some of that space for other uses.

