
Last Updated on March 25, 2025
To remove a camper fridge, first, disconnect all power sources and empty the fridge. Clear the area for safe access. Disconnect DC lines, unplug the AC cord, and cap the propane line after shutting off the supply.
Remove any screws holding trim and door hinges, then carefully detach any electrical connections. Support the fridge as you remove screws securing it to the frame.
Following these steps guarantees a safe removal, and you’ll discover additional tips for efficiency ahead.
Key Takeaways
- Turn off all power sources and disconnect utilities such as AC, DC, and propane lines before starting the removal process.
- Clear the area around the fridge and gather necessary tools, ensuring you wear protective gear for safety.
- Remove refrigerator doors and any external panels, then unscrew hinges and supports securing the fridge to the RV frame.
- Carefully detach electrical connections and remove screws holding the fridge in place, ensuring to support it to prevent dropping.
- Clean the compartment thoroughly after removal and label any disconnected wires for easier reinstallation of a new fridge.
Safely Handling Power and Propane Lines: Preparation and Safety
Before you start removing your camper fridge, it’s crucial to prepare adequately and prioritize safety. First, turn off all power sources by disconnecting camper hookups to prevent electric shock. Empty the fridge to avoid damage during removal.
Secure the surrounding area by clearing any obstacles that might interfere with the process. Gather necessary tools, such as a screwdriver and small wrench, and consult the owner’s manual for model-specific instructions.
Protect your flooring with padding to prevent damage. Maintain the fridge in an upright position to avoid coolant contamination. Use proper lifting techniques and seek assistance to handle the weight safely.
Finally, make sure good ventilation to prevent gas buildup while you work on the removal. Additionally, ensure all camper hookups are disconnected to prevent electric shock during the removal process.
Disconnecting Rear Connections
With the fridge emptied and the area prepped, it’s time to disconnect the rear connections. Start by making sure that no power is flowing to the fridge.
Follow these steps for a safe disconnection:
- Disconnect DC lines at the wire or directly from the refrigerator.
- Unplug the AC cord from the household outlet.
- Use a wiring diagram to confirm positive and negative wires before disconnecting.
- Locate the propane line connection and use a wrench to disconnect it, capping the line afterward.
- Remove any screws securing the fridge to the RV frame and make certain all structural supports are detached. Additionally, ensure that you remove screws from the metal framing of the refrigerator to facilitate its removal.
Detaching Front Components
To detach the front components of your camper fridge, start by removing the screws that hold the front trim or molding in place. Gently pull the trim away to access the underlying components. Disconnect any electrical connections for lights or indicators carefully, ensuring you don’t damage the wires.
If necessary, remove screws holding the door hinges to facilitate the door’s removal. Next, take out any additional screws securing the front panel. Keep in mind that you might encounter tight spaces, hidden screws, or insulation foam that needs cutting.
Always wear safety gloves and glasses to protect against sharp edges. Finally, support the fridge from underneath to prevent it from dropping during removal, ensuring all power sources have been disconnected before proceeding.
Handling Propane Lines
Handling propane lines requires careful attention to safety and technique. Before you begin any work, follow these critical steps:
- Turn off propane supply: Verify tanks are completely shut off.
- Drain propane lines: Allow residual gas to escape from the lines.
- Identify connection type: Determine if it’s a flare nut or another type to select the correct tools.
- Use proper tools: Utilize a suitable wrench to avoid damaging connections. Ensure the fridge is unplugged from the electrical source before starting any disconnection.
- Secure surrounding components: Make certain nearby parts are stable to prevent accidental movement.
Removing the Fridge
Begin the process of removing the fridge by guaranteeing all utilities are disconnected and the workspace is prepared.
First, remove the fridge doors and any external panels or moldings, then disconnect the lighting. Locate and detach the hinges securing the doors.
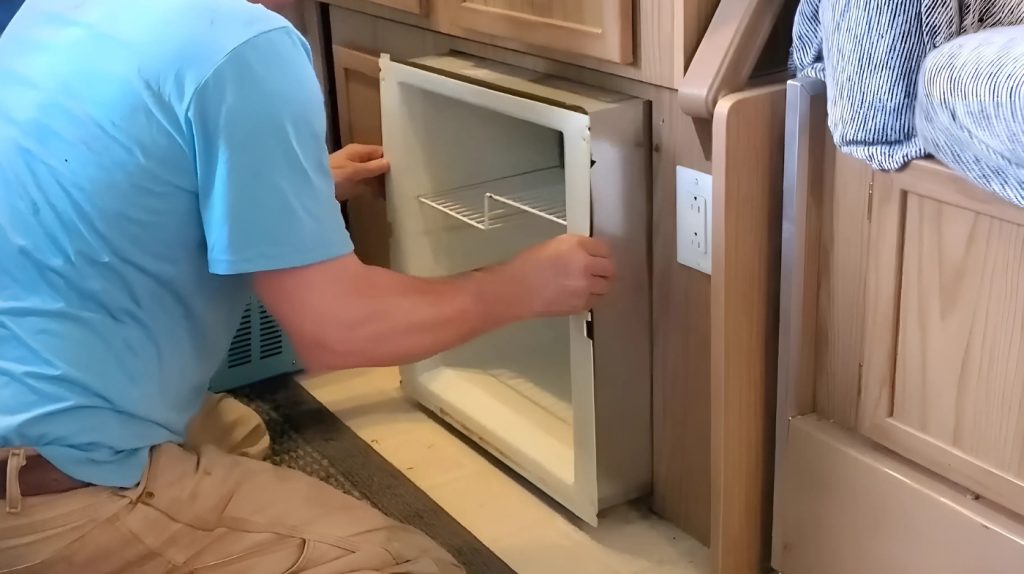
Identify the screws or bolts holding the fridge in place and remove them. Use supports to prevent the fridge from falling, then carefully slide it out of its compartment.
It’s essential to shut off gas at the tank before starting the removal process to ensure safety. Protect surrounding areas with materials to avoid damage.
Utilize safe lifting or pulling techniques to ensure you don’t injure yourself. Once removed, inspect the compartment for debris and clean the area thoroughly, preparing for the next steps in your RV maintenance project.
Reinstallation and Cleanup
After successfully removing the old fridge, the focus shifts to reinstallation and cleanup. Begin by verifying the new fridge fits the existing space and check electrical and gas line requirements.
Clean the area thoroughly and prepare the floor for the new installation. Consider the following:
- Inspect for Damage: Look for any structural or flooring damage.
- Level the Floor: Make certain the surface is secure and even.
- Dispose of Old Materials: Get rid of the old fridge and hazardous materials safely.
- Plan for Ventilation: Confirm proper airflow to avoid moisture accumulation.
- Weight Distribution: Assess how the fridge’s weight affects the camper’s balance. Ensure that you disconnect gas lines and electrical connections before installing the new unit to maintain safety.
With these steps, you’ll be ready for a smooth installation.
Tools and Materials Needed
Removing a camper fridge requires specific tools and materials to guarantee the process is efficient and safe. You’ll need screwdrivers—both flathead and Phillips—to remove screws from the fridge’s mounts and panels. An adjustable or basin wrench is essential for disconnecting propane lines.
Use needle-nose pliers for handling small parts or wires, and a utility knife to cut through any caulk or sealants. A drill may be necessary for making holes if additional mounting is required. Additionally, consider converting the fridge space into a storage area for improved functionality.
For materials, have aluminum plates to cover holes left by vents, caulk for sealing gaps, insulation materials like Reflectix, particle board for filling the fridge space, and fasteners to secure new panels. Gather these tools and materials before starting the removal process.
Common Mistakes to Avoid
When removing a camper fridge, don’t overlook critical safety precautions, as neglecting them can lead to accidents. Always consult the owner’s manual for specific instructions and guidelines tailored to your model; skipping this step can result in costly errors.
Additionally, handle propane safely to prevent leaks and guarantee a secure removal process. Ensuring proper alignment during reinstallation is essential to avoid complications with the vent pipes.
Ignoring Safety Precautions
While it may seem straightforward, ignoring safety precautions during the removal of a camper fridge can lead to serious accidents and complications.
To guarantee a safe process, consider these critical points:
- Clear the Workspace: Remove obstacles to prevent tripping hazards.
- Secure the Fridge Doors: Prevent them from swinging open unexpectedly.
- Use Proper Tools: Confirm you have the right equipment for disconnection, including a socket set and screwdrivers.
- Wear Protective Gear: Gloves and closed-toe shoes can protect against injuries.
- Enlist Help: Have someone assist you, as fridges can be heavy and unwieldy.
Skipping Owner’s Manual
Neglecting the owner’s manual can lead to significant complications during the camper fridge removal process. You risk incorrect disconnection of utilities, such as failing to properly disconnect DC electrical lines, not capping propane lines, or forgetting to unplug AC power cords.
Insufficient preparation can also occur if you don’t clear the area or support the fridge during removal. Removing refrigerator doors can create additional clearance, making the process smoother. Structural damage is likely if you remove screws without checking for hidden fasteners or forget to remove vent caps.
Additionally, electrical and gas line complications may arise, including not labeling disconnected wires or ignoring the need to secure gas lines. Finally, guarantee proper ventilation by disconnecting all exhaust vents and checking for blockages to avoid future issues.
Improper Propane Handling
Improper propane handling can lead to serious safety hazards and operational issues in your camper fridge. To avoid these common mistakes, keep the following points in mind:
- Inadequate Ventilation: Guarantee proper airflow to prevent carbon monoxide buildup.
- Incorrect Leveling: Level your RV within 3 degrees side to side and 6 degrees front to back to avoid overheating.
- Propane Lockout: Always reset your propane system properly after a lockout to maintain functionality.
- Insufficient Maintenance: Regularly clean the burner assembly to guarantee efficient operation.
- Ignoring Safety Features: Pay attention to safety features like heat sensors; they’re essential for preventing accidents.
Tips for Maintaining Your Camper Fridge
Maintaining your camper fridge is essential for optimal performance and longevity. Regular cleaning and temperature monitoring are key practices.
Follow these tips to guarantee ideal functionality:
| Maintenance Task | Frequency | Notes |
|---|---|---|
| Clean with mild soap | Monthly | Prevents bacterial buildup |
| Defrost the freezer | As needed | Maintains efficiency |
| Inspect door seals | Every season | Replace if worn to retain cold air |
Additionally, park in shaded areas, minimize door openings, and keep vents clear for airflow. Monitor the fridge temperature to stay within 34°F to 40°F.
By adhering to these maintenance guidelines, you’ll extend your fridge’s lifespan and ensure it operates effectively. Remember that using a fridge thermometer can help you accurately gauge the internal temperature and prevent food spoilage.
Frequently Asked Questions
How Long Does It Take to Remove a Camper Fridge?
Removing a camper fridge can feel like an epic quest, but it usually takes about 30 minutes to an hour. You’ll need to prepare by gathering tools and ensuring the area is clear. Disconnecting power and gas lines is essential for safety.
Once everything’s unplugged, unscrew and slide the fridge out. With a friend’s help, you’ll make the process smoother. Just remember, a little planning goes a long way in ensuring a successful removal!
Can I Remove the Fridge by Myself?
You can attempt to remove the fridge by yourself, but it’s not advisable due to safety concerns. The fridge’s weight and size make it challenging to maneuver alone, and you’ll need to disconnect power and propane connections carefully.
Additionally, securing support for the fridge during removal is essential. If possible, enlist help to avoid potential damage to both the fridge and your RV while ensuring your safety throughout the process.
What Should I Do if the Fridge Is Stuck?
If your fridge is stuck, first check for hidden screws or brackets that might be securing it. Apply lubricant to any tight joints, which can help ease the removal. Use gentle prying or lifting techniques to avoid damage.
Removing doors and trim can reduce weight and size, making it easier to maneuver. If you’re still struggling, don’t hesitate to ask for assistance from someone else for added leverage.
Are There Specific Tools Needed for This Task?
For this task, you’ll need a few specific tools. Grab a wrench or pliers for disconnecting propane lines, and screwdrivers—both flathead and Phillips for removing screws. Wire cutters or strippers are essential for handling electrical connections.
Don’t forget tape or caps to seal propane lines after disconnection, and supporting materials like wood or a table to stabilize the fridge during removal. These tools will streamline the process and guarantee safety.
Can I Recycle the Old Fridge After Removal?
Recycling your old fridge’s an eco-friendly choice that can save the planet from impending doom! After removal, you can donate it to a recycling facility that handles appliances. Many centers offer compensation for your old fridge, ensuring responsible disposal.
Just make sure to drain all fluids and check local regulations. If you’re feeling creative, consider repurposing it into a unique garden or storage solution. It’s a win-win for you and the environment!
Lift and Secure – The Final Steps to Extract Your Camper Fridge
In the grand journey of camper maintenance, saying goodbye to your fridge can be a bittersweet moment. By carefully following each step, you’ve guaranteed a smooth passage and safeguarded your camper’s heart.
Remember, with proper handling and a little foresight, you can keep the fridge’s spirit alive for future adventures.
As you close this chapter, embrace the opportunity to enhance your camper’s efficiency and comfort, paving the way for countless more memories on the road.

