Last Updated on April 6, 2023
Removing the RV AC Covers can be painful, especially if they’re old and brittle. Often, it is complicated to remove them without the right tools, and if you do not have them, it can be downright impossible.
RV air conditioner cover deduction is a pretty simple process, but there are a few things you need to be aware of. You must follow the proper steps to avoid damaging the RV AC unit.
In this article, we’ll discuss some essential steps on how to remove RV AC cover, as well as some of the potential hazards you may encounter along the way. We also discuss the tools you may need for this job and some safety precautions.
What Tools Should You Use for Removal?
You’ll need a few essential classic accessories to remove the RV AC opening cover. These include:
- A screwdriver,
- A putty knife, and
- A plier.
Additionally, it’s essential to take some precautions before starting this project. Make sure to wear gloves and goggles to protect your hands and eyes from any potential injuries.
How to Remove RV AC cover – Steps to Follow
RV AC covers can be a pain to remove, especially if you don’t know-how. Not only are they a pain to remove, but they can also be challenging to replace if you don’t know the proper steps for doing the job.
By following these easy-to-follow steps, you will remove the cover in no time and replace it with ease.
Step 01. Check the AC Unit for Stand Water
Start by determining whether or not you need to drain any water from the RV air conditioner. If there is already water inside of it when you remove the plastic cover, you will need to drain it before starting.
Many units are equipped with a spout to make the removing and draining of water quick and simple. However, if your air conditioner is not equipped with a spout for this purpose, you will need to find another way to drain the water from the unit.
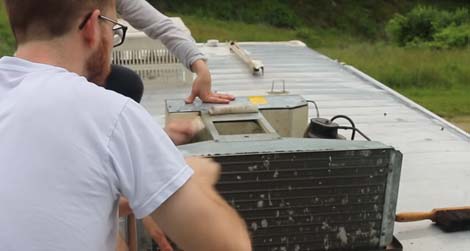
Step 02. Disconnect All Wiring from Air Conditioner
Before you attempt to remove the cover, detach electrical tape & all the wiring from the RV air conditioner. This includes power as well as copper refrigerant lines.
Once the connections have been removed, simply lift up on the unit until it’s free of its base. Once you’ve disconnected the necessary components, the bottom should easily detach from its foundation.
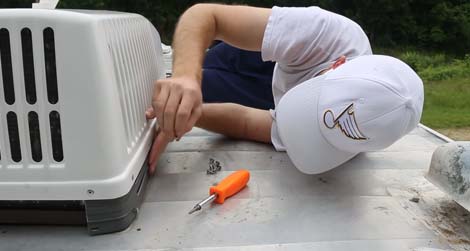
Step 03. Remove the Mounting Bolts from the Cover
Once you have it free of its foundation, you will need to remove all bolts securing the cover in place. This includes all bolts on top as well as those at the bottom.
A cordless drill equipped with a Phillips head bit is the most effective way to quickly and easily remove these screws.
Step 04: Remove All the Screws from Screw Holes
There are also a few screws located in holes on the plastic cover, which you will need to remove. Removing these will allow for a more thorough cleaning, making replacing them significantly more straightforward.
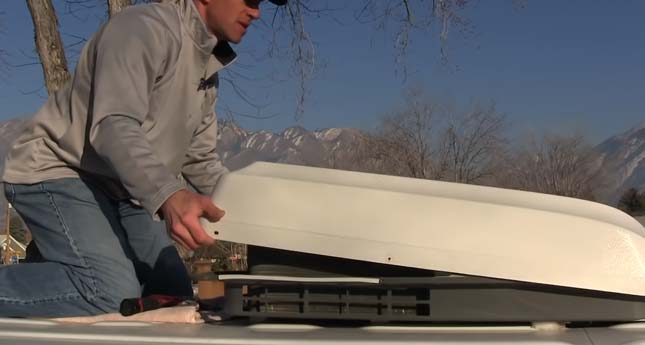
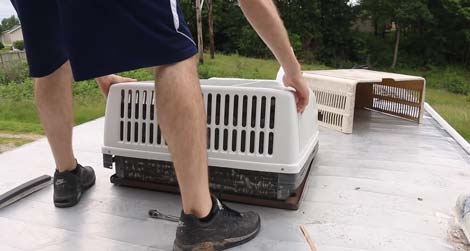
Step 05: Take Off the Cover Using a Screwdriver or Putty Knife
Once all of the necessary screws have been completely removed, you can remove the cover. The simplest way to do this is by using a putty knife or a flat-head screwdriver.
Simply slide the tool of choice between the top of the AC and its plastic cover, working slowly around the edge until you can lift on it.
Depending on how old it is, this may become a little bit difficult, but just take your time and continually work it all the way around.
Potential Hazards During Removal Air Conditioner Cover
There are a few potential hazards you may encounter while removal the RV AC cover. These include:
01. Pressure
During the removal operation, you will experience a good deal of pressure. This can cause problems when you least expect it.
To avoid this type of problem, be aware that the pressure is still there even when it doesn’t seem like it is. You should also wear safety goggles and gloves during this part of the job.
02. Slipping
Once you have removed the cover, it can be a little bit slippery. To avoid this problem, simply set the unit out of the way for a few minutes so that it can fully dry off before attempting to replace it.
03. Exposed areas of the Air Conditioning unit
Removing the cover will likely expose regions of the air conditioner which were previously covered by it. This can potentially cause injury if someone were to touch them unknowingly.
04. Electrical shock
Do not attempt to replace the cover before removing the electrical wiring from the AC. If you do, there’s a good chance that you will be shocked by it and could potentially suffer an injury as a result.
05. Injuries from falling
If your RV is equipped with a slide-out, this can pose a serious problem in removing the cover safely. If you’re unable to do this on a level surface, it is probably best that you avoid removing the unit at all.
06. Burns
Always make sure to disconnect all wiring before removing the cover. If you don’t, you could easily get injured when performing this task.
07. Damage to your AC
You must disconnect all of your wirings before attempting the removal procedure. If you do not, the damage will likely occur to your AC.
To avoid this potential problem, make sure that you keep all children and pets away from the unit until it has been thoroughly inspected and repaired.
Remove Dirt and Debris from the AC Unit’s Top
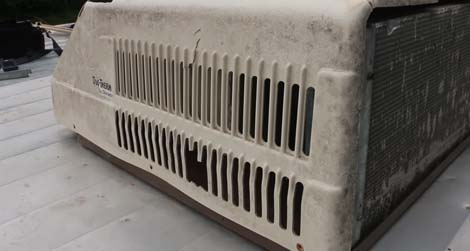
Once you have successfully removed the cover, you must clean it thoroughly. To do this, simply use a mixture of soap and water along with a sponge or cloth.
Make sure that you get into all the corners and crevices to remove any dirt or debris that may be there. Once this is done, you can let it air dry and then replace the cover.
Safety Precautions While Working On an RV AC unit
When working on an RV AC, there are a few safety precautions you should take into account:
01. Make sure to wear safety goggles and gloves while performing the task.
02. Be careful when removing the cover as it can be slippery.
03. Make sure to disconnect all the wires before beginning the removal step.
04. Ask for help if you cannot perform this task safely on your own.
05. If there is any damage to your AC, do not attempt to fix it yourself. Call an expert instead as they will quickly resolve the problem.
06. If your RV does have a slide-out, be very careful when removing the cover from the unit, as it can pose a severe hazard.
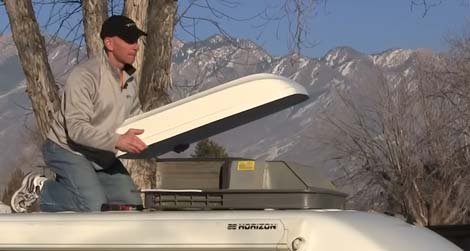
Re-Installing RV Air Conditioner Cover
Once you have adequately removed the cover, it is time to re-install it. To do this, simply follow these steps:
Step 01: Clean the area where the cover will be installed:
Before you can reattach the surface, it is essential to clean the place where it will be installed. This includes removing all of the old screws and adhesives.
Step 02: Install the new bolts:
Once the area is clean, you can begin to properly install the new bolts. Make sure to use the same holes used previously and attach them according to the included instructions.
Step 03: Apply a thin layer of adhesive:
Once the screws are in place, you can apply a thin layer of adhesive. This will help keep the cover in place and prevent it from coming off again in the future.
Step 04: Reattach the cover to the RV AC unit:
Once you have applied a thin adhesive layer, you can reattach the cover to the air conditioner. This should only take about three minutes.
Step 05: Hold the cover in place until it sets ultimately:
You should use clamps when reattaching the body to the air conditioner. Place them on either side of the plastic strip and leave them in place for about 20 minutes before removing them.
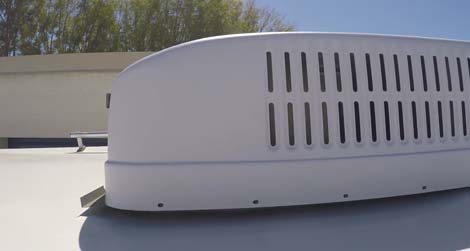
Step 06: Check that the cover is not torn or damaged:
Inspect the exterior for any holes or tears in it. If there are any, you should replace it with a new one to prevent further problems in the future.
Precautions When Reinstalling RV Air Conditioning Cover
When reinstalling your cover, you should keep these safety precautions in mind:
01. Always wear protective gloves and goggles while working on the unit.
02. Make sure to read the instructions provided with the new screws to know which holes to use them in.
03. Be careful not to over-tighten the bolts as they can damage the air conditioner.
04. Take your time to avoid making any mistakes during this procedure.
05. Never attempt to do this task if you are not entirely comfortable with it or feel that you will be unable to complete it safely on your own.
06. Do not attempt to wiring with a wet hand as you can electrocute yourself.
07. Never work on the AC if there is any damage to it or if it has been exposed to water.
08. If you have a slide-out in your RV, use extreme caution when removing the cover from the unit, as it can become a serious hazard when in motion.
09. Avoid direct sunlight when putting the cover back on so that you do not damage it or harm yourself in any way.
10. You should never use glue if you are reinstalling the cover, as it can pose a serious hazard to your air conditioner.
11. Always lift up on one side of the cover when putting it back on instead of pull straight to down on it as this will help prevent any potential problems.
12. Never use a power drill when putting the cover back on, as this can cause it to be damaged or otherwise ruined.
13. Always make sure to apply adhesive in a thin layer to avoid problems with your cover once you have finished reinstalling it.
14. You should also make sure that your air conditioner is not on when you are reinstalling the cover.
15. To avoid any potential injuries, never work with any sharp tools when installing your bolts.
16. If you have any issues with doing this task independently, contact a professional for assistance instead of attempting to do it yourself.
17. Always make sure that no one is standing underneath the entire cover while you are reinstalling it.
18. When reinstalling the bolts, make sure to hold on to them with a wrench or pair of pliers so that they do not slip and potentially injure anyone who is nearby.
19. If there is any damage done to the AC, call a professional to fix it as you don’t want anything to risk breaking during the reinstallation process.
FAQs
Let’s take a look at some of the frequently asked questions that people ask when they are trying to remove & reinstall their RV AC cover on their own:
01. Will I Need to Use Glue When Reinstalling My Cover?
No, never use glue on your AC if you plan to put the cover back on it. Instead, use adhesive by applying a thin layer over the lid and setting it.
02. When Should I Remove my AC Cover?
You should remove your cover at least once a year so that you can inspect it for any potential problems or damage that might need to be repaired.
If you notice any holes, tears, or other defects in the cover, then you will want to get rid of it and replace it with a new one before reattaching it to the unit itself.
03. How Long Should I Leave the Cover Off My AC Unit?
You should leave your AC cover off of the unit for at least twenty-four hours so that you can make sure that all of the dirt, debris, and other foreign materials have been removed from it.
04. Do RV Covers Cause Mold?
While it is possible that your RV cover can cause mold to form on your AC unit if you leave the cover off of the unit for an extended period, you should make sure not to create a serious hazard by reinstalling it too early.
05. Do RV Air Conditioners Need to be Serviced?
Yes, your RV AC unit will need to be serviced at least once every six months for it to remain in good working condition and ensure that your entire RV remains calm no matter how hot it gets.
Verdict
The RV AC unit cover is an important safety measure that you should take to ensure your unit does not overheat or have any other issues.
Thankfully, even the most inexperienced of do-it-yourselfers can install their RV AC covers with these tips and tricks in mind described in this article on how to remove RV ac cover. If you still feel overwhelmed or unsure about how best to handle this task on your own, don’t hesitate to contact a professional who can help guide you through the process, so there are no accidents!

