Last Updated on April 13, 2023
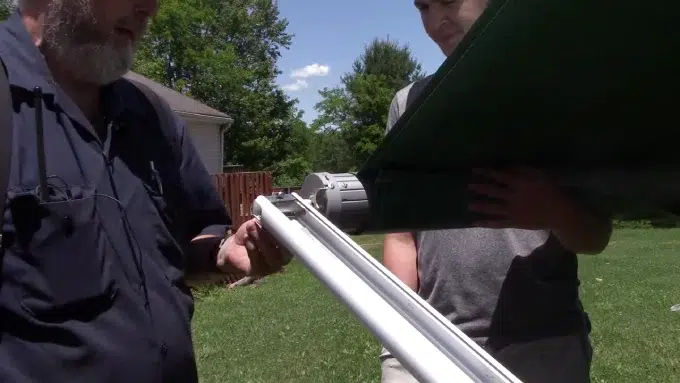
Replacing an RV awning roller tube may seem daunting, but it is a skill that every RV owner should know. RV awning roller tubes are prone to damage from the weather and daily use, and without regular maintenance, the awning can become loose or even fall apart.
Before you start, make sure you have all the tools and materials. Extend the awning fully and find one end of the roller tube. Take out any screws or bolts that are holding it in place and use a saw to cut off any remaining brackets or supports.
Put the tube end cap on one end of the new roller tube. Slide it into place and secure it with screws or bolts. When attaching the fabric to the new roller tube, make sure it’s even and tight for easy operation.
With patience, attention to detail, and the right tools, you can successfully replace your RV awning roller tube and enjoy a durable and reliable awning. Read on.
How to Replace RV Awning Roller Tube: DIY Steps
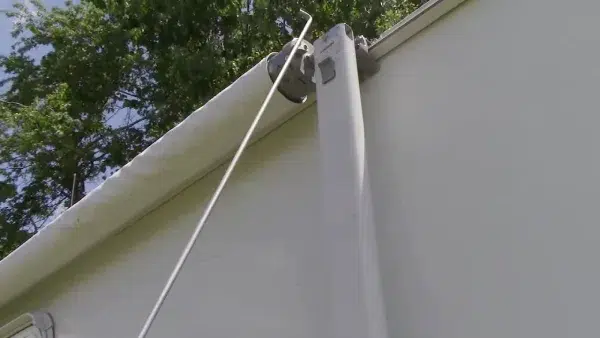
To replace an RV awning roller tube, prepare yourself with the necessary materials and tools. This will make the process smoother and more efficient.
Gather Materials and Tools
Before replacing your RV awning roller tube, gathering all the necessary materials and tools is important. This will ensure you have everything you need and avoid any unnecessary delays or trips to the hardware store.
To replace your RV awning roller tube, you will need the following:
- A new roller tube
- Replacement fabric (if necessary)
- End caps
- Torsion assembly
- Slide out awning arms
- Screwdriver
- Socket wrench set
- Pliers
Make sure you purchase a roller tube compatible with your RV’s make and model. It is also a good idea to get replacement fabric if your existing fabric is worn out or damaged.
Having all the necessary tools on hand will make the process much smoother. You will need a screwdriver, socket wrench set, and pliers to remove and install the various components.
Removing Old RV Awning Roller Tube
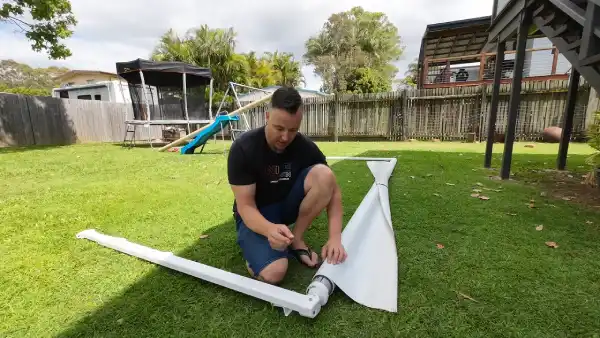
Replacing the RV awning roller tube requires removing the old one. This process requires careful attention to detail and the use of appropriate tools. Here are the steps to follow:
Step 1: Remove the Fabric from the Roller Tube
To replace the RV awning roller tube, you need to remove the old fabric from the roller tube. This is an essential step that must be done carefully to avoid damaging the fabric or other parts of the awning.
Firstly, extend the awning and secure it in place. Then, locate the screws on both ends of the roller tube that hold the fabric in place. Using a screwdriver, remove these screws and gently pull down on the fabric to release it from the tube.
Once you have removed all screws and released all tension from the fabric, slide it out of the groove on the roller tube. Be careful not to tear or damage it during this process.
Step 2: Loosen and Remove the Torsion Assembly
To replace the RV awning roller tube, loosen and remove the torsion assembly. This is a crucial step in the process as it allows you to remove the old roller tube and install a new one.
The torsion assembly provides tension to the awning fabric, which keeps it taut and prevents sagging. To remove it, you must first locate it on the roller tube. It’s usually on one tube end and looks like a coiled spring.
You’ll need two adjustable wrenches or pliers to loosen the torsion assembly. Use one wrench to hold the winding unit in place while the other wrench turns the set screws counterclockwise. This will release the tension on the torsion assembly.
Once you’ve loosened the set screws, use caution when removing them as they are under tension from the spring. They can fly off and cause injury or damage if they come loose too quickly.
Next, use your wrenches or pliers to unwind the torsion assembly from the roller tube. Be sure to keep track of how many times you turn it so that you can reinstall it correctly later.
With the torsion and assembly removed, you can now remove the end caps and slide out the awning arms before removing the old roller tube. Remember that these parts are also under tension from the spring and should be handled with care.
Step 3: Remove End Caps and Slide Out Awning Arms
To remove the end caps and slide out the awning arms of your RV awning, you will need to follow a few simple steps. First, locate the end caps on both sides of the awning roller tube. These end caps hold the awning arms in place and must be removed before you can take out the old roller tube.
You will need a screwdriver or drill with a Phillips head bit to remove the end caps. Use this tool to remove any screws holding the end cap in place. Once all screws have been removed, gently pry off the end cap using a flathead screwdriver or pry bar.
Next, locate the slider assembly on each side of the roller tube. This assembly holds the awning arm in place and must be loosened before you can slide it out. To loosen this assembly, use a wrench or pliers to turn the tension knob counterclockwise until it is loose enough to slide out.
Once both slider assemblies have been loosened, slide out each awning arm from its corresponding slot on either side of the RV. Be sure to keep track of any screws or bolts holding these arms in place so they can be reinstalled later.
Step 4: Take Out the Old Roller Tube
To replace your RV awning roller tube, remove the old one first. This crucial step requires careful handling to avoid damaging any components.
- Locate the screws that hold the end caps in place. These are typically located on either side of the roller tube.
- Unscrew these caps using a screwdriver or drill.
- Slide out the awning arms from their brackets and set them aside.
- Loosen and remove the torsion assembly carefully, ensuring no damage to any components.
- Once you have removed the torsion assembly, remove the old roller tube by sliding it out of its brackets.
It’s essential to be cautious during this process as some parts may be under tension and could cause injury if not handled correctly. Ensure you have all the necessary tools before beginning, and take your time during each step.
Remember to keep track of all screws and bolts you remove so that you can easily reassemble everything once you’ve replaced the roller tube.
Installation of New RV Awning Roller Tube
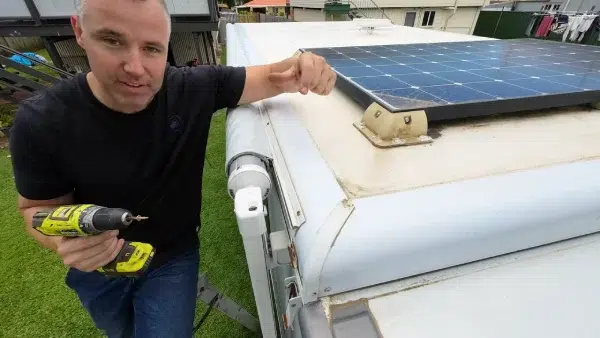
Installing a new RV awning roller tube can seem daunting, but it can be done easily with the right tools and knowledge. To get started, follow these steps:
Step 5: Put in New Roller Tube
To put in a new roller tube for your RV awning, you will need to follow these steps:
- First, ensure you have the correct replacement roller tube for your awning. You can find this information in your awning’s manual or by contacting the manufacturer.
- Next, remove the old roller tube by following the steps outlined in the previous section. This will involve removing the fabric from the roller tube, loosening and removing the torsion assembly, and removing the old roller tube.
- Once you have removed the old roller tube, it’s time to add the new one. Begin by sliding one end of the new roller tube into where the old one was removed.
- Carefully feed the fabric back onto the new roller tube as evenly as possible to avoid any wrinkles or bunching.
- Slide the other end of the new roller tube into place and ensure it is properly aligned with both ends of your RV’s awning arms.
- Reinstall both end caps on each end of your awning arms.
- Slide in both arms until they lock into place with a click.
- Finally, install your torsion assembly by reversing Step 2 above.
- Roll up your newly installed fabric onto your new roller tube using either an electric motor or manual crank handle, depending on what type of awning you have installed on your RV.
Step 6: Reinstall End Caps and Slide In Awning Arms
To reinstall the end caps and slide in the awning arms, follow these steps:
- Align the end cap with the roller tube and slide it back into place. Make sure that it is securely attached to the roller tube.
- Next, reattach the slide in the awning arms. These arms should be inserted into the brackets located on either side of the RV.
- Once you have inserted both arms, secure them by tightening any bolts or screws that were removed during disassembly.
- Ensure everything is properly aligned and tightened before moving on to the next step.
Reinstalling the end caps and sliding in the awning arms is an important part of replacing your RV awning roller tube, ensuring that your new roller tube is properly secured and supported. Take your time during this step to ensure a safe and successful installation process.
Step 7: Install Torsion Assembly
To install the torsion assembly in your RV awning roller tube, you will need to follow these steps:
- Slide the torsion assembly onto the new roller tube. Make sure that it is centered and level.
- Insert the end of the torsion assembly into the bracket on one end of the awning rail.
- Secure the torsion assembly to the bracket using a drill or screwdriver with screws or bolts.
- Slide the other end of the torsion assembly into the bracket on the opposite end of the awning rail.
- Again, use a drill or screwdriver to secure it with screws or bolts.
- Check that the tension on both ends of the torsion assembly is equal and adjust if necessary.
- Finally, test your new RV awning by extending and retracting it a few times to ensure everything works properly.
Remember that installing a new RV awning roller tube can be a complex process, so take your time and follow each step carefully. If you are unsure about any part of this process, consult an expert or refer to manufacturer instructions for additional guidance.
Step 8: Roll Up the Fabric
Once you have installed the new RV awning roller tube, it is time to test it out. The final step is to roll up the fabric and see if everything works properly.
To do this, simply extend the awning fully and then retract it again. Ensure the fabric rolls up smoothly and evenly onto the new roller tube. If there are any issues with the rolling motion, you may need to adjust the tension on the torsion assembly or ensure all components are properly aligned.
It’s also a good idea to inspect the fabric itself for any signs of wear or damage. Check for tears, holes, or fraying along the edges. If you notice any issues with the fabric, you may need to replace it as well.
Testing Your New RV Awning Roller Tube
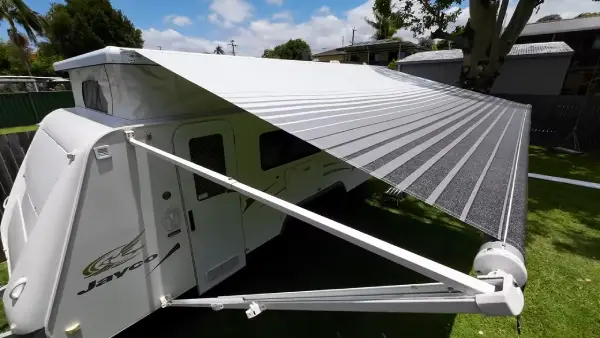
After installing a new RV awning roller tube, it’s important to test it out to ensure that everything is working properly. Here are the steps to follow for testing your new roller tube:
- Extend the awning: Use the rod to extend the fabric from the RV. Make sure that it rolls out smoothly and doesn’t get stuck or jammed.
- Check for proper tension: Once the awning is fully extended, check to ensure proper tension on the fabric. The fabric should be taut and not sagging in any areas.
- Retract the awning: Next, use the awning rod to retract the fabric back into its casing. Again, make sure that it rolls up smoothly and without any hitches.
- Test with the wind: Finally, test your new RV awning roller tube with some wind. You can do this by using a leaf blower or simply waiting for a breezy day. Watch how the fabric reacts to wind gusts – it should stay firmly in place and not flap around excessively.
If you notice any issues during testing, such as sagging fabric or difficulty rolling/unrolling, you may need to adjust your installation or seek professional help. But if everything looks good during testing, you can rest assured that your new RV awning roller tube is ready for action.
How do you measure an RV awning roller tube?
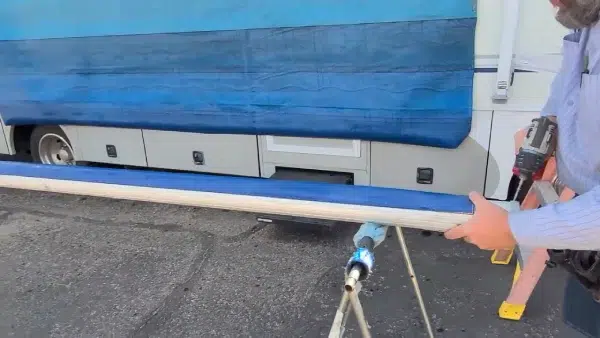
To accurately measure your RV awning roller tube, start by extending the awning and locating the roller tube. You will need to measure the tube’s length and diameter. It is important to ensure the frame is in good condition before any measurements.
To remove the old tube, begin by unwinding the torsion spring and counting the number of times it is unwound. Then, slide the old fabric off the tube and remove the end caps.
To install the new fabric, slide it onto the new tube and replace the end caps. Once the new fabric is in place, attach the torsion spring and new roller tube to the RV. Finally, test the awning to ensure proper function.
How do you straighten an RV awning roller tube?
If your RV awning roller tube is bent, there are a few methods you can use to try and straighten it out. The first method involves using 2x6x16 boards, a 2x4x12 board, and deck screws. To use this method, place the boards on either side of the bent section and attach the shorter board to them with screws.
Gradually tighten the screws while pushing the bent section against the boards. Keep in mind that even if the tube is straightened, the canopy fabric may not roll up evenly. If this is the case, it may be necessary to replace the tube altogether.
Another method involves using drainage tubing cut in half lengthwise and heavy fabric for cushioning. If you are unsure or uncomfortable with a DIY approach, it is always best to seek professional help.
Replace an RV Awning Roller Tube for a More Enjoyable Outdoor Experience
Replacing an RV awning roller tube may seem daunting, but anyone can do it with a little care and attention. Following these easy-to-follow instructions can increase your RV awning’s longevity and allow you to enjoy countless hours of outdoor fun.
Remember to prepare the necessary materials and tools, take your time with each step, and test your new awning roller tube when you’ve finished to ensure it is working correctly.
If you’re ever in doubt, don’t hesitate to call a professional for help. With this guide, you can easily tackle any RV awning roller tube replacement.

