

Last Updated on April 20, 2023
A regular toilet can easily be installed in your RV with the help of a few simple tools. Not only will this make your trips more comfortable, but it will also save you from having to use those pesky RV toilet seats. If you’ve ever used an RV toilet, you know that they are often small and cramped, making them uncomfortable to use.
Installing a regular toilet in a recreational vehicle can be a real struggle. You have to get the plumbing right, and it’s hard to know if you’re doing it right without tearing everything apart. We have a more straightforward solution based on the query “can a regular toilet be installed in an RV?”
There are many reasons someone might want to install a regular toilet in their RV toilet position. Following these simple steps, you can install a porcelain RV toilet seat or cassette toilet in your RV.
Can a Regular Toilet be Installed in an RV: Step-By-Step Guide
RV toilets are a great way to add a little luxury to your camping experience. This step-by-step guide will introduce you to the basics and details of RV toilet installation.
1. Prepare the RV Toilet Floor Base and Black Tank Pipe
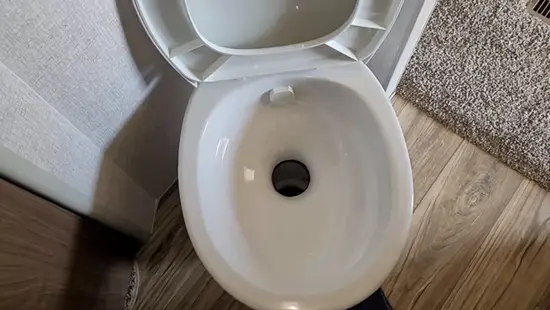
It is essential that the toilet is drained out of the water and that the water supply is shut off to allow the water to drain. The water in the tank must be drained by removing the lid, the refill tube from the overflow pipe, and the fill tube from the refill tube.
When removing the remaining water from the bowl, rubber gloves should be worn while using a sponge and bucket to remove the remaining water. To disassemble the tank, bowl, nuts, and caps, you need to ensure that these parts have been removed.
After you have removed the tank from the bowl, you need to remove the bolts connected to it. A towel should then be placed under the tank once the bolts have been removed, and then the tank can be placed on the towel.
While removing the nuts and caps from your RV toilet seats, a screwdriver will be required to loosen the bolts attached to the base. Based on the hardness of the wood, a hacksaw blade may have to be used to cut if necessary, depending on how difficult the wood is to work with.
After removing it from the bowl’s base, place a towel on the caulk seal and clean it with a soft cloth. Once you have removed the seal from the caulk, you need to replace it with a new one. The rag placed over the drain hole will allow the gas to escape through the hole and enter the house.
If wax seals of your RV toilet have formed over time, they should be removed. Using a knife, the wax seal can be removed from the floor by cutting the blade’s edge with the edge. If any rusted bolts in the drain hole have rusted over time, you should remove them from the hole and clean the drain hole.
2. Install the Black Tank Pipe
A rag should be put into the black tank pipe to prevent hardware from falling and sewer gas from entering the pipe. To prevent leaks, the hole in the floor must be large enough to accommodate the closet flange if it is not attached to its collar.
There is an option to remove excess flooring using a jigsaw if the hole needs to be enlarged after removing the floor. A pencil can be used if you wish to enlarge the hole around the base of the flange to enlarge it. Before cutting any joints, you must ensure that none need to be cut.
The black tank pipe should be firmly dry-fitted into the closet bend to fit snugly inside the bend. The distance between the collar of the flange and the finish floor should be measured after the flange has been installed over the black tank pipe to know how far it is away from it.
With the help of a handsaw, you can cut the black tank pipe according to the dimensions you have measured previously after measuring the measurements. Scrape away any burrs from the edge of the cut with a utility knife before continuing.
3. Install the RV Floor Base Black Tank Pipe and Closet Flange

Next, wipe a PVC primer outside one end of the soil pipe and inside the bend at the back of the closet before replacing old cassette toilets with a new RV composting toilet. If you want to seal these surfaces, you can apply PVC cement, and then the soil pipe should be immediately twisted into the closet bend, which should be done very soon.
It is recommended that a free end of the soil pipe is cemented, and the flange should be inside the closet. By twisting and pressing the collar flange onto the soil pipe, it should be seated on the ground in the RV toilet by being twisted and pressed downwards.
Right, and left slots should be aligned with the hole after rotating the collar. If you insert the closet bolts into the slots, there should be a parallel line between the closet bolts and the wall behind the tank when they are inserted into the slot.
To secure the collar to the subfloor, screws made of stainless steel must be screwed into the subfloor. The PVC flanges with fixed collars must be glued before the cement sets; it is essential to align bolt slots as soon as possible.
4. Make Sure the Stop Valve Is Soldered
There needs to be a shutoff valve installed in the bathroom so that the water supply can be turned off. The supply line needs to be cut with a tubing cutter so it can be connected. You should place a bucket under it, and then you should sever the line.
An escutcheon and stop valve should be attached to about one inch of pipe to form a stop valve. After the water has been drained out of the pipe, it needs to be refilled. To remove the valve, you will need to remove both the handle and the stem from the valve.
During the soldering process, there is a possibility that the plastic washers placed on the stem might be damaged. To ensure the pipe is completely dry, place a rag on the inside and outside of it and use it to wipe it.
With a wire-brush pipe cleaner, make sure that both the inside of the pipe as well as the outside of the valve’s inlet is thoroughly cleaned. A fluxing operation needs to be carried out in both areas.
When the escutcheon has been attached to the supply line, it should be positioned upwards, and a stop valve should be installed. The joint at the end of the supply line stop valve can be heated using a propane torch.
It is easy to do this with a propane torch. Before you start soldering, be sure you have run enough solder around the joint to prevent thermal shock. It is a sign that the joint has been filled when a drop of solder can be seen near the base of the joint.
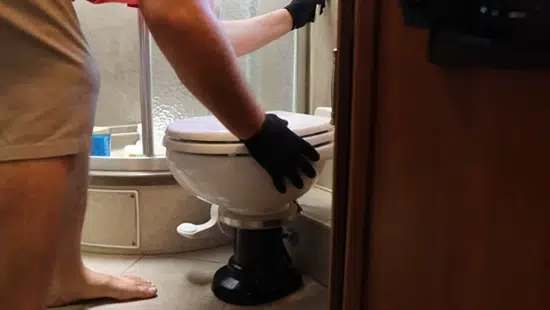
5. Set the Bowl After Installing the RV Toilet Wax Ring
Four slots on the flange collar must be threaded with the long brass closet bolts. There should be a gap between each brass washer so it can be slipped over the other. It is advisable to use a flat-sided ring to gently press it over the flange.
By lifting the RV composting toilet bowl onto the flange, aligning the holes in the base of the bowl with the holes in the closet bolts, and securing the bowl to the ring with the rings, the RV toilet bowl can be assembled.
There should be no twisting or rocking of the wax ring when pressed down on the bowl, and its bottom should rest on the floor. The stainless steel washers can be used to adjust the bowl on an uneven floor if there is an uneven floor.
After the nylon washers have been slipped over the bolts, you must hand-thread the nuts to ensure they remain in place. To tighten the nuts, begin using a wrench and then turn the nuts a quarter turn simultaneously.
Ensure the wrench is not overtightened, as it will crack if it is overtightened. If you have a hacksaw, you should trim two threads above the nut on closet bolts to make them look good. Before adding them to the bolts, you must ensure that the plastic bolt covers are in place.
6. The Installation of a Tank
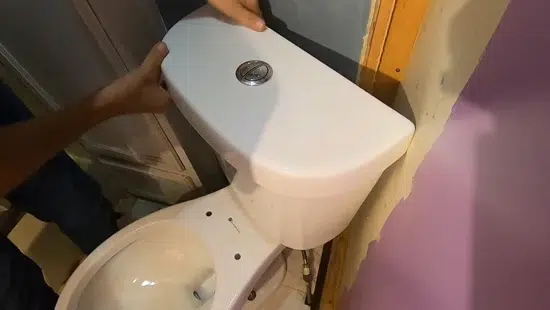
There should be a giant rubber tank to bowl a washer or a spud washer adequately installed at the bottom of the tank on the outside of its bottom. The tank bolts must be inserted into the small tank holes after the rubber tank washers have been inserted from the inside of the tank.
When you lower the tank, you should ensure that you guide the ends of the tank bolts into the holes in the bowl. Bolts should be fitted with nylon washers, followed by the nuts being hand-threaded, and then the bolts should be tightened by hand.
Hand-tightening the nuts should be done by rotating between them as you hold each bolt head with a screwdriver while checking the tank level continuously throughout the process of hand-tightening the nuts.
Overtightening porcelain can cause it to crack because it is tightened beyond its limits. You must attach the flapper chain to the tank’s handle to operate it.
7. Install the Supply Line and Seat Assembly
Tube benders allow the supply line to be curved to fit the outlet of the stop valve and the tank supply fitting. Mark the flared-end-up pipe half an inch below the outlet and place it between these two points. The line will be long enough to fit inside the outlet.
A tubing cutter can be used to cut the supply line at the mark made above. Attach the compression ring, the compression nut, and the plastic nut to the supply line by sliding them on.
The outlet threads of the valve should be coated with Teflon paste, then the line should be seated in the outlet, and finally, the compression ring should be inserted. A plastic nut found under the tank of the supply line should be hand-tightened by hand. The bolt should be locked when the compression nut is tightened with a wrench.
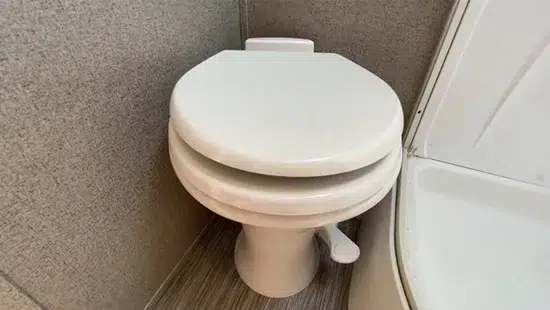
8. The Final Touches of Finishing
Using a screwdriver, tighten the nuts on the bowl by inserting a plastic bolt in the holes, and once the bolt is in place, tighten the nuts using a plastic bolt that appears in the hole.
The toilet seat assembly has now been positioned over the bowl, and once it has been positioned, it will now be necessary to install the assembly over the bowl after it has been positioned.
Water must be turned on via the main supply line, the stop valve should be opened, and the tank must be allowed to fill with water by turning on the main supply line.
There is a recommendation that a flush must be performed six times if the best results are to be achieved. Once the toilet has been installed, you must check for any leaks present after the installation.
Parts of the Regular Toilet: Brief Overview & Introduction
When you flush an RV toilet, there’s more than just the disappearance of your waste. To ensure that your bathroom experience is sanitary and pleasant, it’s essential to understand the different parts of the RV toilet and how they work together.
While it may seem like a simple machine, the toilet is quite complex. But we can appreciate this fantastic invention even more by understanding how each part works.
Flapper chain: Perhaps the essential component of the toilet is the flapper chain. This chain is responsible for opening and closing the flapper valve, which controls water flow from the tank to the bowl.
Without a properly functioning flapper chain, your toilet would constantly be running or unable to flush toilet. Keeping your flapper chain in good working order with essential maintenance is relatively easy.
Brass Tank Bolts: The toilet’s tank is held together by brass tank bolts, which are solid and durable. These bolts ensure that the tank doesn’t leak, making them an essential part of your toilet’s structure.
Besides holding the tank together, brass tank bolts also help to prevent leaks by providing a tight seal. These bolts can become loose or damaged, so it’s essential to check them regularly and tighten or replace them as needed.
Rubber Washer: Most toilets have a rubber washer that forms a seal between the tank and the bowl. This seal is important because it prevents water from leaking from the tank and into the bowl.
The rubber washer is a small piece located at the bottom of the flushing mechanism. The rubber washer seals the connection between the flushing mechanism and the sewer system or septic tank.
Seat Bolts: The seat bolts are a crucial component of the RV toilet, as they ensure that the seat is securely attached to the bowl. Some Seat bolts are hidden, while others are exposed.
There are also different bolts, including standard, wing, and cap nuts. Choosing the correct type of seat bolt is essential, as it will ensure a tight and secure fit.
Rubber Tank To Bowl or Spud Tank Washer: These are located at the tank’s base and create a seal that prevents water from leaking. This washer is responsible for forming a watertight seal between the two components.
Spud tank washers are a small, disk-shaped piece of rubber that sits in the bowl and on top of the tank. Its purpose is to create a watertight seal so that water doesn’t leak out when the flush valve is opened.
Wax Ring: The wax ring is a donut-shaped piece of wax that seals the connection between the toilet and the drain pipe. This helps to prevent sewage and water from leaking out of the toilet and into your home. The bowl also contains a flapper, a rubber or plastic disk that opens and closes the hole at the bottom of the bowl.
Closet Flange: The closet flange attaches the drain pipe to the floor. It is made of durable plastic or metal and is bolted into place. The flange is made of durable materials like PVC or metal, creating a tight seal to prevent leaks.
Closet Bolt Slot: The closet bolt slot is one of the essential parts of the toilet. This is because it is responsible for holding the bolts that secure the toilet to the floor. Without these bolts, the toilet would be unstable and could even tip over.
The closet bolt slot is usually located near the toilet’s base in front or back. It is crucial to ensure that this slot is not obstructed by anything, as this could prevent the bolts from properly securing.
Supply Line: The supply line is the first part of the toilet and is responsible for bringing fresh water. This carries water from the main supply into the tank. The fill valve is a float-operated valve that controls water flow into the tank.
The water then fills up the bowl, which is the second part of the toilet. The flush valve allows the water to flow from the tank into the bowl and is responsible for stopping water flow once you have finished flushing.
Compression Nut: The compression nut is located at the toilet’s base, where the tank and bowl connect. This nut helps secure the fill valve and controls the water flow into the bowl.
When you flush the toilet, water is released from the tank and goes through the fill valve. The compression nut regulates how much water flows through the valve so the bowl can be properly flushed.
Compression Ring: The compression ring is a rubber or plastic donut-shaped seal that is adhesive on one side. It is placed under the lip of the toilet bowl to form a seal between the bowl and the flange.
The compression ring allows the toilet bowl to be tightened onto the flange without damaging the porcelain. When installed correctly, the compression ring should flush the top of the flange. If it is not, it can cause leaks.
Copper Supply Line: The copper supply line is the pipe that runs from the water supply to the toilet. This pipe is essential because it delivers fresh water to the toilet bowl, which is necessary for flushing.
The copper supply line is typically made of copper or PVC, and it is essential to ensure that this pipe is installed correctly and in good condition. If there are any leaks, they can cause significant damage to the bathroom and even lead to flooding. The copper supply line may also need to be replaced if it becomes corroded or cracked.
Escutcheon: The escutcheon is the metal or plastic disk that covers the hole in the porcelain where the water supply lines and drainpipe enter the toilet. It usually has two holes for the water lines and one for the drainpipe.
The escutcheon may also have a small notch cut out of it to allow access to a shutoff valve behind it in case you ever need to stop water flowing to your toilet. The escutcheon is sometimes called a “trim ring” or a “flange.”
Stop Valve: The stop valve is the toilet part controlling water flow into the tank. It is usually located behind the bowl at the back of the toilet. The stop valve is operated by a handle or lever attached to a rod that goes through the tank to the valve.
Water flows from the supply line into the tank when the handle is in the “open” position. Water cannot flow when the handle is ” closed. “
The stop valve is an essential part of the toilet because it allows you to turn off the water supply if there is a problem with the gravity flush toilets valve or another part of the toilet.
Closet Bolt: The closet bolt is a metal rod that connects the toilet bowl to the floor and helps to keep the bowl in place. The closet bolt also has a rubber gasket that creates a watertight seal with the floor.
Without this seal, water would leak out every time the toilet was flushed, making a mess and wasting water. To ensure that your toilet works appropriately, it is essential to check the condition of the closet bolt and gasket regularly. If you notice any leaks, replace the gasket or tighten the bolt.
Black Tank Pipe: The black tank pipe is the toilet part that removes waste and water from the bowl. It is connected to the bowl via a flange and the sewer line via a trap. The pipe is typically made of PVC or ABS plastic and is sealed with a wax ring.
The black tank pipe is responsible for carrying sewage and water away from home, so keeping it clear of any obstructions is essential. A clogged black tank pipe can cause sewage to back into the home and lead to costly repairs.
Closet Bend: The closet bend is the toilet part that connects the flush valve to the drainpipe. The closet bend typically has transparent traps designed to be installed in locations where it would be difficult or impossible to clean a conventional trap.
It is located between the bowl and the tramway, and its primary purpose is to prevent sewage from flowing back into the bowl. The typical closet bend is U-shaped, but some newer designs feature an S-shaped bend that is more effective at preventing sewage backup.
RV Toilet paper: The RV toilet paper holder is an essential part of any RV bathroom. RV toilet paper comes in individual rolls, so you can easily take it on the go.
The Bottom Line Message
The drain line carries waste away from the toilet and your sewage system. All these parts work together to make your toilet function properly and provide a simple but essential service. So next time you take a trip to the bathroom, take a moment to appreciate all your toilet’s hard work.
We hope our guide on the query “can a regular toilet be installed in an RV?” did help you. That’s all for now on is it possible to set up a standard sanitation system in an RV. Follow the steps mentioned above to ensure that you successfully installed a regular toilet in an rv correctly.

