Last Updated on May 4, 2023
RV vents play a crucial role in ensuring proper ventilation in your recreational vehicle, making them essential components for your overall camping experience. However, standard RV vents can be boring and may not align with your style or preference.
Fortunately, there is an easy solution to this problem: Painting! But before you go ahead and grab a paintbrush, it’s essential to know whether or not it’s safe to paint RV vents.
Today we’ll explore everything you need to know about painting your RV vents while maintaining a professional and informative tone. So sit back, relax, and dive into the exciting world of RV vent painting.
How Can I Paint RV Vents Like a Pro: 5 DIY Steps
When painting RV vents, there are some essential steps to ensure that the paint adheres properly and lasts for a long time. The steps are as follows:
STEP 1. Choosing the Right Paint
First, you must choose the right type of paint for your RV vents. Look for a paint designed specifically for use on plastic or metal surfaces, depending on the material of your vents. Rust-Oleum and Krylon are popular brands offering spray paints designed exclusively for plastic and metal.
STEP 2. Applying Primer
Before you start painting, applying a coat of primer is essential. This will help the paint adhere better and last longer. Look for a primer designed to go on plastic or metal, according to what your vents are made of.
To apply primer, clean your vents thoroughly with soap and water. Once they’re dry, use painter’s or masking tape to cover any areas you don’t want to be painted (such as surrounding trim).
Then, hold the can of primer about 6-8 inches from the vent surface and spray evenly in even strokes. Allow the primer to dry completely before moving on to painting.
STEP 3. Paint the Vents
Once your primer is dry, it’s time to start painting. Again, ensure you use paint designed specifically for plastic or metal surfaces.
To apply paint, hold the can about 6-8 inches away from the vent and spray in even strokes, moving back and forth across the surface. Be sure not to overspray or let any drips form.
It may take multiple coats of paint to achieve full coverage. Allow each coat of paint to dry completely before applying another one.
STEP 4. Allow the Paint to Dry
After you’ve finished painting your RV vents, be sure to allow plenty of drying time. This will ensure that it sets correctly and won’t smudge or peel.
Check the label on your paint can for recommended drying times. In general, you’ll want to let the paint dry for at least 24 hours before handling or reinstalling your vents.
STEP 5. Reattaching RV Vents
Once your paint is fully dried, it’s time to reattach your RV vents. Simply reverse the steps you took to remove them in the first place.
Be sure not to overtighten any screws or bolts, as this can cause damage to your newly painted vents. By following these steps, you can successfully paint your RV vents and give them a fresh new look.
How to Prepping RV Vents Correctly for a Flawless Paint Job?
Before you start painting your RV vents, prep them properly. This will ensure that the paint adheres well and lasts long. Preparation for painting RV vents can be done in the following ways:
#1 Cleaning the Vents with Detergent
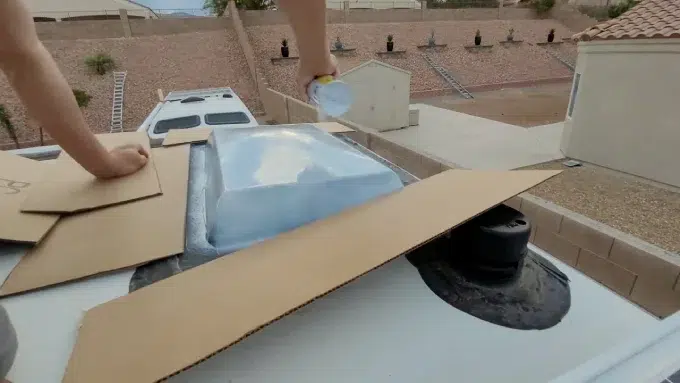
Cleaning the RV vents is an essential step in preparing them for painting. To clean the vents properly, you must remove them from your RV. This will give you better access to all sides of the vent and ensure you can clean it thoroughly.
Before you start cleaning, make sure to remove any dirt or debris that may have accumulated on the vent. This can be done using a soft brush or cloth.
Next, clean the vent thoroughly using mild detergent and warm water. Make sure to use a non-abrasive cleaner that will not damage the surface of the vent. You can also use a specialized RV cleaner designed for plastic surfaces.
After cleaning, rinse the vents thoroughly with clean water and dry them completely using a soft towel or cloth. Make sure that there is no moisture left on the surface of the vents, as this can affect the adhesion of paint.
#2. Sanding the Vents Using Sandpaper
Sanding the RV vents is another crucial step in getting them for painting. Sanding helps to remove any existing paint, rust or debris and creates a smooth surface that allows the new paint to adhere correctly.
You can sand your RV vents by following these steps:
- Start by removing the vent covers from your RV. Use a screwdriver or drill to loosen the screws, and gently pull off the covers.
- Use a wire brush or sandpaper to remove loose paint or rust from the vents. Wear gloves and a mask while doing this, as it can create dust.
- Next, use fine-grit sandpaper (around 220 grit) for sanding the entire surface of the vent covers until they are smooth and free of any bumps or rough spots.
- Wipe the vents with a clean cloth to remove any remaining dust or debris.
- If there are any dents or scratches on the vents, you may want to use auto-body filler to fill them in before painting.
- Finally, inspect your vents closely for any imperfections and make sure they are completely smooth before moving on to priming and painting.
Remember that proper preparation is critical when it comes to painting RV vents. Taking the time to sand them properly will ensure your new paint job looks great and lasts for years.
Painting RV Vents: Some Essential Tips and Tricks
When painting RV vents, a few tips and tricks can make the process easier and ensure a high-quality finish.
UV-protected metal paint is the best: Always choose the proper paint for the job. Look for a paint specifically designed on metal surfaces to help it adhere better and last longer. Also, consider using paint with UV protection to prevent fading from sun exposure.
Carefully prepare vents before painting: You must clean and prepare the vents properly. Remove any dirt or grime buildup with mild detergent and warm water, then rinse thoroughly and let dry. Next, sand the vents lightly with fine-grit sandpaper to create a rough surface that will help the primer adhere.
Apply primer according to the instructions: When you’re ready to start painting, apply a coat of primer to the vents. This will help the paint stick and provide an even base for your color coat. Follow the manufacturer’s instructions about drying time and application.
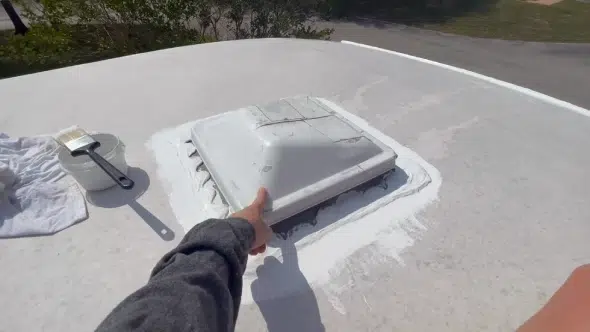
Cover it evenly in thin coats: Use thin coats and apply multiple layers as needed until you achieve full coverage. Avoid applying too much paint simultaneously, leading to drips or uneven coverage.
Carefully reinstall the vents after drying: After you’ve finished painting, leave enough time for the vents to dry thoroughly before mounting them on your RV. This could take several hours or even overnight, depending on the type of paint you used and the environment.
Is it Safe to Paint RV Air Vents?
Painting the RV air vents is entirely safe if you do it correctly. In fact, painting them can give your RV a fresher and cleaner look. However, using the right paint and techniques to ensure proper ventilation and safety is essential.
Choose a paint that is heat-resistant and suitable for plastic surfaces. Clean the vent thoroughly before painting to ensure proper adherence to the paint. Also, avoid painting the moving parts of the vent, as this can prevent proper airflow and cause safety hazards.
Can I Paint the RV Roof Vents?
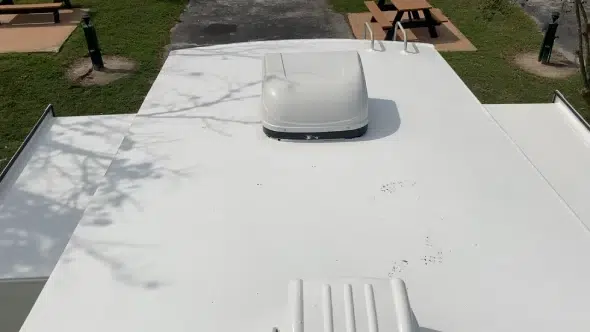
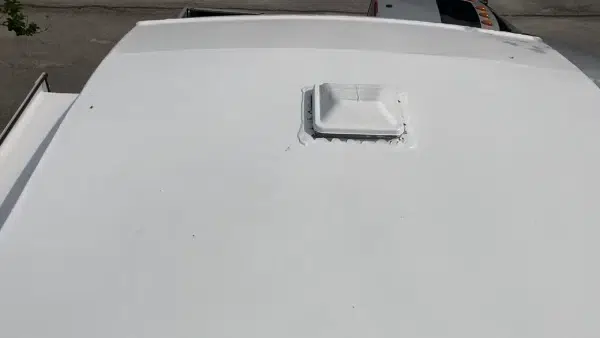
You can paint RV roof vents and coverings also. The process is similar to painting RV vents. First, clean the vent cover thoroughly and sand the surface to create a rough texture. After preparing the surface, you can apply the paint in thin coats, allowing each coat to dry before applying the next one.
It is essential to use high-quality, UV-resistant paint designed for use on plastic surfaces. One thing to keep in mind is that you should never paint the inside of the roof vent. Painting the inside can interfere with the vent’s ability to open and close, leading to airflow issues.
What Color is Best for RV Air Vents?
The best color for RV air vents is one that matches the color of your RV interior walls. This helps create a cohesive look inside your RV and avoids clashes with other colors or patterns in your interior décor. Popular color choices for RV air vents include white, beige, and gray.
But if you want to add a pop of color or make your air vents stand out, you can choose a bright or bold color that complements your interior color scheme. To conclude, the choice of color is up to personal preference as long as it matches the overall look of your RV’s interior.
Transform Your RV with a Fresh Coat of Paint on the Vents!
Painting your RV vents is a great way to give your vehicle a fresh and updated look. However, it’s essential to properly prepare the vents before painting them by cleaning and sanding them.
Choosing the right paint and applying primer ensures a long-lasting finish. Once you’ve painted the vents, allow enough time for the paint to dry completely before reinstalling them.
These tips and tricks will help you achieve a professional-looking result that will make your RV stand out. So why not add some color to your life and paint those RV vents today?

