Last Updated on April 17, 2023
RVers are constantly looking for effective solutions to waste disposal, and plumbing an RV toilet directly into a sewer line can be one such option. But it’s essential to consider factors like the RV location, local regulations, and access to the sewer line before beginning such a project.
Through careful preparation and using appropriate materials, you can have a successful installation. In this post, you’ll get in-depth instructions on how to hook up your RV toilet directly to a sewage line. So let’s begin.
Can RV Toilets Be Plumbed Directly To A Sewer Line: Things to consider
Before plumbing your RV toilet directly to a sewer line, several factors must be considered. First and foremost, you need to check with your local laws and regulations regarding connecting RV toilets directly to sewer lines.
Some areas may prohibit this type of plumbing, while others may require permits or inspections before doing so.
Another important factor to consider is the age and condition of your RV’s plumbing system. If your RV is old or has not been well-maintained, it may not be suitable for direct plumbing to a sewer line. In this case, you may need to replace some or all plumbing components before proceeding.
Additionally, you should evaluate the distance between your RV and the sewer line. If the distance is too great, installing the necessary piping and connections may be impractical or cost-prohibitive.
Lastly, consider how often you will use your RV and how long you will stay in one location. If you only use your RV occasionally or for short periods, it may not be worth plumbing directly to a sewer line.
On the other hand, if you frequently use your RV for extended periods in one location, direct plumbing could save you time and hassle in the long run.
Steps to Plumb Your RV Toilet Directly to a Sewer Line
Follow specific instructions for plumbing your RV toilet directly into a sewer line. It is important to note that not all RV toilets are designed to be plumbed directly to a sewer line, so make sure your toilet is compatible before attempting this process.
Gathering Necessary Materials
You must gather some necessary materials to connect your RV toilet directly to the sewer system. Here is a list of the required tools and materials:
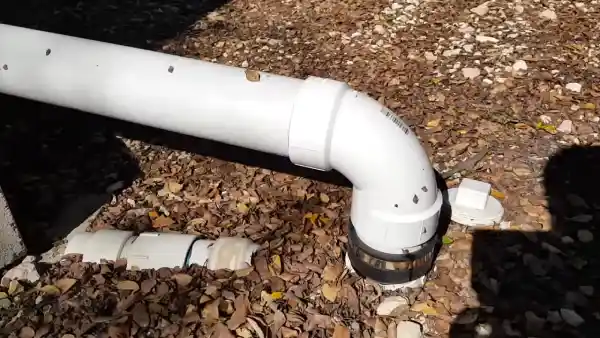
- PVC pipe and fittings: You will need PVC pipes and fittings to connect your RV toilet to the sewer line. Make sure to measure the distance between your RV and the nearest sewer line connection point so that you can buy enough pipes and fittings.
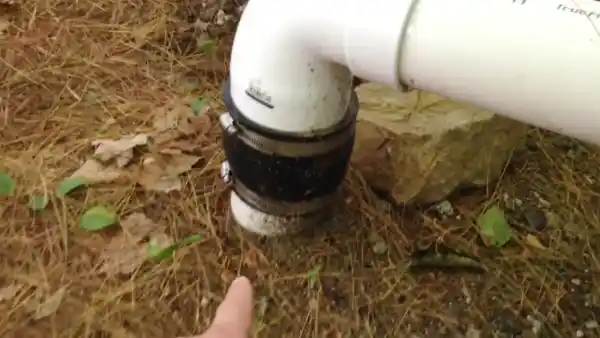
- Hose clamps: Hose clamps are used to secure the sewer hose connections.
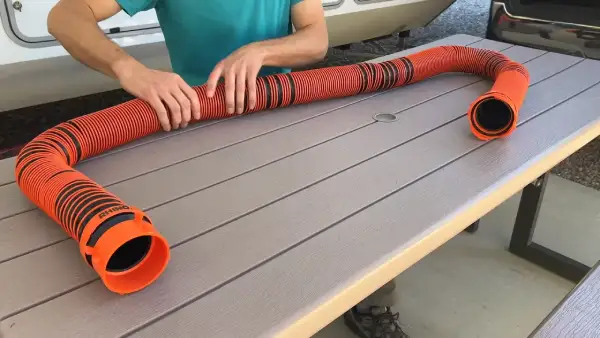
- Sewer hose: You will need a sewer hose that fits your RV’s sewer system. Choose a high-quality hose that is durable and flexible.
- Macerator pump (optional): If you want to connect your RV toilet to a sewer line without gravity flow, you will need a macerator pump. This device grinds up waste into small particles so that it can be pumped through a smaller diameter pipe.
- Screwdriver: A screwdriver is needed for installing the macerator pump.
- Drill (optional): If you need to drill holes in your RV’s floor or walls to install the macerator pump, you will need a drill.
Make sure you have all these materials before starting the installation process. Reading through all instructions carefully before beginning any work is essential.
Required Tools
You’ll need some tools to plumb your RV toilet directly to a sewer line. Here’s a list of the required tools:
- Pipe cutter
- Wrench set
- Screwdriver set
- Drill and bits
- Measuring tape
- Pencil or marker
These tools will help you connect your RV toilet to a sewer line easily. Make sure to have them on hand before starting the process.
RV Sewer System Basics
Before you can plumb your RV toilet directly to a sewer line, it’s important to understand the basics of your RV’s sewer system. Unlike traditional homes, RVs have a holding tank that stores waste until it can be properly disposed of.
This holding tank is typically located underneath the RV and can hold anywhere from 20 to 100 gallons of waste.
Choosing the Right Sewer Hose
Several factors should be considered when choosing your RV’s sewer hose. The first thing you need to determine is the hose length you need. Measure the distance from your RV’s toilet to the nearest sewer connection point and add a few extra feet for flexibility.
Next, decide on the material of the hose. The most common materials are vinyl and rubber. Vinyl hoses are lightweight and easy to store but may not be as durable as rubber hoses. On the other hand, rubber hoses are more heavy-duty and can withstand higher pressure and temperature.
You’ll also want to look for a hose with proper fittings that will connect securely to both your RV’s toilet outlet and the sewer line connection point. Make sure to check that the diameter of the hose matches both connections.
Another consideration is whether or not you want a hose with a built-in sewer elbow. A sewer elbow is an angled attachment at one end of the hose that helps prevent clogs by creating a smoother flow of waste through the hose.
Finally, consider investing in a high-quality sewer hose that will last longer and perform better than cheaper options. While it may cost more upfront, it could save you money on repairs and replacements.
Finding the Nearest Sewer Line Connection Point
Finding the nearest sewer connection point is crucial when plumbing your RV toilet directly to the sewer line. This will ensure easy access to a proper disposal system for your waste.
To locate the nearest sewer line connection point, consult a map of where you plan to park your RV. Look for any nearby RV parks or campgrounds, as these are likely to have established sewer connections.
If you are not staying at an RV park or campground, you may need to do some additional research. Contact local sanitation departments or public works offices and inquire about available sewage systems and hookups. They may be able to provide information on nearby dump stations or other facilities that can accommodate your needs.
Another option is to use online resources such as Campendium or AllStays, which provide maps and information on RV-friendly locations, including dump stations and campgrounds with sewer hookups.
Once you have located the nearest sewer line connection point, ensuring your RV is parked nearby for easy access is important. You will also want to ensure that any hoses or pipes connected to your RV toilet are long enough to reach the sewer hookup without any kinks or bends.
By taking the time to properly locate and prepare a sewer line for your RV toilet, you can ensure the safe and efficient disposal of waste while traveling.
Connecting Your RV Toilet to Sewer Line
Connecting your RV toilet to a sewer line is essential in ensuring the proper functioning of your vehicle’s plumbing system. This process can be done with or without a macerator pump, which breaks down waste and makes it easier to dispose of. Here are the steps to connect your RV toilet to a sewer line:
- Ensure you have all the necessary tools, including a wrench, screwdriver, and hose clamps.
- Locate the nearest sewer line connection point to your RV. This may be at a campsite or RV park.
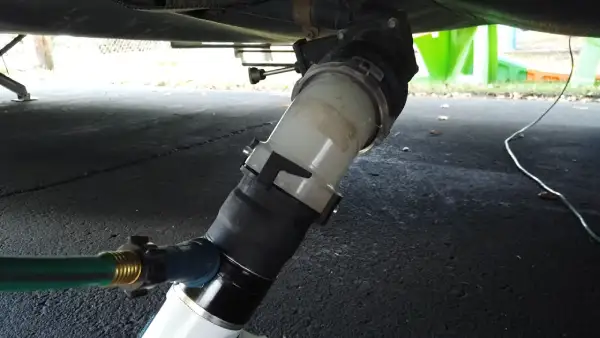
- If using a macerator pump, install it according to the manufacturer’s instructions. This will typically involve attaching it to the RV’s sewage outlet and connecting it to a hose that leads to the sewer line.
- If not using a macerator pump, attach a hose directly from the RV’s sewage outlet to the sewer line connection point. Use hose clamps to secure the connections and prevent leaks.
- Test the system by flushing the water and checking for leaks or blockages.
- Regular maintenance is key for keeping your new system functioning properly. Check for leaks periodically and ensure that all connections are tight and secure.
Connecting Your RV Toilet to a Sewer Line with Macerator Pump
To connect your RV toilet directly to a sewer line with a macerator pump, you will need to follow these steps:
- Install the RV Macerator Pump: The first step is to install an RV macerator pump. This device grinds up waste and toilet paper into small pieces that can easily flow through the hose and into the sewer line. You will need to install the macerator pump near the holding tank so that it can be connected to both the tank and the sewer hose.
- Connect Your Toilet to Macerator Pump: Once you have installed the macerator pump, you must connect your RV toilet to it using a short piece of PVC pipe. You may need to remove your existing toilet flange and replace it with one that has a built-in macerator connection.
- Connect Hose from Macerator Pump to Sewer Line: After connecting your toilet to the macerator pump, you must connect a hose from the pump outlet to the nearest sewer line connection point. Make sure you use a high-quality hose designed for use with sewage and can withstand high pressure.
- Test Your System: Before using your new system, it’s important to test it out for leaks and proper functioning. Fill up your holding tank with water and add some biodegradable toilet paper or waste treatment chemicals. Turn on your macerator pump and watch as waste flows through the hose and into the sewer line.
- Maintain Your System: To keep your system functioning properly, make sure that you regularly clean out your holding tank and flush it with fresh water after each use. Also, inspect all hoses and connections for signs of wear or damage and replace them as needed.
Connecting Your RV Toilet to a Sewer Line without Macerator Pump
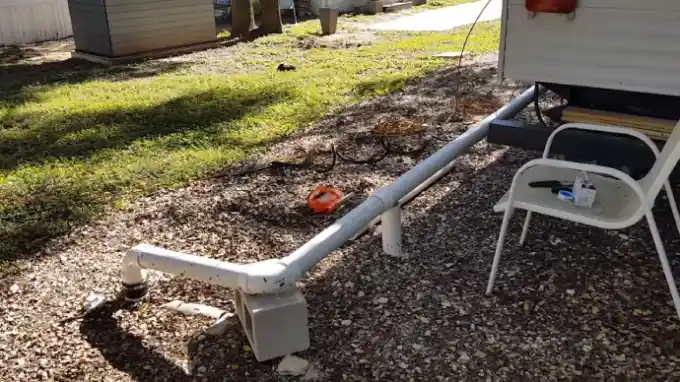
Connecting your RV toilet directly to a sewer line without a macerator pump may seem daunting, but it is quite simple. The process involves connecting your RV’s black water holding tank to the sewer line using a sewer hose and some necessary fittings.
Before getting started, ensure you have all the required materials. These include a sewer hose, hose clamps, rubber gloves, Teflon tape, and PVC pipe fittings. Once you have everything you need, follow these simple steps:
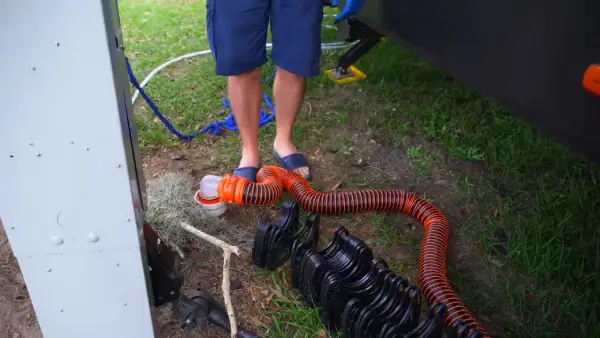
- Your RV should be connected to the sewer line at the nearest point. Your RV should be connected to the sewer line at the nearest point. This may be in an RV park or campground or near your home if you are parked there temporarily.
- Remove the cap from the sewer line connection point and securely attach one end of your sewer hose to the opening using hose clamps.
- Connect the other end of the sewer hose to your RV’s black water holding tank outlet using more hose clamps.
- Use Teflon tape to seal any connections between the PVC pipe fittings and the black water holding tank outlet.
- Turn on your RV’s black water tank valve and let it empty into the sewer line through the connected hose.
- Once it has emptied completely, turn off the valve and disconnect the hose from both ends.
- Rinse your black water-holding tank thoroughly with fresh water before storing it for future use.
Testing and Maintenance Tips
Testing and maintaining your RV toilet when it is connected directly to a sewer line is imperative. After all, you want to make sure that your new system is functioning properly and without any leaks. Here are some tips to help you with testing and maintenance:
Checking for Leaks
To ensure that your RV toilet is properly connected to the sewer line, it’s important to check for leaks. Leaks can cause damage to your RV and the surrounding environment and can also create unpleasant odors. Here are some steps you can take to check for leaks in your new system:
- Fill the black water tank with water: To test for leaks, you’ll need to fill the black water tank with water. This will allow you to see if there are any leaks in the pipes or connections.
- Add food coloring: Once the tank is filled with water, add a few drops of food coloring into the toilet bowl. This will help you identify where any leaks may be coming from.
- Check all connections: Check all of the connections between your RV toilet and the sewer line for any signs of leaking. Look for drips or puddles of water around each connection point.
- Inspect valves: Look for any wear or damage on all the valves in your RV sewer system. Ensure they are closing tightly and not letting any water leak.
- Check seals: Check all seals around your RV sewer system for signs of damage or wear. Replace any seals that appear worn or damaged.
- Repeat as necessary: If you find any leaks during your initial inspection, make repairs as necessary and repeat the process until no more leaks are present.
Maintenance Tips
Regular maintenance is crucial for properly functioning your RV toilet directly connected to a sewer line. Here are some tips to help you maintain your system:
- Clean the hose: After every use, it’s important to flush out the hose with clean water. This will prevent any debris or waste from accumulating and causing blockages or odors.
- Use RV-safe chemicals: When using chemical treatments in your toilet or black water tank, ensure they are specifically designed for RV use. Using the wrong chemicals can damage your system and harm the environment.
- Inspect for leaks: Regularly check all connections and hoses for any signs of leaks. If you notice any drips or puddles, address them immediately to prevent further damage.
- Empty tanks regularly: Don’t let your black water tank fill up completely before emptying it. This can cause backups and overflows. Instead, empty it when it’s about 2/3 full.
- Protect against freezing: If you’re camping in cold temperatures, make sure to protect your pipes and hoses from freezing by insulating them or using heat tape.
By following these maintenance tips, you can ensure that your RV toilet is always functioning properly and avoid any costly repairs down the road.
Alternatives to Plumbing Your RV Toilet Directly to a Sewer Line
A few options are available if you’re looking for alternatives to directly connecting your RV toilet to a sewer line. Depending on your needs and preferences, you may find one of these alternatives better fits you than direct plumbing.
Dumping Your RV Tank at a Dump Station
Dumping your RV tank at a dump station is a common and convenient way to dispose of waste on the road. Most campgrounds and RV parks have dump stations available for their guests, but there are also stand-alone dump stations located throughout the country.
Dumping your RV tank at a dump station is simple and straightforward. First, you’ll need to locate the dump station at your campground or find a stand-alone one using an app or website like Sanidumps.com.
Once you’ve found the dump station, park your RV near it and connect your sewer hose to your RV’s waste outlet.
Next, place the other end of the sewer hose into the dump station’s inlet and open the valve on your RV’s black water tank. Allow all the waste to flow out of your tank until it’s empty. Then, close the valve on your black water tank and open the valve on your gray water tank to allow any leftover soapy water to drain out.
Once both tanks are empty, disconnect your sewer hose from your RV and rinse it out thoroughly with fresh water. Some dump stations have hoses available for rinsing, but bringing a separate hose along is always a good idea.
Finally, dispose of any used gloves or protective gear in a trash can and wash your hands thoroughly with soap and water.
Using Portable Waste Tanks
Portable waste tanks are a great alternative to directly connecting your RV toilet to the sewer system. These tanks come in various sizes and can hold anywhere from 5 gallons to 50 gallons of waste. They are designed to be easily transported and emptied at dump stations or other appropriate locations.
Using portable waste tanks is convenient for RVers who want more flexibility in where they camp. With a portable tank, you can stay at campsites that don’t have sewer hookups and still have access to a bathroom. Plus, it allows you to avoid the hassle and expense of plumbing your RV toilet directly to a sewer line.
When using a portable waste tank, it’s important to follow proper disposal procedures. First, ensure the tank is securely attached to your RV and that all connections are tight. Then, when the tank is full, take it to an approved dump station or other designated location for disposal.
Dumping the waste from your portable tank is easy. Simply connect the discharge hose from the tank to the dump station inlet and open the valve on the tank. Allow all the contents to flow out before closing the valve and disconnecting the hose.
Where does water come from to flush the RV toilet?
RV toilets require water to flush waste into holding tanks. The source of water depends on the type of toilet. Gravity flush toilets use water from the RV’s fresh water tank while macerating toilets grind waste with water from the RV’s fresh water tank.
Cassette toilets use a separate water tank for flushing waste into a portable waste tank. Proper installation requires turning off the water pump and flushing the toilet to remove pressure and water in the lines and bowl.
Are camper toilets usable without water hookups?
Camper toilets can be used without water hookups. For example, the Laveo Dry Flush toilet uses a liner to encapsulate waste; no water is required. Cassette toilets are portable toilets fixed in place with a black water tank that can be removed.
Water conservation techniques can also conserve water while using a traditional flush toilet.
How is an RV toilet connected?
An RV toilet is connected to a water supply line and a drain pipe. The water supply line can connect to an external supply or the RV’s water tank. A foot pedal or push-button electric flush mechanism can be used.
The contents of the toilet bowl go into a sealed-off black water tank, which needs to be regularly emptied at designated dumping stations. The water supply line can be 3/8″ or 1/2″ in diameter, and the correct size should be used to avoid leaks or other problems.
Make Your RV Trip Hassle-Free: Plumb Directly to the Sewer Line
Plumbing an RV toilet directly to a sewer line is an efficient way of disposing of waste when camping with your RV.
By considering factors like local regulations, access to the sewer line, and proper preparation, you can have a successful installation that will make your experience even more comfortable and enjoyable.
Alternatives like dumping at designated stations or using portable waste tanks also exist if desired, depending on individual needs and preferences as an RVer. Regardless of your chosen solution, considering all necessary aspects ensures you’ll make the best decision for yourself and your journey.

