Last Updated on April 20, 2023
Opening and closing an RV awning by hand can take up time and energy that you don’t always have when you’re on the road. Especially if you have a larger camper tent, and you have mobility issues.
Electric models will do the job at the push of a button. But can you convert a manual awning to a motorized one? You need to understand how they are different before you can get the answer.
RV manual shades typically use a crank handle to open and close the fabric. And, electric awnings open and close with a motor.
The obvious difference is that one requires physical labor and the other does not. This article will explain the actual facts and assist you in understanding the debate. Let’s get started.
Can You Convert a Manual Awning to Motorized for RVs?
The truth is YES. It’s not as difficult as you think. Because most of the RV awnings on the market are made to be compatible with both methods.
As long as your RV awning has a gear system, you can replace the hand crank with an electric motor for your convenience. The installation process is not rocket science either. You don’t need to be an engineer or have any special skills.
The entire process should not take more than an hour or two depending on your handiness. It’s important that you have some knowledge about the overall process. It will make the process easier and faster.
While the installation is pretty simple, you need to take some measurements and do a little math to get it right. And of course, you’ll need some tools.
Nothing too fancy, just a conversion kit, a few wrenches, a drill, a tape measure, zip ties or electrical tape and a screwdriver should do the job.
How to Convert a Manual RV Awning to Electric?
Now that we know it’s possible, let’s see how it’s done. To begin, make sure you have all the tools and parts you need. If possible, get a friend or relative to help you with the motorized awning installation.
This is always easier with two people. But if you’re sure you can handle it on your own, go ahead.
Step 01: Prep the Area and Take Measurements
Before you begin the conversion process, use a tape measure to determine the width of your RV’s awning opening. Next, measure the distance from the edge of the RV to the center of the tent arm.
Once you have these measurements, you can select the appropriate size conversion kit. It’s also a good idea to check your RV’s owner’s manual for specific instructions or requirements for installing an awning.
Step 02: Buy the Conversion Kit
The kits usually come with everything you need to make the switch, including articulated arms, motors, hand cranks, and more. Be sure to select a kit that is compatible with your particular make and model of RV.
You should also make sure the kit you choose has all the features you want, such as remote control, wind sensor, and sun sensor if you desire. But these are additional features that you don’t necessarily need for the conversion.
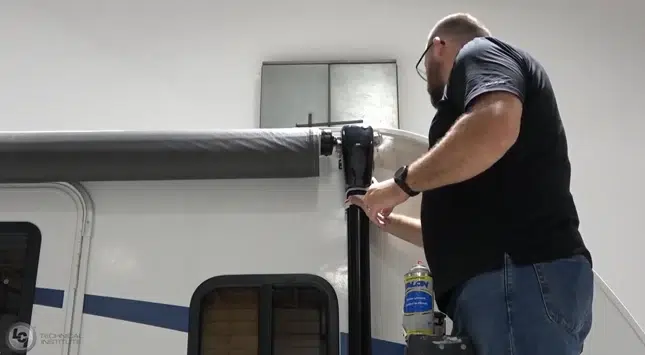
Step 03: Attach the Motor to the Awning.
The first step is to remove the retractable awning fabric from your RV’s awning roller tube. Check the fabric to see if it needs to be replaced. Usually, it won’t, but it’s always good to check for rips, holes, and other damage before moving forward.
Finally, reattach the awning fabric to the motorized arms with the included hardware. By threading the fabric through the arms and securing it with the provided screws or bolts, you can achieve this.
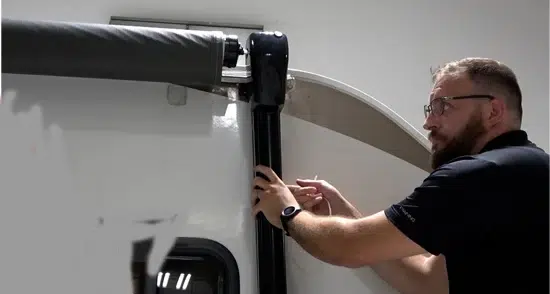
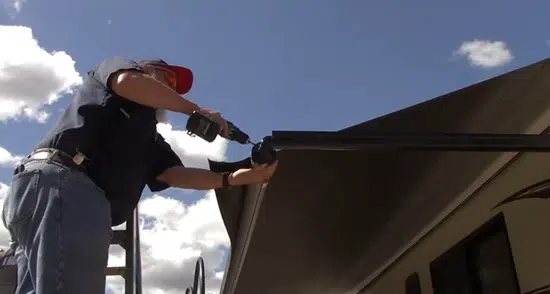
Step 04: Mount the Motorized Arms to the RV
First, locate the mounting brackets that came with your kit. These will be used to attach the arms to the RV. Next, hold the bracket up to the side of the RV and mark where the holes need to be drilled.
When you have the holes marked, drill them out and then secure the bracket in place with bolts. Repeat this process for the other side of the RV.
With both brackets in place, it’s time to attach the arms. These will simply slide into the brackets and then be secured with set screws.
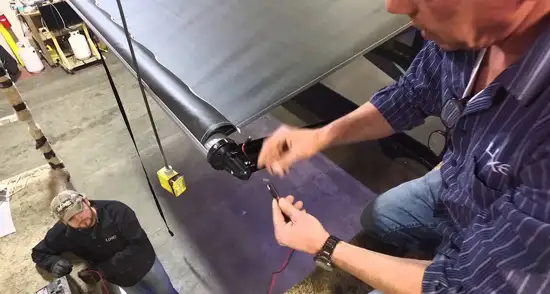
Step 05: Route and Connect the Wires
You will need to connect the black wire to the negative post on the battery, and the red wire to the positive post. It is important to make sure that the wires are not touching any metal surfaces, as this could cause a short circuit.
Once the wires are connected, you can use zip ties and electrical tape to secure them in place. Last but not least, you must attach the ground wire to a metal surface on the RV. This will help to ensure that the power awning is properly grounded.
Step 06: Install the Receiver or Switch
This will allow you to operate the awning from inside your RV, using a remote control or manually. First, determine where you want to mount the remote controller.
Then, use the wiring diagram to connect the wires to the appropriate terminals. Finally, secure your transmitter device or switch in place. Make sure to test the awning before you put everything away to ensure that it is working properly.
Why Convert to a Motorized Awning from a Manual Awning?
While it may seem like a lot of work to convert your RV’s awning from manual to motorized, there are several benefits that make it worth the effort. And, once you’ve made the switch, you’ll wonder how you ever went without a motorized shade. The following are just a few of the benefits:
1. Motorized awnings are much easier to open and close than manual awnings. This is especially beneficial if you have an RV with a large shade structure. With an easy button press or remotely, you can open or close your RV’s tent.
2. You can operate your RV’s awning without having to step outside. It’s perfect for those times when you want to enjoy the shade without being in the sun.
3. These awnings are great for RVs that are parked in areas with high winds. The motor will allow you to close the shade quickly and easily if the wind picks up.
4. Automated awnings provide additional security for your RV. When you’re not using the tent, you can close it and lock it in place even from inside of your motorhome. This will help to deter thieves and vandals.
5. Awnings with motors can be equipped with additional features, such as wind sensors and sun sensors. These features will allow the patio awning to close automatically if the wind blows too hard or the sunlight heat becomes too strong.
Frequently Asked Questions
While motorized awnings are becoming more popular, there are still many RVers who are unfamiliar with them. The following are some of the most frequently asked questions about these types of awnings:
1. How Are Motorized Awnings Powered on RVs?
Motorized awnings on RVs are powered by a 12-volt DC motor that is connected to the RV’s battery. Most automatic awnings also have a manual override feature that allows the awning to be deployed or retracted even if the battery is not working.
Some models also have sensors that automatically extend or retract the awning based on wind speed and other conditions. You can control it either push the switch or with the help of a remote if your model is compatible.
2. Can You Put an Electric Awning on a Camper?
Yes, you can, but you will need to make sure that your camper is equipped with the proper electrical outlets and wiring. You will also need to confirm that the awning you purchase has the capacity to support your camper’s size and weight.
3. Is Motorized Awning Better Than Manual?
Motorized retractable awnings provide the convenience of not having to physically open and close the awning yourself. With just the push of a button or remote control, you can have instant shade or sun depending on your needs.
This is a great option for those who want the ease of use that a motorized system provides.
Conclusion
You are now aware of “can you convert a manual RV awning to motorized” for your RV. This way, you can enjoy all the benefits that these types of shade structures have to offer. Awnings with motors are easier to use and more secure, and they often come with additional functions that make them even more convenient.
Remember to follow the wiring diagram when connecting the wires to the receiver or switch, and check the tent fabric before putting everything away. With proper installation, you’ll be able to enjoy your new awning last for a long.

