
Last Updated on May 1, 2023
If you’re looking to give your RV a new look, painting the ceiling is an easy and cost-effective way. In some cases, it isn’t a good idea. Painting a fabric ceiling in an RV can cause the worst outcome in appearance, so experts suggest avoiding this option.
If you still want to go ahead with painting your RV ceiling, there are a few steps to follow, such as clearing and prepping the surface, applying primer or paint, and ensuring adequate drying time.
Knowing what type of paint to use and taking the necessary precautions will help ensure a successful outcome. Keep reading to find out more about how to safely and effectively paint an RV ceiling.
Can You Paint an RV Ceiling
Cleaning and Prepping the Ceiling
Before you start painting, it’s essential to clean and prep your RV’s ceiling correctly. Doing so ensures that the paint adheres properly and lasts for years.
Clearing the Surface and Removing Debris
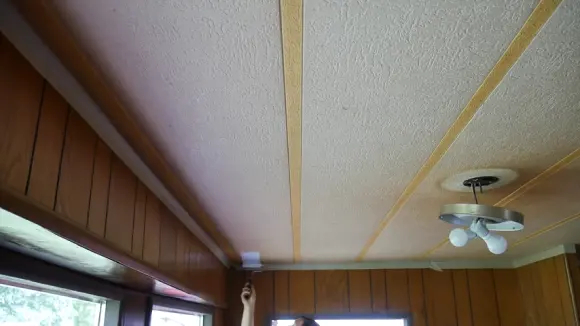
Before you even consider picking up a brush, you must make sure that your RV ceiling is completely clear of any dirt and debris. This can be done using a vacuum cleaner with an attachment designed explicitly for hard-to-reach areas like ceilings.
If there are any stubborn particles stuck on the surface, use a soft-bristled brush lightly dampened with water to remove them without causing damage to the ceiling material itself.
Applying Primer, If Necessary
If your RV ceiling has previously been painted, then it may not be necessary to apply primer before painting over it again.
To check if the primer is needed or not, do a simple test by wiping down an area with rubbing alcohol if no color comes off onto the rag, then a primer isn’t required, but if some does come off, then applying primer would be best to get a smooth finish when painting over it later on.
Choosing The Right Paint for RV Ceilings
The type of paint used for RV ceilings can vary depending on what material was used in its construction. Different types of paint might adhere better to certain materials than others, so it is essential to pick one suited for whatever material lies underneath.
Acrylic paints are generally suitable for most surfaces, such as wood, drywall, or plastic. Still, you should always follow manufacturer instructions when choosing which paint will work best for your particular situation to get optimal results without damaging anything.
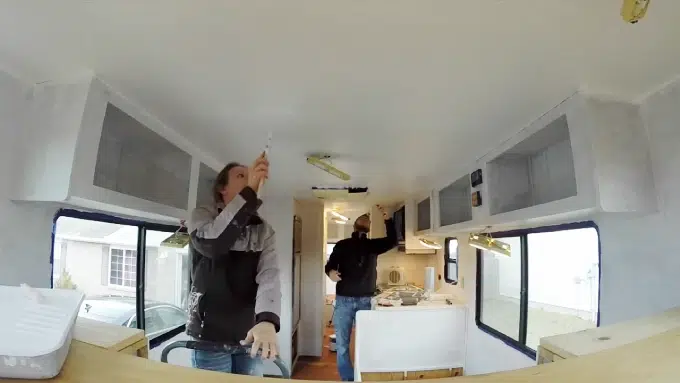
Step-by-Step Process for Painting an RV Ceiling
It’s a relatively simple process that requires some essential tools and materials, and it can be done in a few easy steps. Here is a detailed explanation of the step-by-step process for painting an RV ceiling.
Wash the Ceiling with Soap and Water:
Before painting your RV ceiling, it must first be cleaned thoroughly with soap and water. Make sure to remove any dust, debris, or dirt from the surface before applying primer or paint, as these contaminants may interfere with the adhesion of the paint.
Use a rag or sponge dipped in warm soapy water to scrub away any stubborn stains. Once you’re finished washing, dry off the ceiling with a towel or rag before moving on to sanding.
Sand the Ceiling:
Sanding is an essential step in preparing any surface for painting, as it helps create a smooth finish by removing imperfections like bumps and cracks from the surface. Use fine-grit sandpaper to gently sand down the ceiling until it has an even texture.
Be careful not to apply too much pressure while sanding, as this could damage your vehicle’s interior surfaces. Once you’ve finished sanding, use a vacuum cleaner or damp cloth to collect any dust particles left behind on the surface of your RV ceiling before continuing with priming and painting.
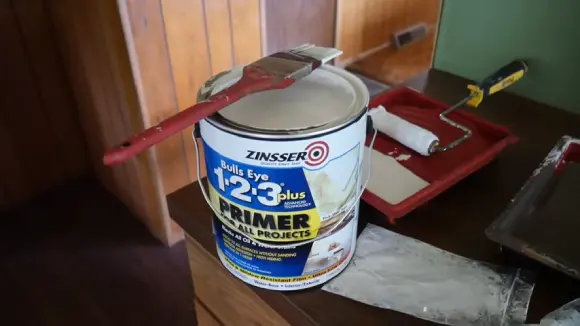
Apply Primer:
Depending on your specific needs, it may be necessary to apply primer before beginning with paint application. Primer provides an extra layer of protection between your base material (in this case, the RV ceiling) and your paint coating; it also helps ensure that the paint will adhere better over time.
For best results, choose a primer specifically designed for use on RVs; apply one thin coat using either a roller brush or spray gun for even coverage across the entire surface area of your RV ceiling. Allow each coat of primer to dry completely before moving on to the painting itself.
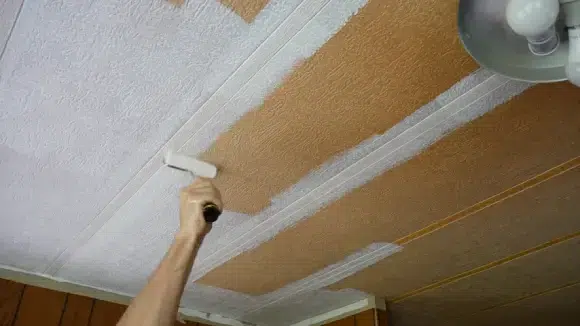
Paint Application:
Once all preparations have been made, you can finally begin applying paint to your RV ceiling. Start by pouring some paint into a tray; if using multiple colors, make sure each color has its own tray (and brush/roller).
Working in small sections at a time (approx 2ft x 2ft), use either a roller brush or regular brush to evenly distribute thin layers of paint onto each section of your RV ceiling until all areas are covered; allow each coat of paint to dry completely before applying another layer (3 coats should do).
Finally, once all layers have dried completely, use fine grit sandpaper with gentle pressure over all areas where flatness is desired; this will help ensure that no roller lines are visible when finished.
Let Each Coat Dry Completely Before Applying the Next Layer:
One vital aspect of completing successful painted projects is allowing ample time for each layer (including primer) to dry completely before moving on to other steps, such as adding more layers or finishing touches like border designs.
This will prevent peeling & bubbling from occurring, which could ruin both appearance & performance quality later down the road; typically, 30 minutes per layer should suffice, but always double-check product instructions beforehand.
Allow the Final Coat To Dry Completely Before Using The RV Again:
After you have painted your project with three thin coats of paint, including primer, and given time to dry, it is important to let the final coat dry for at least 24 hours and up to 48 hours. This will prevent early fading or chipping of the paint after the job is done.
Add Extra Protection With A Spray-On Fabric Protector:
It’s important to remember that nothing lasts forever. To keep your RV looking new, it’s a good idea to use fabric protectants regularly. You can find these products in most markets now.
Spraying the affected area every few months will help protect it from dirt and stains, so you won’t need to repair or repaint it down the line due to lack of maintenance.
Choosing Paint for Your RV Ceiling
Choosing the right paint for your RV ceiling can be tricky. We will discuss factors to consider when selecting color for your RV ceilings, such as type, durability, and ease of application.
Types of Paint:
When it comes to painting an RV ceiling, there are several different types of paints available. Latex paints are often recommended because they are easy to clean without damaging the fabric. In contrast, specialty paints like oil-based or vinyl acrylics might provide better coverage and long-term protection against moisture and wear.
Additionally, those looking for a more decorative finish on their RV’s ceiling may want to look into metallic or glossy paints that will give it a unique appearance.
Durability:
Another important factor when choosing paint for an RV ceiling is its durability in terms of resisting fading from UV rays and absorbing moisture from rain or snow. Oil-based paints offer some of the best protection against fading and water damage, but they can be challenging to apply and may require additional priming before painting.
Latex paints are generally less durable than oil-based products but easier to apply, which makes them ideal for DIYers who don’t have experience with oil-based paints.
Ease of Application:
Depending on the paint you choose, you will need to consider how easy (or difficult) it is to apply to the surface of your RV ceiling. Latex paints are generally one of the easiest types of color to apply since they don’t require extra priming or other special preparation techniques before being used.
However, they may also require multiple coats to cover the surface area fully. On the other hand, oil-based paints can be more challenging to apply but may only need one coat since they usually provide better coverage than latex products due to their thicker consistency.
When choosing paint for an RV ceiling, you must consider what type will work best for your needs. Latex paints are easy to clean and apply quickly, but oil-based paints may give better coverage and protect against UV rays better. Research before you start painting so you can pick the right kind.
Post-Painting Care For RV Ceilings
It’s easy to paint the ceiling of your RV, but it needs to be adequately cared for afterward to ensure it lasts. Let’s discuss post-painting care for RV ceilings and explain how you can protect your paint job with sealants, regular inspections, and spot touch-ups.
Adding Sealant to Protect from Dust and Moisture Damage
Sealant is essential when painting an RV ceiling because it helps protect the surface from dust and moisture damage. It’s essential to use a high-quality sealant designed for indoor air quality.
This will ensure that no harmful chemicals or fumes enter your living space. When applying the sealant, cover all surfaces thoroughly and apply several thin coats rather than one thick coat. Once the sealant has dried completely, it should last several years before needing another application.
Performing Regular Inspections and Spot Touch-Ups as Needed
In addition to using a top-quality sealant, performing regular inspections of your RV ceiling is vital for keeping its paint job looking fresh. Every 6 months, look around for any signs of cracking or fading in the paint.
If any areas are beginning to show wear and tear, then you should address them immediately with spot touch-ups as needed. To do this effectively, be sure to use high-grade paint specifically designed for RV ceilings to match the color of the rest of the walls perfectly.
Once you’ve finished applying for the touch-up paint job, make sure to clean off any excess paint with a soft cloth before allowing it to dry completely overnight.
Can I spray paint the RV roof?
It is possible to spray paint your RV roof. However, it is important to consider the type of material you are painting and the type of paint you use. For example, if your roof is made of rubber, some colors may not adhere to the material.
Oil-based paints are recommended for rubber roofs. If you have a metal roof, silicon RV roof sealant can be used as a coating. It is also important to note that spray-on bedliner can be used to protect your RV from damage.
Can you paint a carpeted RV ceiling?
Painting a carpeted RV ceiling is possible, but it takes some extra effort. Start by cleaning the ceiling and using a primer to protect against moisture. Then use paints designed for fabric surfaces, which are more durable than regular wall paint.
Be sure to apply thin coats of paint with even pressure for the best results. Painting can give your RV a fresh new look without needing to replace the entire ceiling – just remember that it’s not an easy job.
What happens if you don’t sand walls before painting?
It’s important to sand your walls before you paint them. If you don’t, the new paint won’t stick properly and could start to flake off eventually. You need to make sure you use the right kind of sandpaper so it doesn’t damage the walls but also gets rid of bumps and other things that might be left from old coats of paint or wallpaper.
Wipe away any dust after sanding with a damp cloth before adding primer or paint. By taking the time to do this, your walls will have a smooth and even finish that will last a long time.
Transform Your RV’s Interior in a Flash
Painting your RV ceiling is a great way to freshen up its look without too much effort or expense. With proper preparation, the right paint and tools, and post-painting care, you can transform your RV’s interior in no time.
Whether you’re an experienced do-it-yourselfer or just getting started on your first project, tackling this job will surely bring rewarding results.

