
Last Updated on March 11, 2023
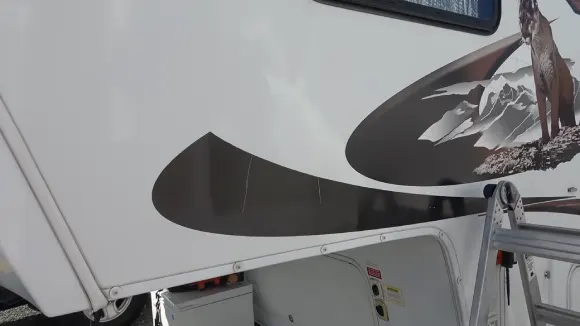
It is possible to paint over RV decals, but it can be intimidating and time-consuming. If you use proper techniques and materials, your paint job can last for years.
This method can help you create a personalized touch on your recreational vehicle that will make you proud to show off your ride. With proper preparation, the correct type of paint, and some DIY know-how, you can successfully repaint your RV’s decals in no time.
Here, we’ll provide step-by-step instructions on how to paint over RV decals while also discussing essential factors such as surface preparation, the types of paints used in this process, and why it’s essential to follow each step carefully. Let’s get started.
Can You Paint Over RV Decals: 7 Factors
Preparing the Surface Before Painting
Painting over RV decals can be a great way to give your RV a refreshed, updated look. However, it is essential to properly prepare the surface before painting to ensure you get the best possible results. Several steps must be taken when preparing the surface for painting, and provide tips for ensuring that your paint job looks its best.
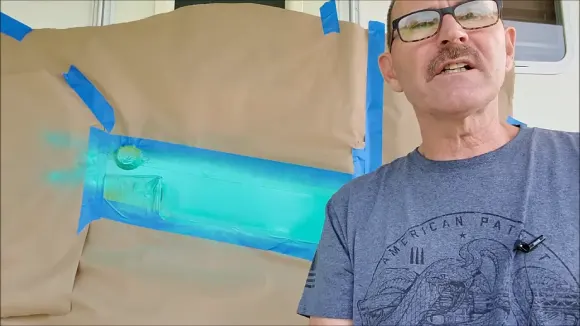
Sanding Down the Old Decal
Sanding down the old decal is essential to create a smooth base for your new paint job. Start by using fine-grit sandpaper or a buffing pad to remove any cracking, loose edges, and wax from the decal.
Sand lightly until all of these imperfections have been removed and you have achieved a smooth, even surface. Make sure to clean up all of the dust created when sanding with a cloth or vacuum.
Degreasing and Cleaning the Surface
After sanding down your decal, it is important to degrease and clean off any remaining wax residue before washing it. Do this by applying a product such as Spray 9 onto the surface and allowing it to sit for 5 minutes before wiping it off with paper towels or rags.
Once all residue has been removed, make sure to wash off any remaining soap solution with warm water and allow it to dry completely before proceeding with painting.
Choosing the Right Quality of Paint for an RV Decal
When applying a new decal to an RV, there are several factors to consider when choosing the right paint quality. These factors include the type of surface being painted on, the weather conditions, and the desired finish.
Additionally, care must be taken to ensure that the vinyl decals do not continue to crack under the new paint layer. Here we will discuss each of these factors in more detail so you can make an informed decision about which type of paint is best for your RV decal.
Factors to Consider When Selecting Spray Paint Quality:
When it comes to selecting spray paint quality for an RV decal, several factors should be considered. The first factor is surface preparation. It’s essential to ensure that any environmental contaminants are removed from the surface before painting and that any rust or corrosion has been treated with a suitable rust inhibitor.
Additionally, it’s important to choose a primer suitable for use on metal surfaces, as some primers can cause the finished product to look dull or streaky.
The next factor is weather conditions. If you’re painting in cold weather, it’s important to select a paint formulated for outdoor use, as these paints are more resistant to fading and chipping due to changes in temperature and humidity levels.
Similarly, if you’re planning on painting in high humidity areas such as near coastal regions, then you should choose a paint designed for humid climates as these tend to have better adhesion properties than regular paints.
Also, plan on painting outdoors. You should ensure that your chosen paint has been designed specifically for exterior applications, as these paints usually contain UV inhibitors which help them withstand direct sunlight better than standard interior colors.
The final factor is achieving the desired finish. Different types of spray paint offer different levels of coverage and sheen, so it’s important to select one that works well with your specific project goals.
For instance, if you want a glossy finish, then you should opt for enamel-based paints, whereas if you want a matte finish, then acrylic-based colors may work better for your project.
Some spray paints offer metallic or sparkle finishes, which can add a unique touch but may require multiple coats to appear correctly without looking faded or dull after they dry.
Ensuring That The Vinyl Decals Do Not Continue To Crack Under The New Paint Layer:
In addition to selecting good quality paint, ensuring that the vinyl decals do not continue cracking under the new layer of paint is also essential when performing an RV decal project.
Firstly it’s important to avoid using abrasive materials such as sandpaper when cleaning or prepping the vinyl decals before painting as these can cause micro scratches, which could show up under the new coating and eventually lead to them cracking over time due to their weakened structural integrity.
Secondly, it’s important not to apply too thick a layer of primer/paint when covering up existing decals. This could increase pressure on them, leading them eventually to crack due to excessive stress caused by thicker coating layers.
Finally, it’s recommended never to apply heat directly onto vinyl decals before, during, or after the applied coatings. This includes avoiding hair dryers, heat guns, etc. Allowing adequate curing times between each coat applied requires patience from the user but will result in longevity from the finished product when done correctly.
Applying Paint on Existing Decals
We will cover proper methods for applying paint on existing decals with a brush or roller, the selection of appropriate primers for good adhesion results, and also provide a summary of tips for painting over RV decals successfully. Let’s dive in.
Applying Paint on Existing Decals with a Brush or Roller
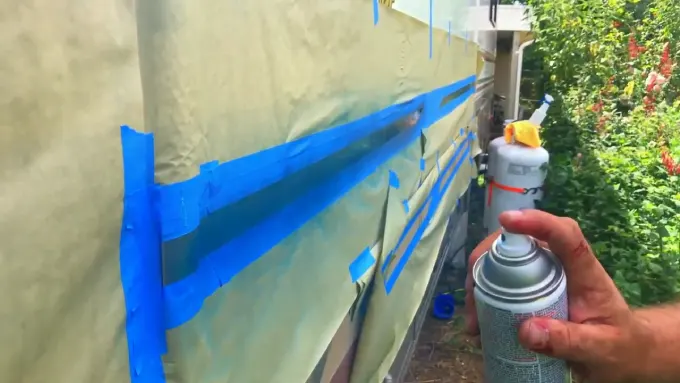
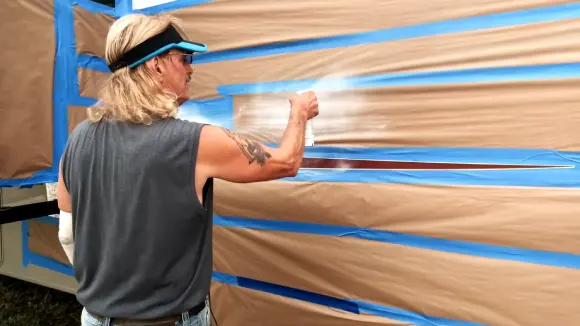
Painting an existing decal can be tricky because it requires the right technique to ensure that the paint adheres properly to the surface otherwise, the color won’t stay put. To start, clean the area around the decal thoroughly with soap and water before beginning any painting project.
This will help ensure that your new layers of paint adhere to the surface. Next, use painter’s tape to mask off any areas you don’t want to be painted. After that, apply two coats of primer specifically designed for outdoor surfaces and allow it to dry completely between each coat.
Now you’re ready to begin painting. Start by lightly brushing (or rolling) on your chosen color in thin layers until you achieve desired coverage and opacity; for best results, let each layer dry between applications.
Finally, when you are happy with your results, allow everything to dry completely before removing the painter’s tape.
Selection of Appropriate Primer for Good Adhesion Results
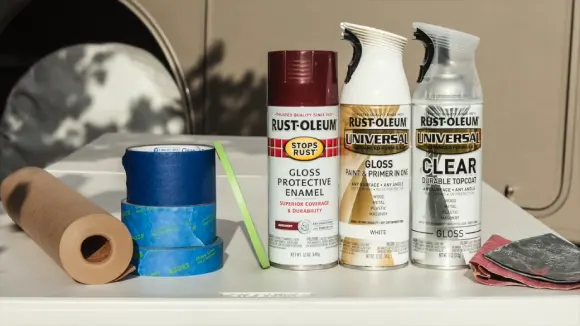
When you want to put a primer on an RV decal, ensure it sticks well and is durable against rain, UV rays, and other weather. It should be flexible enough not to crack or peel when stretched over curved surfaces.
It should also have good hiding power, so sanding isn’t needed after priming. Some popular RV decal primers are Rust-Oleum Heavy Duty Primer & Sealer Spray and Kilz Premium High Hide Stain Blocking Interior/Exterior Latex Primer/Sealer.
Summary of Tips for Painting Over RV Decals Successfully
Painting over an RV decal is possible if you take your time and do it correctly. Start by cleaning the area around the decal, then use painter’s tape where needed. Apply two coats of outdoor primer, then brush or roll several thin coats of paint until you get the coverage you want.
Let each layer dry before adding another coat. Finally, remove all painter’s tape after everything has dried completely. With these tips in mind, painting over RV decals can be a fun DIY project that will give your vehicle a brand-new look without spending too much money.
Maintaining Your New RV Paint Job After Application
It’s important to maintain your paint job after it’s been applied. We will cover how to touch up any spots that may have been missed during the application process, how to wax or seal your vehicle to keep it looking nice and protected from weather damage, and the careful measures you should take when cleaning your car to preserve its appearance over time.
Touching Up Any Spots That May Have Been Missed During Application Process
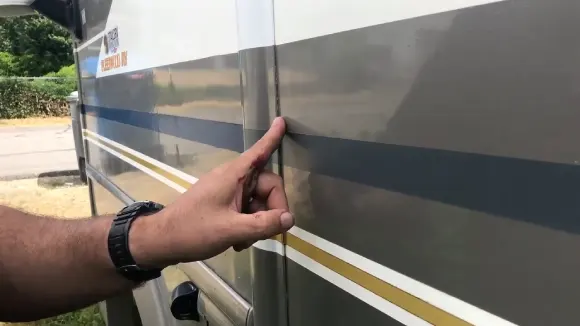
Once you’ve finished painting your RV, you should inspect it for any spots or flaws that may have been missed during the application process. It’s always best to catch these mistakes early on so they don’t become bigger issues later.
To touch up any areas that may have been missed, you’ll need a small brush, some of the same paint used for the original coat, and some time. Pay close attention as you inspect your RV and note any spots where the color looks off.
Once identified, use a small brush with some paint to cover up those areas until they match their surroundings. This step is especially important if you’re painting over decals on an RV, as even tiny discrepancies can stand out more prominently against large designs.
Waxing or Sealing Your Vehicle to Keep it Looking Nice and Protected from Weather Damage
Waxing or sealing your RV will help keep it looking nice and shiny and protect it from weather elements like fading from the sun or rain. Depending on what kind of paint is used, you can choose either wax or sealant designed for automotive surfaces like RVs.
Applying these is usually easy, just using a cloth or spray bottle. Different formulas are available, so make sure to research before choosing one that suits your needs.
Taking Careful Measures When Cleaning Your Vehicle to Protect Its Appearance Over Time
When cleaning an RV with newly applied paint, you must be careful, so the color looks good for a long time. Use cleaners made especially for cars, and don’t use sponges or paper towels that can scratch the surface.
Microfiber clothes are better because they’re gentle but still get the job done. Pressure washers should not be used either because they are too strong and remove protective layers of wax or sealant. Instead, try using a hose attachment with soft bristles to help loosen dirt without causing damage.
How do you spray paint over decals?
Spraying paint over decals is a great way to give your project a unique and personalized look. To do this, you’ll need first to coat the decal with latex primer using a soft polyester paintbrush. Apply gentle pressure to prevent runs and allow the sticker to dry for two hours.
After that, you can use any paint, from spray cans to brush paints. When applying the paint, make sure to use gentle pressure so as not to damage the decal. Once you’re done painting, let it dry completely before removing any tape or stencils used.
What to do about peeling decals on RV?
Removing decals from your RV can be tricky, but it’s possible. You’ll need some heat; you can use a blow dryer or a heat gun or just let the sun do its thing. Then use a plastic razor blade to pry off the decal. If there is any leftover glue residue, use an adhesive remover to get rid of it.
For bigger decals, unique tools like the 3M Stripe Off Wheel and Wonder Wheel make removal easier. Just be careful not to damage your RV’s paint job, and you’ll have those pesky peeling decals removed in no time.
Do you need special paint to paint the vinyl?
Vinyl is a strong material that can be painted with the right type of paint. Special paints are made just for vinyl that help it look nice and keep its soft feel.
When painting vinyl, make sure to clean and sand the surface first, then add a primer before the paint. It’s essential to use multiple thin coats instead of one thick coat to look neat and even.
Do you need a primer for vinyl paint?
If you want to paint vinyl surfaces, you need to use a special primer. This will help the paint stick better. There are two kinds of primers: oil-based and water-based.
Oil-based is better for sticking but harder to clean up, while water-based is easier to clean up but not as good at sticking. Follow the instructions on the primer when you use it, and let it dry before painting.
Upgrade Your RV with a Fresh Paint Job
Painting over RV decals is a great way to give your recreational vehicle a facelift without spending extra money on replacements. However, it is essential to take the necessary steps to ensure optimal results.
This includes sanding down the old decal, degreasing and cleaning the surface, choosing the right paint quality, applying primer for good adhesion results, and touching up any spots that may have been missed during the application process.
By following these steps and following proper techniques for applying paint with brushes or rollers, you’ll be able to transform your RV into something beautiful successfully.

