Last Updated on May 4, 2023
Are you looking to give your RV an updated and unique look? Painting the trailer cabinets is a great way to do just that.
Beginners may find it challenging, but with patience, prepping, and painting techniques, anyone can create beautiful cabinets in their trailer.
We’ll walk you through the process step-by-step so that you can transform your trailer cabinets into something truly eye-catching. From choosing the right paint and primer to applying the clear coat, we’ll cover everything you need to know about giving your RV a fresh look. So let’s get started.
Can You Paint Trailer Cabinets: Primary Steps
Preparing the cabinets for painting is an essential step in any trailer-painting project. It’s crucial to ensure that all surfaces are clean, smooth, and ready to accept new paint.
This process can involve a variety of supplies and tools, as well as several steps that should be followed carefully. By understanding each step, you can achieve the best results when painting your trailer cabinets.
Gather Supplies:
Before starting the painting process, it’s essential to make sure you have all the necessary supplies on hand.
For this job, you’ll need primer, paint, sandpaper in varying grades (coarse and fine), brushes and other painting tools, painter’s tape or plastic sheeting for covering hardware or hinges that cannot be removed, and a damp cloth for cleaning.
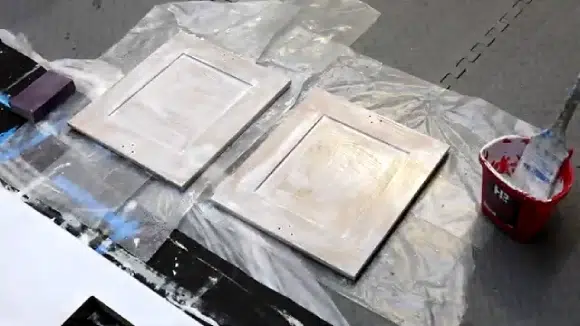
Clean & Prep Surfaces:
Once your supplies are gathered, give the cabinet door and drawer fronts a thorough cleaning with a damp cloth. Make sure there is no dust or dirt present on these surfaces because it could affect how the paint adheres later on.
Next, use a piece of medium grit sandpaper to lightly scuff up the surfaces; this will help create an even smoother surface to which the primer can bind more effectively than it would otherwise.
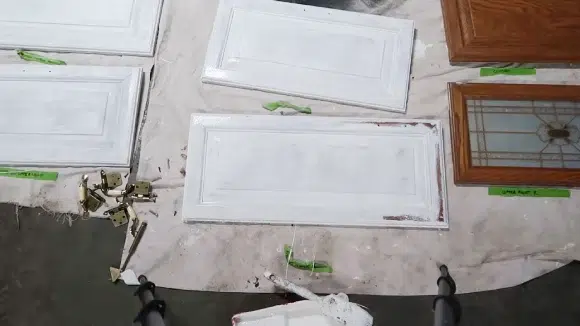
Cover Hardware & Hinges:
For pieces of hardware such as hinges or handles that cannot be removed before painting, use painter’s tape or plastic sheeting to cover them so they won’t get painted over accidentally. Be sure to press down firmly around the edges so there are no gaps where paint may seep through during application.
Following these steps carefully, it will ensure that your trailer cabinets are properly prepared before beginning to apply primer and paint.
Choosing the Right Paint and Primer
It is essential to choose the right paint and primer for the job. The type of paint and primer that you choose will affect how long the paint job lasts and how well the trailer cabinets look after they are painted. The following discussion discusses selecting the right paint and primer for painting trailer cabinets.
Choosing the Right Paint Finish:
When choosing a paint finish, there are three main types: glossy, semi-gloss, and flat finish. Polished finishes are highly reflective and durable; they resist dirt, dust, and moisture well but can sometimes look overly shiny.
Semi-gloss finishes offer a nice balance between shine and durability; they are easy to wipe clean without looking too glossy. Flat finishes provide a smooth matte look with good coverage, but they may not be as durable as other options. Ultimately, it’s up to you which finish you would like your trailer cabinets to have.
Selecting Oil or Latex Primers:
After deciding on your desired paint finish, you must select an appropriate primer for your trailer cabinets. Primers provide a layer between the surface of the metal cabinet and the paint itself, which helps fill in any blemishes while also providing extra durability against elements such as sunlight or water damage over time.
Generally speaking, oil-based primers tend to work better with glossy finishes, while latex-based primers are better suited for matte or semi-gloss paints.
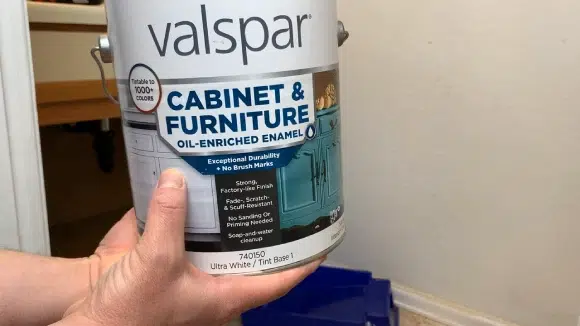
Choosing Quality Outdoor Acrylic Enamel Paint:
Finally, it’s important to select high-quality outdoor acrylic enamel paint when painting trailers since this type of paint is specially formulated for outdoor use on metal surfaces like trailers’ cabinets due to its excellent adhesion properties and resistance against fading caused by direct sunlight exposure over time.
With the right combination of primer, paint finish, and quality outdoor acrylic enamel paint, you can ensure that your trailer cabinets will look their best for years to come.
Applying the Primer and Paint in Layers
The key to any successful painting project is preparation, so it’s essential to apply the primer and paint in layers correctly. Here’s how best to layer your primer and paint when tackling trailer cabinet paint projects.
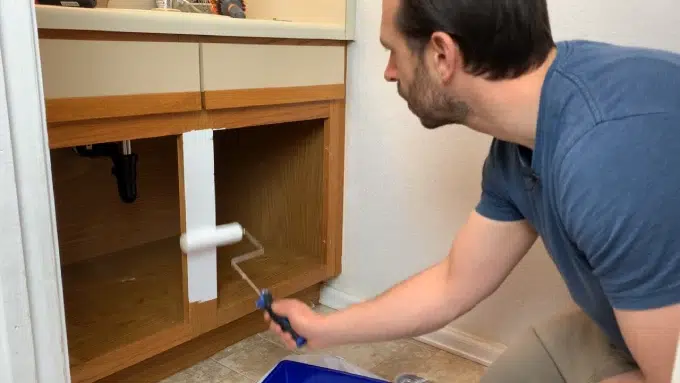
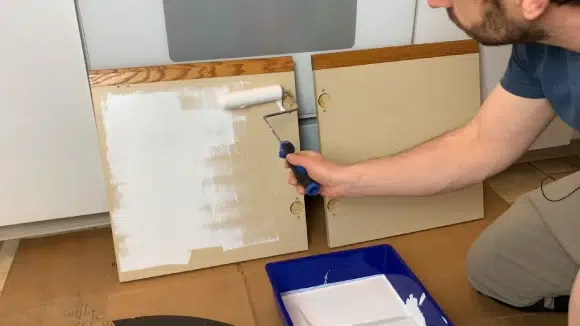
Applying Prime:
When it comes to priming trailers, you have two main options: either use a short nap roller or a clean paintbrush. Make sure you’re applying the primer in thin, even coats to get an even coverage of the area. And don’t forget to let each coat dry thoroughly before applying another layer. This will help ensure that your paint cabinet job lasts longer and looks better.
Drying Time:
Even though you want to get started with your topcoat of paint as soon as possible, it’s essential to allow enough time for your primer layers to dry completely. If they aren’t left to dry properly between applications, this can lead to bubbling or uneven surfaces when it comes to painting.
To ensure everything goes as planned, wait until each layer of primer is fully dry before starting on the next. This could take anywhere from 1-4 hours, depending on the type of primer used and environmental factors such as temperature and humidity levels.
Paint selection:
Once your primer has dried completely, you can move on to selecting your choice of topcoat paints, either oil-based or latex-based are most commonly used for trailer cabinets. Latex-based colors are typically more straightforward to use due to their water-soluble nature, which makes them more forgiving if mistakes are made during application.
Oil-based paints tend to be more durable over time, so this could be a good option if longevity is more important than ease of use when taking on larger projects like trailer cabinets.
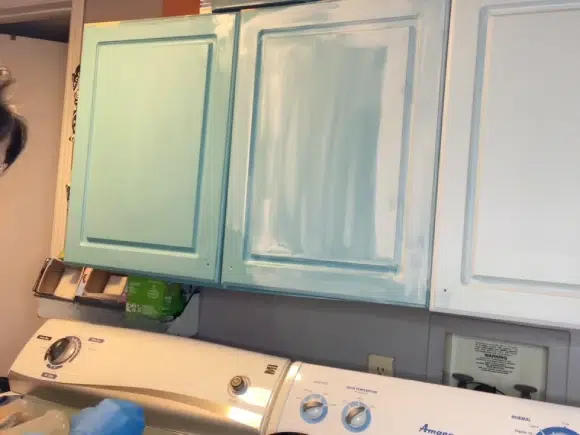
Applying Topcoat Paint:
Once all of your primer coats have dried completely, it’s time to start applying your topcoat of paint whether it is oil-based or latex-based paint will depend on what type you choose for your project. Again, work in small sections and apply two thin coats of paint using overlapping strokes to help you achieve even coverage.
Make sure that you let each coat dry thoroughly before continuing onto another area or adding another layer of paint on top; otherwise, you may end up with uneven patches in some places, which will ruin the look of your finished product.
Finishing Touches
It takes a lot of small steps to complete the project, from applying a clear coat to protect the finish to adding hardware like handles, knobs, and hinges to cleaning up messes and drips with solvents. Here’s a detailed discussion of how to achieve the perfect trailer cabinet finish:
Applying a Clear Coat:
Once you’ve completed painting your trailer cabinets, it’s essential to apply a clear coat for protection. This will help keep the paint glossy, prevent scratches and other damage, and give it an even more subtle appearance.
There are various types of clear coats available, from oil-based to water-based, so be sure to choose one suitable for use with your chosen paint. Use a brush or roller to spread the clear coat onto the cabinet surface evenly. Allow time for drying before reinstalling hardware such as handles, knobs and hinges.
Reinstalling Hardware:
Before adding hardware back onto your trailer cabinets, such as handles, knobs and hinges, ensure that the clear coat has completely dried. Now is also an excellent time to replace any faulty or broken hardware.
Start by attaching each piece of hardware gently with screws or bolts, depending on its weight and shape. Check if pieces fit correctly and ensure they’re securely fixed before proceeding with more hardware items.
Cleaning Up Messes:
As with any painting job, messes may be left behind; anything from paint drips or splatters to marks left by masking tape used during the preparation stage must be cleaned up carefully with appropriate solvents so as not to damage existing layers of paint in case of touch-ups needed later on.
Wipe off excess paint with a damp cloth, then use alcohol-based solvent cleaners for tough spots, followed by wiping down surfaces with warm water to remove traces of solvents used before laying down another layer of protective wax if desired.
Enjoying Your New Look:
The last step after finishing the touches for painting trailer cabinets is enjoying their new look. Whether you’ve decided to give them an entirely fresh makeover via repainting or simply decluttering them by changing some old hardware pieces, what matters most is that you have achieved what you set out to do.
Take some photos of your work and share them with friends and family; maybe even leave yourself little reminders in places around where you can see them often as an ode to all your efforts.
Maintenance Tips For Your Newly Painted Trailer Cabinets
Keeping your trailer cabinets in good shape is important for both the look and functionality of your vehicle. With routine maintenance and care, you can keep them looking great and working correctly. Here are some tips to help maintain your trailer cabinets and keep them looking their best.
Cleaning:
It’s essential to clean your newly painted trailer cabinets regularly. Use a soft cloth or sponge rather than abrasive materials that could scratch away the paint or cause other damage. You should also periodically clean underneath the cabinets, as dirt buildup can affect both the appearance and functionality of the cabinetry.
Sealing:
Check your sealant regularly to ensure it is still in place; environmental factors such as humidity and temperature can cause wear over time. If any panels become cracked or broken due to age, weather conditions, etc., reseal them immediately to protect the cabinetry from further damage.
Maintenance:
To keep your trailer cabinets looking like new, perform regular maintenance on them. This includes wiping down surfaces with a cloth or sponge, checking sealants for wear, and re-sealing any panels that may be cracked or broken.
Additionally, don’t forget to clean underneath the cabinets periodically; this will help ensure they remain functional and attractive for years to come.
What cabinets can you not paint?
It is essential to know which cabinets you can and cannot paint before beginning a painting project. Redwood kitchen cabinets can be painted, but not laminate ones, as they are made of plastic-like material or fake wood that is hard to paint.
It’s best not to paint over particle board or MDF (medium-density fiberboard) either, as the results may not be significant. If you’re unsure about your cabinets, it is best to ask an expert for advice.
Do paint cabinets decrease home value?
Painting your kitchen cabinets can be a great way to upgrade the look of your home and make it more valuable. With the right color and finish, you can make it look brand new.
It’s also important to note that the wrong color or finish could decrease value, so it’s essential to get advice from an expert before deciding on a color or finish for your cabinets. Painting your kitchen cabinets is a great way to improve their value and appeal.
How do you paint RV cabinets without sanding?
Painting RV cabinets without sanding is possible, but it requires a few extra steps to ensure the paint adheres properly and lasts. The first step is to thoroughly clean and degrease the cabinets. This will remove any dirt, grease, or other contaminants that could prevent the paint from sticking.
Next, you’ll need to use a good bonding primer before painting. This will help ensure that the paint adheres properly and won’t peel off over time. Finally, use a foam roller when painting the doors, drawers, and cabinet frames to avoid brush strokes. With these steps, you can successfully paint RV cabinets without sanding.
Is it hard to paint RV cabinets?
Painting an RV cabinet isn’t hard if you know what to do. First, remove the handles and hinges and lightly sand down the surfaces. Then tape everything up, so you don’t get paint where you don’t want it. Put on a bonding primer, then two coats of color with a brush or roller.
Finally, finish it off with a clear coat for added protection. Just be sure to take your time and follow the instructions for the best results.
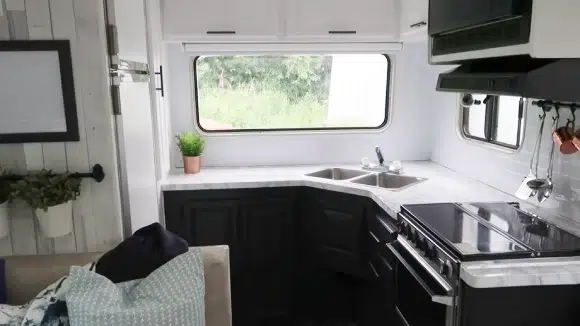
Transform Your RV and Make It Look Brand New
Painting trailer cabinets is a great way to add style and protection to your RV. By following the steps outlined above, you can easily give your recreational vehicle a whole new look without spending too much time or money.
So why not take advantage of this opportunity and give yourself something new to admire every time you open the door? With just a few simple steps and supplies, painting trailer cabinets can be a fun and rewarding experience for anyone who takes on a DIY project.

