Last Updated on April 20, 2023
Rotating your RV toilet might be the solution you’re looking for if you’re stuck with an uncomfortable RV bathroom setup. This process can help optimize limited space and provide increased comfort while on the road.
Before attempting this transformation, however, there are certain considerations you must consider, such as plumbing and electrical connections.
Using the correct precautions and methods, rotating an RV toilet is a simple yet effective way to improve your RV living experience. Discover how to control your RV bathroom setup now.
Can You Rotate an RV Toilet: Why Would You Want?
Rotating an RV toilet might seem like an odd idea, but it actually has some practical benefits. A detailed description of these can be found here.
Space-saving
Space-saving is a crucial aspect to consider when it comes to RV toilets. As we all know, recreational vehicles come in different sizes, and space is often limited. Therefore, optimizing every inch of the vehicle’s interior, including the bathroom area, is essential.
One way to save space in an RV bathroom is by rotating the toilet. Doing so allows you to create more legroom or free up some floor space for other items. For instance, if you have a small bathroom with a tight corner where your toilet is located, rotating it could give you more room to move around.
Optimal positioning
Optimal positioning of an RV toilet is crucial for ensuring comfortable and safe use. It can also help maximize the available space inside your RV’s bathroom.
One factor to consider when determining the optimal position of your RV toilet is the height. The standard height of an RV toilet is around 17 inches, but it may vary depending on the model and brand. You should ensure that the toilet is at a comfortable height for you and any other users.
Another consideration is the placement of the toilet in relation to other fixtures in the bathroom, such as the sink or shower. You want to ensure enough space between them to avoid any discomfort or inconvenience when using them simultaneously.
Methods of Rotating an RV Toilet

Rotating an RV toilet can be done in a few different ways, depending on your toilet type and preferred method. Here are some methods to consider:
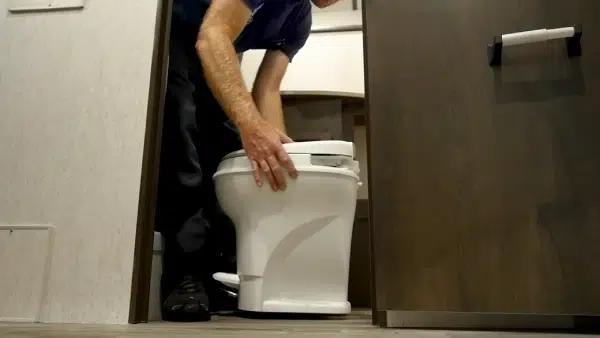
Method 1: Adjusting the Base Bolts
Adjusting the base bolts is one of the methods that can be used to rotate an RV toilet. This method is relatively easy and can be done by anyone with basic plumbing skills.
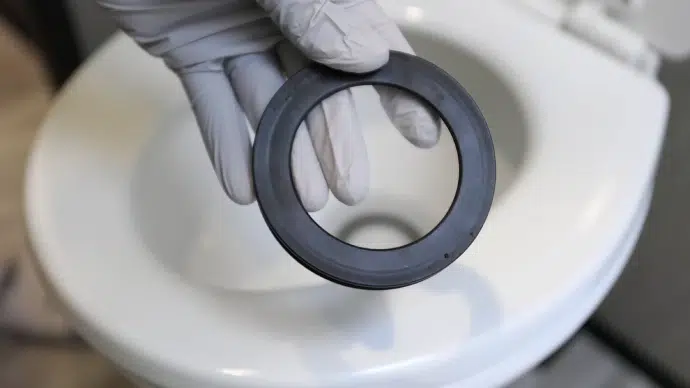
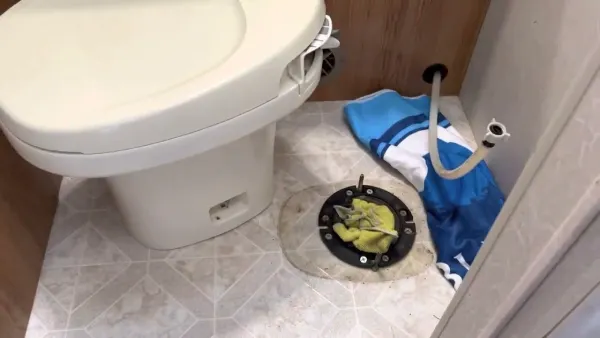
To begin, locate the base bolts that hold the toilet to the floor. These bolts are usually located at the bottom of the toilet bowl and connected to a floor flange. The flange is a circular ring that supports the toilet and connects it to the waste pipe.
Using a wrench, loosen the nuts on both base bolts. Once they are loose enough, you can adjust the position of the toilet by rotating it in either direction. Ensure you do not move it too much, as this may cause damage to your plumbing connections.
Once you have adjusted the position of your RV toilet, tighten both nuts on each base bolt using your wrench. Ensure that they are tightened properly to prevent movement in your toilet.
It’s important to note that adjusting base bolts should only be done if you need to make minor adjustments to your RV toilet’s position. Other methods may be necessary if you need to rotate it significantly or change its angle, such as replacing gasket rings or using a flexible collar connection kit.
Method 2: Replacing the flange seal and gasket rings
It is common practice to replace the flange seal and gasket rings as one method to rotate an RV toilet. This method is recommended if you want to change the position of your RV toilet without disconnecting the plumbing or electrical connections.
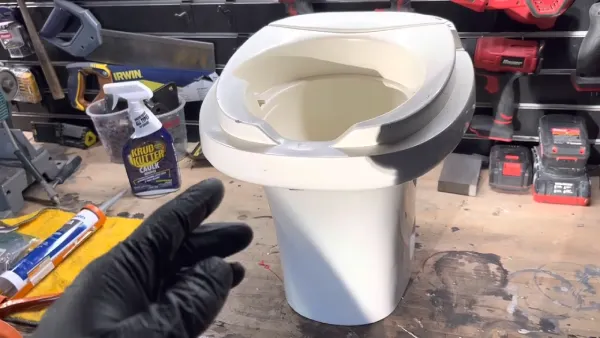
The first step in replacing the flange seal and gasket rings is to turn off the water supply to your RV toilet. Then, use a wrench or pliers to remove the bolts that secure the toilet base to the floor. Lift the toilet carefully and set it aside on a clean surface.
Next, remove the old flange seal and gasket rings from around the waste pipe opening on your RV’s floor. Clean debris or residue around this area using a putty knife or scraper.
Install new flange seal and gasket rings onto your RV’s waste pipe opening according to manufacturer instructions. Ensure they are securely placed before repositioning your RV toilet back onto its base.
Align the bolts with corresponding holes on your RV’s floor, then tighten them until they are snug but not overly tight. Reconnect any plumbing connections you may have disconnected earlier, ensuring all connections are tight and secure.
Finally, turn on your water supply and check for any leaks around your newly installed flange seal and gasket rings. If there are no leaks, you can now easily use your newly rotated RV toilet.
Method 3: Using a flexible collar connection kit
When rotating an RV toilet, using a flexible collar connection kit is one of the most effective methods. This kit allows for greater flexibility in positioning the toilet, providing a flexible connection between the toilet flange and waste pipe.
To use a flexible collar connection kit, you must remove the existing toilet flange and replace it with a flexible collar. The collar should be secured to the waste pipe using screws or other fasteners. Once the collar is in place, you can attach the RV toilet using bolts or other hardware.
One of the main benefits of flexible collar connections is that it allows for greater adjustability in terms of positioning. This can be especially useful if you are trying to optimize space usage or achieve optimal positioning for your particular needs.
However, before attempting to rotate an RV toilet using a flexible collar connection kit, there are some important considerations to remember.
First and foremost, you will need to ensure that all plumbing connections are properly aligned and secured. Additionally, any electrical connections should be checked and adjusted as necessary.
It’s also important to note that manufacturers may have specific recommendations or requirements for rotating their toilets. Consult your owner’s manual or contact the manufacturer directly before attempting any modifications.
Considerations Before Rotating an RV Toilet
Before you decide to rotate your RV toilet, there are several important considerations to keep in mind. These include plumbing and electrical connections and the manufacturer’s recommendations.
#1. Plumbing connections
When considering rotating an RV toilet, it is important to consider the plumbing connections. These connections are crucial for the proper functioning of the toilet, and any changes made to them can affect the system’s overall performance.
Before you rotate an RV toilet, you must ensure all plumbing connections are properly disconnected. This includes turning off any water supply and disconnecting hoses or pipes that may be connected to the toilet.
It is also important to ensure no leaks or damage in the plumbing system before making any changes.
When rotating an RV toilet, all connections with the plumbing must be reconnected. This includes connecting hoses or pipes back to their original positions and properly installing all seals and gaskets. Failure to do so can result in leaks or other issues with the plumbing system.
It is also important to note that some RV toilets may have specific plumbing requirements based on their design or manufacturer’s recommendations. It is essential to follow these guidelines when making any changes to the plumbing system to avoid damaging the toilet or causing other issues with its operation.
#2. Electrical connections
The electrical connections are an important consideration when rotating an RV toilet. Before rotating the toilet, ensure all electrical connections are properly disconnected and secured. This includes any wiring for sensors or heating elements that may be present in the toilet.
Further, it should be noted that some RV toilets may have specific electrical requirements or limitations that should be considered before rotating them. For example, a toilet with a heating element may need to be positioned in a certain way to prevent damage or malfunction.
To ensure that you don’t run into any issues with electrical connections when rotating your RV toilet, it’s always best to consult the manufacturer’s recommendations and guidelines.
This will give you a clear understanding of any potential risks or limitations associated with rotating your specific model of RV toilet.
#3. Manufacturer’s recommendations
To rotate an RV toilet, it is essential to consult the manufacturer’s instructions or contact customer service for guidance. They may have specific guidelines regarding how much the toilet can be rotated and what modifications can be made without voiding the warranty.
Ignoring these recommendations could damage the toilet or its components and potential safety hazards. For example, rotating a cassette toilet too far could cause leaks or spills, while rotating a macerator toilet could damage the motor.
It is also important to consider any plumbing or electrical connections that may be affected by rotating the toilet. If some pipes or wires cannot be moved or adjusted easily, it may not be possible to rotate the toilet without causing damage or disrupting functionality.
How do you deal with an RV toilet?
Dealing with an RV toilet requires regular maintenance to ensure its longevity. This includes using inexpensive products such as a tank treatment, holding tank deodorizer, and water softener designed specifically for RV toilets.
Waste from the RV toilet should be deposited into the black tank, while wastewater from sinks and showers should be directed to the gray tank. Black tanks can range in size from 15 to 50 gallons.
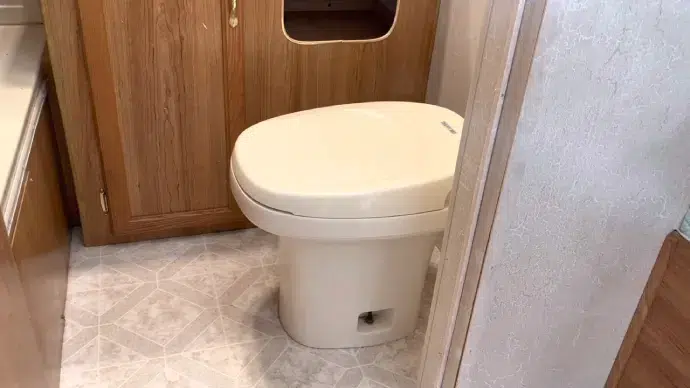
Can an RV toilet be angled in a corner?
It is possible to angle an RV toilet in a corner. Toilet flanges typically have multiple slots for different positions, so adjusting flange bolts in the slot can slightly turn the toilet.
However, it is important to note that each model of vinyl beam construction may have its own limitations due to the design and type of toilet used.
Can an RV toilet be installed incorrectly?
Installing an RV toilet incorrectly can lead to leaks, odors, plumbing damage, and more.
Replacing a standard household toilet with an RV one is not recommended due to differences in water usage and space requirements and potential additional weight that could damage the flooring.
Experience An Enhanced RV Living: Safely Rotate Your Toilet
Rotating an RV toilet to achieve optimal positioning and make the most out of limited space is possible. However, it is important to remember manufacturer recommendations and plumbing/electrical connections before attempting such a task.
Don’t let limited space or uncomfortable positioning hinder you from enjoying life on the road. Take control of your RV bathroom setup today. With proper considerations and precautions, rotating an RV toilet can be a beneficial decision that will ultimately improve your RV living experience.