Last Updated on April 20, 2023
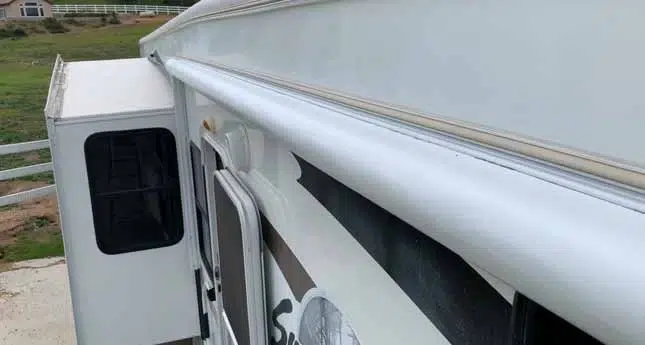
RV awnings are a very practical way to enjoy the outdoors, but they can be affected by the weather. Tree sap can cause damage to them, which can also be a headache to clean. Fortunately, awning covers are here to help you, although they are rather expensive. That’s when DIY comes in handy.
Awning covers are generally made out of weather-resistant materials like vinyl or acrylic. They are also often treated with a UV protector to keep them from fading in the sun.
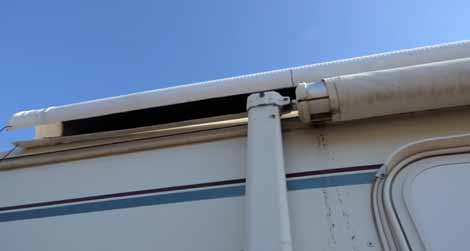
Many awnings come with straps or ties to help keep them in place in windy conditions. Then how do you make a protective cover for an RV awning?
With this article, we’ll give you a few tips for making a DIY awning cover that doesn’t cost an arm and a leg. We’ll begin right now.
How Do You Make a Protective Cover for an RV Awning in Simple Steps?
Awnings are a great addition to any RV, providing shade and protection from the elements. To help prolong the life of your RV awning, it is important to make a protective cover for it. Here are some easy steps to follow for taking care of your RV awning:
Step 01: Choose Awning Fabric and Measurement
First, take a look at the fabric of your awning. Most are made from polyester or vinyl, both of which are durable materials that will stand up to wind and sun. If you’re not sure which option is right for you, ask a sales associate at your local RV dealership or camping supply store.
Once you’ve got the right fabric, it’s time to choose a size. Awning covers come in a variety of sizes, so be sure to measure them before making your purchase.
You’ll also want to consider the weight of the cover, as some models are designed for lighter-weight awnings while others can accommodate heavier ones. With the right size and weight in mind, it’s time to pick out a style.
There are many different awning covers available in different colors and patterns, so you can choose one that matches your RV’s exterior or goes with the overall theme of your camping gear.
Step 02: Gether Right Materials
Assemble the needed materials for your project prior to starting. You will need a piece of tarp that is larger than your RV awning, bungee cords, a heavy-duty sewing needle and thread, a utility knife, and a straight edge or ruler. Choose a tarp that is made from a durable, weather-resistant material such as PVC-coated polyester.
This will help to ensure that your cover lasts for many seasons. If you are concerned about the tarp’s color fading in the sun, you can purchase one that has been treated with UV inhibitors. Once you have gathered all of the necessary awning accessories, you are ready to begin making your protective cover.
Step 03: Cut the Fabric Into the Right Size
You’ll need to measure the length and width of the awning, and then add a few inches on each side to allow for overlap. Once you have the measurements, mark them onto the fabric with a pen or chalk, and then cut along the lines.
It’s important to be precise when cutting the fabric, as an inaccurately sized cover will not provide adequate protection. Once you have the fabric cut to size, you can move on to the next step.
Step 04: Sew the Sides Of the Protective Cover
To do this, first, fold over one side of the fabric so that the wrong sides are facing each other. Then, using a sewing machine or needle and thread, sew along the edge of the fabric. Repeat this process on the other fabric side.
Once you have sewn both sides, your protective cover is complete. During this time you have to make sure that the stitches are strong enough to withstand heavy winds. The cover should now be able to slide over your RV awning easily.
Step 05: Check the Cover Before Use
Now that you’ve made your protective cover, it’s time to check it before use. Make sure the cover is secure and all the seams are sealed. Also, check the fabric for any holes or tears.
You can do this by holding the cover-up to a light source. If you see any rips or openings, simply sew them up with a needle and thread. Once you’ve checked the cover and made any necessary repairs, you can put it to use.
Step 06: Put the Cover On The Awning
Start by placing the cover over the awning, making sure that the side with the grommets is facing up. Then, use zip ties or bungee cords to secure the cover to the awning.
Start at the front of the awning and work your way back, attaching the cover at each of the grommet points. Once the cover is in place, you can trim off any excess cordage.
Extra Tips for Choosing Right Awning Cover Fabric
While there are a number of different materials you can use for your RV awning cover. The following factors should be kept in mind when choosing the perfect one for learning how to make RV awning cover.
1. Understand the Climate
In selecting the right fabric for awning covers, the climate is an important consideration. In general, more durable fabrics with higher UV ratings are best suited for hotter, sunnier climates, while lighter-weight fabrics may be more appropriate for cooler, shadier areas. For example, if you live in an area with hot summers and mild winters, a sturdy acrylic fabric might be the best choice.
On the other hand, if you experience four seasons of varying weather conditions, a vinyl fabric that is both water- and fade-resistant would be a good option. Ultimately, the goal is to choose a fabric that will stand up to the elements in your particular climate.
2. Think About Aesthetics
Awnings are available in a range of colors, so take some time to experiment until you find something that you love. You should also pay attention to how the awning will look in relation to your RV’s existing color scheme. With so many options available, it’s easy to find an RV awning fabric that will complement your RV’s style perfectly.
3. Considering Maintenance
Here is a checklist of maintenance considerations for RV awnings:
- Clean the awning fabric regularly with soap and water to remove unwanted things.
- Inspect the awning fabric for signs of wear or damage, such as holes, tears, or faded patches.
- Tighten all screws and bolts on the awning frame, brackets, and support arms.
- Lubricate all moving parts on the awning, such as rollers, tracks, and pulleys.
- Inspect the awning for damage after severe weather events, such as high winds or hail storms.
4. Determine Your Budget
RV awnings are available at a wide range of prices, depending on the quality of the materials and the size of the awning. If you are trying to determine your budget for an RV awning, it is important to first consider how often you will be using the awning and what type of weather conditions you will be using it in.
For example, if you only plan on using the awning occasionally, you may not need to invest in a heavy-duty model that can withstand strong winds. However, if you live in an area with harsh winters, it is important to choose an awning that can withstand snow and ice.
It is also important to consider the amount of sun exposure your RV will be getting. If you know you will be parked in direct sunlight for extended periods of time. By taking all of these factors into account, you can narrow down your choices and find an RV awning that fits both your needs and your budget.
Frequently Asked Questions
There are a number of questions that RV owners often have concerning awnings and awning covers. Here are a few of the most commonly asked questions, along with their answers.
1. Why Do I Need an Awning Cover?
For various reasons, you might need an awning RV cover. Awning covers can protect your awning from sun damage, wind damage, and debris.
They can also help to keep your awning clean and free of dirt and grime. Ultimately, an awning cover is a good investment for any RV owner curious about extending the life of their awning.
2. How Do I Care for an Awning Cover?
Here are a few tips for caring for your awning cover:
- Inspect the awning fabric regularly for signs of any damage. If necessary, clean the fabric with mild soap and water.
- Check the awning frame for corrosion. If you see any problems, have the frame repaired or replaced by a professional.
- In high winds, it’s important to secure the awning so it doesn’t blow away. Most awnings have straps or tie-downs that can be used for this purpose.
- When not in use, store the awning in a dry, protected place. This will help to prolong its life.
3. How Often Should I Replace My Awning Cover?
The frequency with which you’ll need to replace your awning cover will depend on a number of factors, including the type of fabric it’s made from and the climate you live in.
Most durable fabrics, like vinyl, can be useful for decades, while lighter-weight fabrics like acrylic may need to be replaced more frequently. Additionally, awning covers in hotter, sunnier climates may fade or degrade more quickly than those in cooler, shadier areas.
Conclusion
As you can see, there are a few things to note when making awning covers for RVs. Most importantly, you’ll need to choose the right fabric for your climate and your RV’s style. You’ll also need to think about maintenance and budget when making your decision.
While an awning cover is not an essential piece of RV gear, it can be a valuable investment for anyone who wants to extend the life of their awning. With so many different fabrics and styles available, there’s sure to be an awning cover that’s perfect for your needs.

