
Last Updated on September 19, 2023
You may need to access your RV’s water lines if they develop leaks or require maintenance. Accessing the water lines of an RV is impossible without proper knowledge and tools.
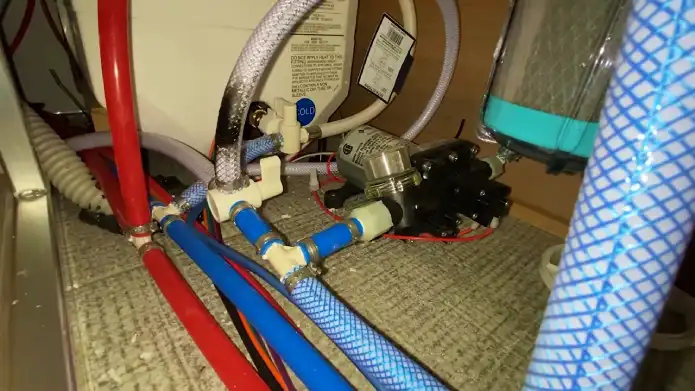
To access the water lines in your RV, you need to consult your RV owner’s manual to locate the water lines. Your RV water lines are often concealed behind drawers, underneath the vehicle, or inside compartments.
After locating the actual area, you need to remove the outer part of the area. Once that’s done, you can access your RV’s water line.
Alright, let’s break it down and get into the basics of accessing those RV water lines. We’ve got your back and will ensure you know exactly what to do.
Steps on How to Access Water Lines In RV
Here are a few quick steps that you can follow to gain access to your RV’s water lines.
Step #1: Gather the Necessary Tools
Step #2: Consult the RV Owner’s Manual To Identify Access Points
Step #3: Remove Panels or Compartments
Step #4: Remove Drawers Or Cabinets
Step #5: Inspect the underbelly and floor
Let’s take a deeper look at the steps.
Step #1: Gather the Necessary Tools
Gather all the tools you’ll need, like a screwdriver, pliers, adjustable wrench, flashlight, and any other tools specific to your RV model. Make sure to have all the necessary tools before starting the task to avoid unnecessary delays.
A flashlight is especially important, as it’ll help you see any hard-to-reach areas where the water lines may be located.
Once you have all the tools, make sure they’re in good working order and easily accessible. You don’t want to be scrambling to find a missing tool in the middle of the job.
Step #2: Consult the RV Owner’s Manual To Identify Access Points
Check your RV’s owner’s manual to find the water lines. It provides essential information on where the water lines are located and how to access them. Water lines in RVs are usually hidden behind underneath the vehicle, drawers, or inside compartments.
Locate access points and carefully follow any special instructions given. With the help of the owner’s manual, accessing your RV’s plumbing system will be a breeze.
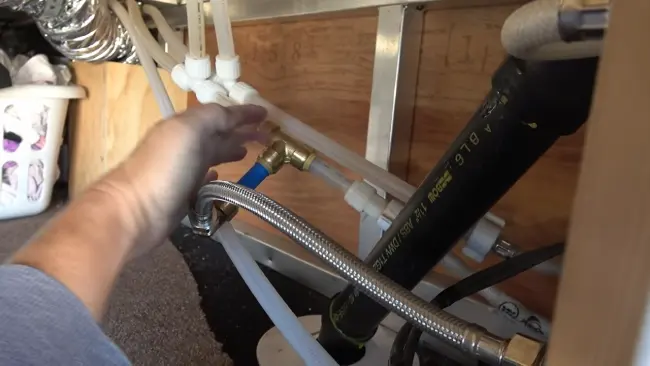
Step #3: Remove Panels or Compartments
Now it’s time to get hands-on and use your screwdriver to take off the panels or compartments obstructing your view of the plumbing.
Before you begin, ensure you have the appropriate tools and a container to hold any screws or fasteners you remove.
Follow these steps to remove the panels or compartments:
- Locate the screws or fasteners holding the panel or compartment in place.
- Use your screwdriver to remove the screws or fasteners.
- Gently pull the panel or compartment away from the wall or ceiling, being careful not to damage any wiring or plumbing.
Once you have removed the panels or compartments, you should have a clear view of the water lines. If you still cannot access the water lines, you may need to remove drawers or cabinets to reach them.
Step #4: Remove Drawers Or Cabinets
If the water pipe is located inside of drawers or cabinets, you will need to remove the drawers or cabinets to access those hidden pipes.
Once you’ve emptied the contents of the cabinets or drawers, locate any screws or fasteners that hold them in place.
Use a screwdriver or drill to remove these screws carefully, and set the components aside in a safe place.
Step #5: Inspect the underbelly and floor
You need to remove the cover of your RV’s underbelly and floor if the access point is there. This usually involves unscrewing panels or removing fasteners.
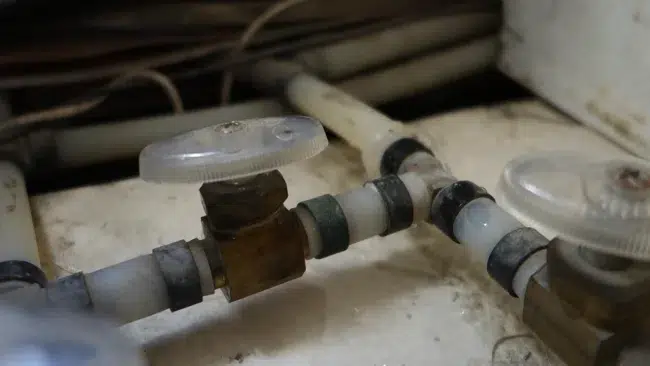
When you have access to the underside of your vehicle, check the water lines for cracks, holes, and wear. If you spot any damage, make sure to repair or replace the affected sections before reassembling the underbelly.
For the flooring, look for any removable sections or panels that provide access to the water lines. Once you’ve removed these sections, look closely at the water lines for any signs of damage or leakage. Inspect the fittings and connections as well, as they can also be a source of leaks.
Step #6: Reassemble
Once you have inspected the water lines and made any necessary repairs or replacements, it’s time to put everything back together. Follow these steps to reassemble the panels, compartments, drawers, or cabinets:
- Make sure all the components are clean and free from any debris or dirt.
- Align the compartments, panels, drawers, or cabinets with their original positions.
- Insert the screws or fasteners back into their respective holes and tighten them using a screwdriver or drill. Be careful not to overtighten and strip the screws.
- Double-check that all the components are securely in place and properly aligned.
- Test the stability of the panels, drawers, compartments, or cabinets by gently pushing and pulling on them to ensure they are firmly attached.
- Once you’re confident that everything is back in place, clean up your work area and put away any tools or equipment.
What types of water lines are used in RV?
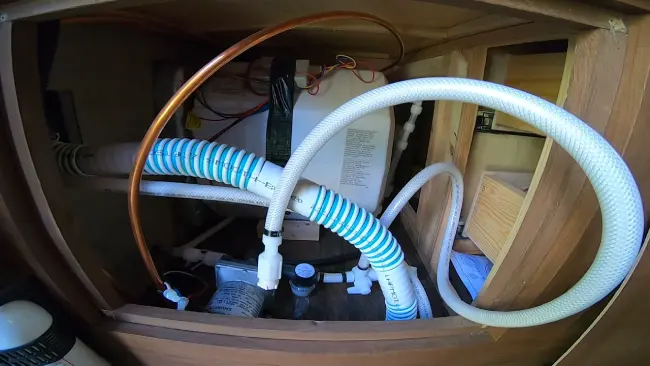
RVs commonly use either copper or plastic piping for their water supply. Copper is more common in older models, while plastic, specifically PEX pipe, is the modern material of choice.
Although copper pipes are known for their durability and resistance to corrosion, they are not as flexible as PEX pipes and may be more difficult to install or repair.
PEX pipes are made of a flexible plastic material called cross-linked polyethylene, which makes them much easier to work with than copper pipes. They are also more resistant to freezing and bursting, which is a common problem in RVs during colder temperatures.
What are some common causes of RVwater line leaks?
If you’re experiencing leaks in your RV’s water system, age and wear, freezing temperatures, or poor installation could be the culprits.
Over time, constant exposure to water pressure, temperature changes, and vibrations can cause the water lines to deteriorate. This leads to cracks, fractures, or weakened connections.
Exposure to freezing temperatures can also accelerate the wear and tear of the pipes, which can result in them bursting or cracking.
To prevent water line leaks, you have to use high-quality materials during installation and ensure that the plumbing system is installed correctly.
Do You Need to Winterize Your RV Water Lines?
Winterizing your RV is essential to prevent damage from freezing temperatures. You’re at risk of cracking or bursting your RV water lines if you live in a cold climate. Water expands as it freezes, and any water left in your RV’s pipes can cause them to burst, leading to expensive repairs.
To winterize your RV’s water lines, drain all the water from the tanks, pipes, and faucets. Open all the valves and drains and let the water drain. Once all the water has been drained, you must use antifreeze to protect any remaining water from freezing.
At what temperature do RV water lines freeze?
RV water lines can freeze when the temperature drops below 32 degrees Fahrenheit (0 degrees Celsius), but they typically freeze around 20 degrees Fahrenheit.
Depending on the RV’s insulation, the location of the water lines, and the length of time exposed to cold temperatures, freezing temperatures can vary.
To prevent RV water lines from freezing, make sure to properly insulate the RV and ensure that the water lines are in a location that is less exposed to the cold. Also using heat tape or a space heater can also help keep the water lines from freezing.
Efficiently Maintain Your RV Water Lines with Easy Access
Congratulations, you’ve successfully accessed your RV’s water lines. With the steps outlined in this article, you can confidently tackle any repairs or maintenance needed to keep your RV’s water system in tip-top shape.
Remember, there are different types of water lines used in RVs, so it’s important to identify what type you have before making any repairs. Also, leaks are a common issue with RV water lines, so regular inspections and maintenance can prevent costly repairs.
Taking good care of your RV’s water system means years of worry-free road trips. Let’s ensure you’re ready to hit the road without any water system headaches.

