Last Updated on April 20, 2023
Without a battery or a stable connection, you can’t provide power to trailer LED lights, brakes, and other electronic systems while on the road. Also, it can’t store energy gathered from a solar panel or other sources while parked, so you must properly install a battery in your trailer if you want it to handle all those functions.
Properly adding a battery to your trailer can revolutionize the way you travel and transport goods. That’s why you should know how to add a battery to a trailer. You can attach travel trailer batteries to your trailer with a battery maintenance kit by following some easy steps.
A proper connection between the travel trailer battery and electrical components can ensure your travels remain safe and efficient. This article will provide an in-depth look at the process of adding a battery to a trailer, including all the necessary steps to safely and correctly complete the task.
How to Add a Battery to a Trailer: Simple Steps

Adding an RV battery to a trailer can help you enjoy long-distance trips with greater ease and peace of mind, with less worrying about running out of power for essential trailer functions like lights, brakes, and other accessories.
The following steps to ensure your tow vehicle battery is installed correctly:
Step 1: Determine the Type of Battery Needed for a Trailer
When you attach a battery to a trailer, you must decide what kind you want. The most common types are lead-acid, AGM (Absorbed Glass Mat), and Lithium-ion batteries. Lead-acid batteries are the most common and least expensive, while AGM and Lithium batteries are more expensive but offer longer life and higher energy storage capacity.
Factors like the size of your trailer and its intended use should be considered when selecting a type of battery. Compared to an RV-style trailer combined with a 120-volt battery, a small travel trailer might need a 12 volt battery.
Also, if your trailer has more electrical components or you intend to use it for extended periods, it is better to use a more significant amperage battery like a 12V 300Ah lithium battery with 4000+ Deep Cycles.
Step 2: Gather Necessary Materials and Tools for Installation
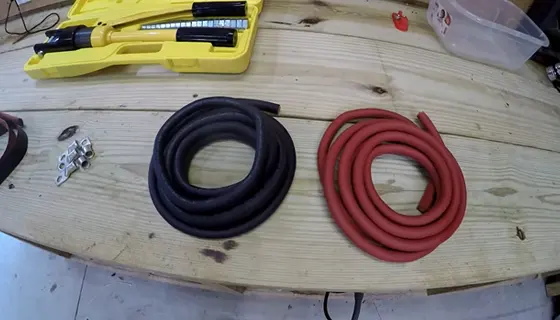
Once you have determined which type of battery is best for your trailer’s needs, it is time to gather the tools and materials needed to install it. To begin with, make sure you have all of the necessary parts for installation, such as:
- Terminals connectors,
- Screws/nuts/bolts,
- Cables/wire/harness,
- Shims/washers/mounting brackets, etc.
Also, you have to have all of the necessary tools, such as:
- Wrenches,
- Screwdrivers,
- Pliers, and
- Wire cutters.
While some trailers come with preinstalled wiring systems that can be used to connect existing components to a new battery, others may require additional wiring work if components are not already connected in a way that allows them to be connected to a new battery easily.
Step 3: Prepare the Trailer for Battery Installation
Before beginning installation, you should create a safe working environment around the trailer’s battery compartment by ensuring there are no flammable materials nearby, such as gasoline cans or oil rags.
Make sure all other electrical components in the area have been disconnected from shore power sources either by unplugging them or disconnecting their wires from each other before starting on any wiring work so that shock hazards are avoided during installation.
To further prepare for installation, remove any traces of corrosion in the battery compartment using baking soda mixed with water, followed by washing it out with clean water.
Once completed, ensure all connections are dry before installing any new components, so they do not rust over time due to moisture exposure from condensation buildup.
Step 4: Install The New Battery Into The Trailer’s Battery Compartment
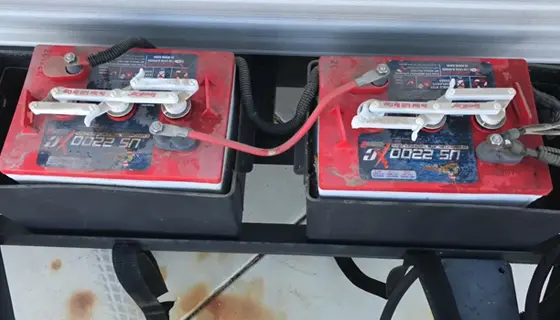
After preparing the compartment, place your new battery into its designated space within your trailer’s battery compartment before beginning any further steps.
Ensure it’s secure enough so there won’t be any rattling sounds due to vibrations while driving over rough roads. This means too much play between fixtures and fittings, which could cause serious issues.
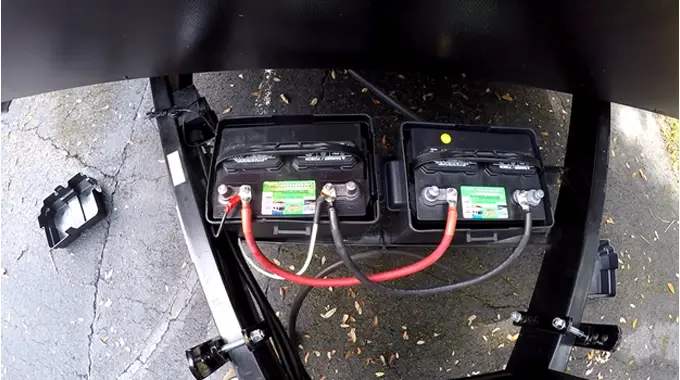
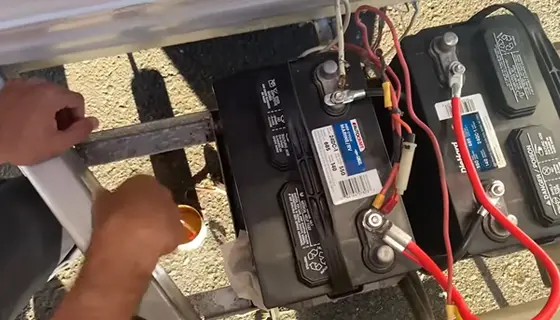
Once placed securely within its position in the compartment, attach battery terminal connectors (typically red/positive terminal followed by black/negative) onto their respective terminals located at either end of your new battery before ensuring they don’t interfere with nearby wiring by using straps/bolts.
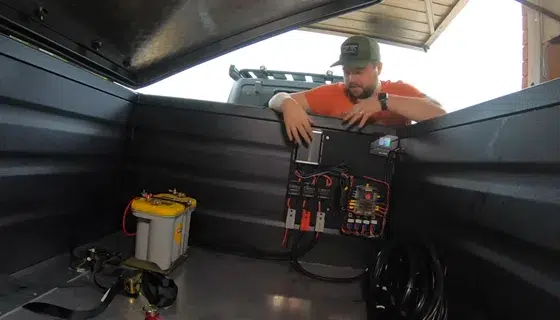
Step 5: Test/Inspect After Installation Has Been Completed
Now that your new battery has been securely placed into its compartment and connected with the correct wiring, inspect all connection points using an appropriate digital multimeter clamp device before starting up your trailer’s electrical system.
This can help identify potential issues caused by faulty wiring connections before a more extensive failure down the line, which can save you time & money during future maintenance.
Also, inspect all areas within your trailer’s engine bay for signs of corrosion which may indicate improper grounding leading towards dangerous short circuits, especially when combined with high current drains such as powering auxiliary lighting systems on trailers or recreational vehicles.
Step 6: Reassemble Components Around The New Unit
After testing & inspection are completed satisfactorily, begin reassembling components around your new unit.
Starting with reconnecting electrical wires back into their respective terminals, followed by tightening loose screws (if present) around both units before reinstalling plastic covers if applicable depending on how you installed them (some come pre-equipped with weatherproof casing).
Now you need to cover the whole area with an appropriate weatherproof material, such as dielectric grease, if applicable, according to what kind of box/enclosure you used during installation (some can come pre-equipped with waterproof gaskets).
Once all components have been reassembled, test the trailer’s electrical system again to ensure everything works. Otherwise, you’ll need to troubleshoot any issues that may have arisen during installation.
Safety Precautions to Consider When Adding a Battery to a Trailer
When installing a battery pack to a trailer, you should consider the following essential safety precautions:
Keep Batteries Away from Metal
Remember to keep batteries from metal when mounting a battery to a trailer. This includes keeping the battery at least a few inches away from any trailer parts that may contain metal, such as hinges and fasteners.
This is for safety, as any contact between the two could create an electric spark, which can cause short-circuiting and even explosions in some cases. To further reduce the risk of creating a spark, it is also recommended that non-conductive materials be used around the battery and its components.
Don’t Make Contact with Both Terminals
When connecting a battery to a travel trailer, you should avoid contacting both terminals simultaneously. Doing so could result in an electric shock or fire hazard.
It is best practice to use insulated tools (like insulated screwdrivers) or wear protective gear such as rubber gloves or eye protection while working near batteries, especially when handling exposed wires or terminals.
Don’t Hand-Guide Batteries When Lifting/Moving
It is not advisable to hand-guide batteries during lifting/moving them due to their weight and size. When moving it between trailers, use appropriate equipment, such as a trolley.
Also, ensure that all connections are properly secured before lifting/moving the battery, so they don’t come loose during transportation.
Lifting Safely and Appropriately
When lifting or moving a battery bank, always do it safely and appropriately using your legs rather than your back while keeping your back straight throughout the motion. If you must lift heavy objects (more than 50 pounds), seek help from another person who can help you carry out this task without risking injury.
It’s important to note that if your trailer has any ramps or steps leading up to it, you should have someone else guide you while carrying the battery onto them; never attempt this task alone due to safety concerns.
Wear Protective Gear When Working with Batteries
You must always wear protective gear when working on batteries due to the risk of electric shock and associated fire hazards. This includes non-conductive gloves, eyewear/goggles, long sleeves/pants, closed shoes made for electrical work (as well as any other items needed for specific installations).
Ensure all exposed parts are properly covered before beginning any installation process involving adding new batteries into trailers. This will help reduce the risk of accidental injury caused by open wires or clamps coming into contact with the skin directly upon connection of said parts.
Mishandling Batteries Can be Dangerous
Batteries should never be mishandled because they can create powerful electric shocks or fires if not handled correctly during installation procedures on trailers.
Ensure all safety precautions are followed closely, including those outlined above, to avoid potential hazards caused by mishandling these devices incorrectly, which can lead to property damage and personal injury in extreme cases if left unchecked.
How To Maintain Your New Battery After Install to a Trailer
To ensure that your new battery for a trailer is maintained properly and operates at its full potential throughout its lifespan, there are a few key steps to follow.
Regularly Test Battery Voltage Level: Testing the voltage level of your battery should be done periodically, as this will provide you with an accurate reading of how much energy the battery is producing.
To do this, you will need to use a voltmeter or multimeter and attach the leads directly to the negative and positive terminals of the battery.
Charge Your Trailer Battery Regularly: It is important to keep the battery charged. A trailer battery powers the lights and other electronics in the trailer. If the battery dies, you will be left in the dark. Additionally, a dead battery can be difficult to recharge.
For this reason, it is best to keep it charged on a regular basis. This will keep the battery healthy and prevent it from dying unexpectedly.
When charging the battery, be sure to use a proper charger that is designed for trailer batteries. Using the wrong type of charger could damage the battery and shorten its lifespan. With a little bit of care, you can keep your trailer battery powered up and healthy for many years to come.
Properly Disconnecting Wiring Before Installing: To prevent any unnecessary damage to the battery, it’s important to disconnect all wiring before servicing or performing any maintenance procedures.
This includes disconnecting power from any attached wires, such as lights and signals, and ensuring all electrical components are turned off.
Keeping Battery Terminals Clean: Keeping its terminals clean is one way to ensure optimal performance from your trailer battery. Any dirt or debris can impede electricity flow between components, cause poor performance, or even fail over time. To avoid this, clean terminals whenever they become dirty.
Ensuring Adequate Ventilation: Your trailer’s battery compartment needs good ventilation to operate efficiently and stay cool during long usage. This helps reduce strain on internal components damaged by overheating due to inadequate airflow around them.
Checking Battery Fluid Level: After installing a new battery in a trailer, you must check the fluid level regularly. Check the side of the battery and look for the fill holes.
You can use a dropper or pipette to fill each hole with distilled water. Be sure not to overfill, as this may cause the acid to overflow and damage surrounding areas.
Use a Battery Tender to Keep it in Good Condition: Trailer batteries can be difficult to maintain, as they are often stored in less than ideal conditions. That’s where a battery tender comes in. A battery tender is a tool that helps to keep your trailer battery in good condition by providing a steady trickle of power.
This helps to prevent the battery from being drained by self-discharge, and also prevents damage from overcharging. As a result, using a battery tender can help to extend the life of your trailer battery. And that’s why it’s an essential tool for any trailer owner.
Utilizing Battery Surge Protectors: A surge protector for your trailer’s new battery can help protect against electrical spikes and surges while supplying clean power to your trailer’s electrical components.
A surge protector should be installed at both ends of any wiring connecting different electrical devices and near connection points where equipment plugs into an outlet or wall socket.
Storing Batteries in Proper Temperatures: When storing a new battery in your trailer, it is essential to do so at proper temperatures and conditions.
The ideal temperature range for most batteries should be between 32-140 degrees Fahrenheit (0-60 degrees Celsius). Ensure your storage area does not exceed these temperatures, which could cause permanent damage.
Applying Protective Coatings to the Terminals: Once you have installed a new battery in a trailer, apply some protective coating over its terminals and connection points before using it outdoors or in wet environments such as rain or snow.
By coating your battery’s terminals, corrosion won’t cause short circuits, diminished performance levels, or other issues that happen due to environmental factors like moisture or dust sticking on it over time.
Disconnect the Battery When the Trailer isn’t in Use: Disconnecting your trailer battery when it’s not in use is essential for keeping the battery charged and in good condition. When the battery is connected, even if the trailer isn’t being used, it will slowly discharge.
This can lead to a number of problems, including decreased battery life and reduced performance. If the battery is left too long without being used, it can become sulfated, which can also damage the battery and reduce its lifespan.
To avoid these problems, it’s important to disconnect the trailer battery when it’s not needed. Doing so will help to keep your battery energized and ready to go, ensuring that it will be ready to go when you need it.
Will trailer lights work without a battery?
Trailer lights are typically connected to the tow vehicle via a trailer plug. This plug contains several different wires, including a power wire and a ground wire. When the tow vehicle’s brake lights are activated, the power wire sends a current to the trailer’s lights, causing them to illuminate.
The ground wire provides a path for the current to return to the tow vehicle’s battery. As long as the charge line on the trailer plug is connected to the tow vehicle’s battery, the trailer lights will work even if the tow vehicle’s headlights are turned off. If the charge line is not connected, the trailer lights will not work.
Does my travel trailer battery charge when plugged in?
Shore power is a great way to keep your RV battery charged and ready to go. Most RVers find that they can keep their batteries topped off by plugging into shore power for an hour or two each day.
If you are planning to be parked for an extended period of time, you may want to consider investing in a solar panel charger. Solar chargers can help to keep your battery charged even when you are not able to plug into shore power.
Ultimately, keeping your RV battery charged is important for maintaining a healthy electrical system. By plugging into shore power or using a solar charger, you can help to ensure that your battery stays charged and is ready to go.
How do I know if my camper battery is charging?
There are a few ways to tell if your camper battery is charging properly. First, check the voltage with a voltmeter. The ideal voltage for a camper battery is 12.6 volts.
If the reading is lower than that, it’s time to give the battery a charge. Another way to tell if a battery is charging properly is by checking the specific gravity of the cells. This can be done with a hydrometer.
Fully charged cells should have a specific gravity of 1.265 or higher. If the readings are lower than that, it’s an indication that the battery isn’t being fully charged.
You can also check the overall condition of the battery itself. By regularly checking on your camper battery, you can ensure that it stays in good condition and continues to work properly.
How do you charge a camper trailer battery at home?
Fortunately, there are a few different ways to charge camper trailer batteries at home. One option is to take the battery out of the dump trailer and charge it inside your home using a 12-volt battery charger. This can be a bit of a hassle, but it’s usually the quickest way to get the job done.
Another option is to use a solar panel to charge the battery. This is a great choice if you’re looking for a more eco-friendly option, but it can take longer to charge the battery this way. Whichever method you choose, make sure you follow the instructions carefully so that you don’t damage the battery.
Maximizing the Lifespan of Your Trailer Battery with Proper Installation
Installing a trailer battery may seem daunting at first, but with the right steps in place, it can be done swiftly and safely. Knowing that you’ve securely set up your electrical system is key to having peace of mind when hitting the road for adventure.
A trailer battery can last for around six years if it is properly maintained and serviced. Proper connection & maintenance includes regularly checking the charge level and ensuring that the terminals are clean.
To maximize the lifespan of your trailer’s deep cycle battery, you should follow the precautions and maintenance tips mentioned above. If you follow those steps carefully, a battery should easily last 6+ years in an optimal trailer setting.

