Last Updated on April 10, 2022
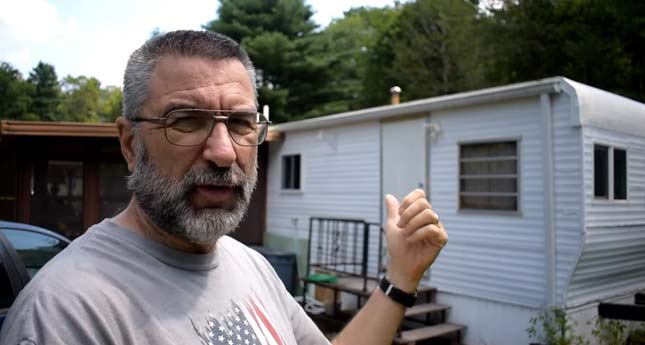
When you think of a porch, do you imagine sitting on the front step with your feet up and sipping iced tea? Or maybe it’s a place to set down the groceries or pull off your boots. Whatever your idea of a porch is, an RV porch is entirely different.
In this case, a “porch” means that space between the trailer hitch and bumper where we install steps for easier access to our home-on-wheels.
Building an RV porch can seem like a daunting task, but it’s not as difficult as it may seem. With the right tools and a bit of know-how, you can have your new porch up in no time.
This article will show you how to build RV porch that looks good and works well for either side exit or rear entry RVs. We’ll start by looking at some options for materials then examine various building techniques before walking through all steps required to complete the entire project.
Materials Needed to Build an RV Porch
First, we’ll deal with the two primary choices in porch material: Wood and Aluminum.
Wood:
Wood looks good, is easy to work with and repair, and like metal can be painted to give it a fresh new look. Wood, however, cannot stand up against all weather conditions, so that additional treatments may be required for your climate.
Aluminum:
Aluminum is the best-preferred choice for durability and resistance to wear & tear, including saltwater. It’s also easy to repair, comes in various colors, and can be easily painted or powder-coated for design flexibility.
The porch structure is built upon the frame rails, which are sturdy cross members that run along either side of your camper shell. This ensures an adequately strong base on which to build the RV deck.
Tools Needed to Build an RV Porch
The following list of tools will make the job much easier.
- Drill: Drill bits, spade bit (for cutting openings for steps), drill/driver
- Circular Saw: Used to cut aluminum
- Jigsaw: Used to cut aluminum and wood
- Handsaw: Used for steel tube rail
- Screwdriver(s): Used to attach aluminum and steel tube rail
- Hole Saw: For cutting holes in wood
- Sander: To smooth rough edges
- Tape Measure: To aid in squareness and marking measurements
- C-clamps: For holding pieces together for drilling etc.
Selecting the Proper Lumber for Your RV Deck
There are several options for building your RV deck structure, but most people choose to use wood because it’s inexpensive and easy to work with.
But there are different types of wood to choose from, each with its own merits:
Pressure Treated Lumber:
This is the choice for most campers. It’s inexpensive and easy to work with, but it can discolor over time. However, the wood will resist rot and bugs, which makes it an excellent choice to use on the flooring.
Untreated Wood:
This choice has the natural beauty of wood, but it’s prone to rot and bugs. It can be expensive, but it doesn’t require treatment, so simple to paint or stain.
Bamboo:
Bamboo is another exterior-ready material that is easy to work with, doesn’t require any treatment, and has the bonus of being environmentally friendly.
Cedar Wood:
The benefits of cedar are its natural beauty, resistance to rot and insects, and ease of maintenance. It is somewhat costly compared to treated pine, but the added cost may be worth the money if you plan on staying in one spot for a long time.
Composite Wood:
This option is relatively new to the market but gaining in popularity. It’s recyclable, insect & rot-resistant, and comes in many styles. The drawbacks are the cost and difficulty of working with it due to its high durability.
How to Build RV Porch in Just a Few Convenient Steps
Once the correct lumber has been chosen for your porch, then it’s time to put together a plan. It doesn’t need to be too complicated, but knowing what you want before beginning construction is good.
By following the below steps, you can expect to finish the DIY project on about weekends.
Step 01. Choose a Suitable Location
The first thing to do is choose the location & flat surface for your RV deck. You’ll want it close enough to your door that you can reach out and touch it, but not so tight that it’s in the way when getting into or out of your rig.
Mark an X on each side of the camper shell where you plan on building the steps. These are where you’ll be drilling the holes for the steps to attach to.
Once you have your X’s marked, measure from each one as far as your door is wide and align them as close as possible.
Step 02. Plan the RV Deck Design Ideas
Now you want to plan out the layout and the design of your RV deck ideas. You can do this however you like, but it’s essential to stay within the area between your X’s to avoid drilling holes in anything that shouldn’t be there.
Measure and mark the location for all the elements in your RV deck, including handrails, support wood beam, frame, etc.
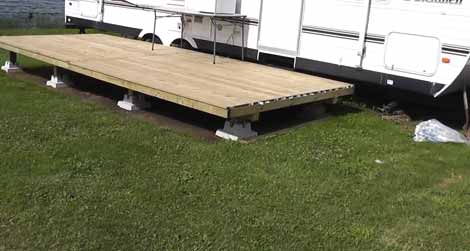
Step 03. Assemble the Frame
There are two ways to go about assembling the frame. You can use treated multiple wood planks and attach everything with screws, or you can use steel tube rail for a more sturdy structure that will stand up to strong winds and other elements.
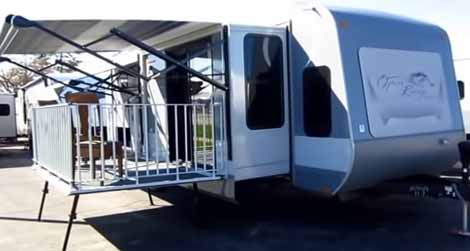
Step 04. Install the Decking and Railing
The critical step is to install the decking and railing. It’s essential to lay out all your pieces and plan for this next phase before you begin putting it together for sturdy foundation, so you don’t mess up your RV deck layout. These include:
a) Laying Concrete Pier Blocks:
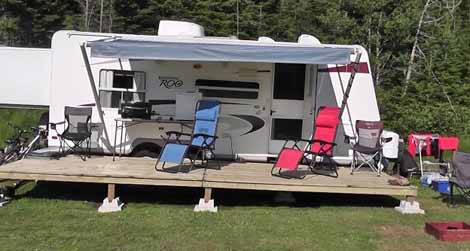
After the frame has been built, layout the concrete blocks & in-ground footers over the holes drilled into your shell. Use a trowel or circular saw to create a perfect spot for each block. The sturdiness of the deck relies heavily on this step.
b) Erect the Post and Arrange the Joist:
Next, you’ll need to put all the block posts in place and secure them. Before putting together the railing, installing the straight and liner joists to be attached to both posts is essential.
c) Adding Decking Boards:
The portable deck boards will make an outstanding finished product. You don’t want to use treated wood for this because of what it does to the look of the RV deck. You can also add steps earlier on before the decking boards are added; it’s up to you.
Step 05: Add Railings and Look at Your Finished Product
Now that all your pieces have been put together, your last step for the building is to attach the railing with screws.
You can make the railings as elaborate or simple as you like, but keep in mind that they will need to be strong enough to withstand all kinds of weather.
Step 06. Finishing touches
Final touches are a matter of personal taste. If you want to, you can paint the RV deck or leave it as is for a nice natural look, or you can use finish for a more shiny, polished look.
You could even use scrap lumber and make your swing hang off the front of the porch.
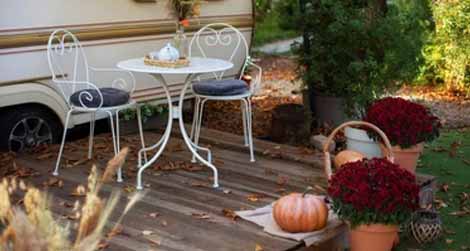
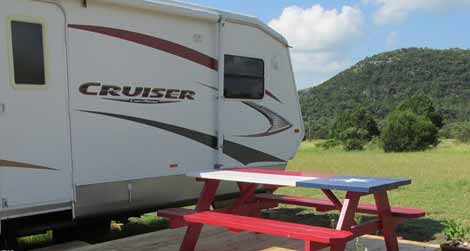
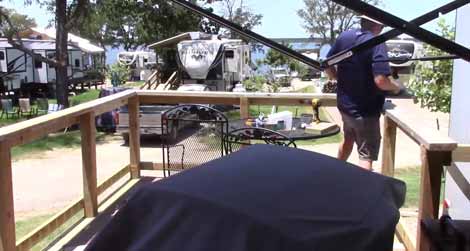
What are the Benefits of an RV Porch?
There are several benefits to having an RV porch. Some of these benefits include:
01. Added Space: A porch can provide you with additional space, perfect for hosting events or gatherings.
02. Increased Curb Appeal: A well-constructed porch can dramatically increase the curb appeal of your RV. Not only will it make your RV more attractive, but it will also increase its value if you ever decide to sell it.
03. Increased Functionality: A porch can also provide additional functionality, such as a place to store your bicycles or hang your laundry.
04. Additional Storage Space: If you are running out of storage space inside your RV, an RV deck can provide you with additional storage space. This is especially beneficial if you use your RV as a home base.
05. Added Shade: A porch can also provide you with some much-needed shade, which is perfect for those hot summer days.
FAQs
Following are some frequently asked questions that people ask for more information:
01. Can I Build a Portable Deck for RV?
Yes, you can, a portable deck is not only easy to build, but they are also easy to operate. Additionally, they are mobile, so if you get tired of hosting your barbecue at the exact location every week, you can move the portable deck around.
02. What are Floating Decks?
A floating deck is not connected to a building and appears to float above the ground. The floating deck is generally low to the ground and do not require handrails or even portable stairs.
Decks constructed above ground level are sometimes referred to as “grade-level” or “freestanding.”
03. Can You Build a Freestanding Deck for RV?
You can always build a freestanding deck for your RV. However, if you want to go with freestanding decks, keep in mind that they will require more support wood beams and posts because the ground is not supporting them, unlike decks attached to an existing structure.
04. How Can I Add Finishing Touches to My Porch?
If you add finishing touches to your porch, consider adding decorations like flowers and lights. Adding elements like these will make your porch more inviting to guests and visitors.
In Conclusion
Building an RV porch is a great way to increase your home’s curb appeal and functionality on wheels. If you are looking for ways to get started, this article provides all the information you need to know about how to build RV porch.
An RV porch can provide various benefits, from added attractive outdoor living space to increased curb appeal. Not only is it a great place to gather with friends and family, but it can also be used for additional storage, shade, or laundry hanging.
With a few simple steps, you can have your very own porch that will increase the functionality and attractiveness of your RV.

