
Last Updated on May 22, 2023
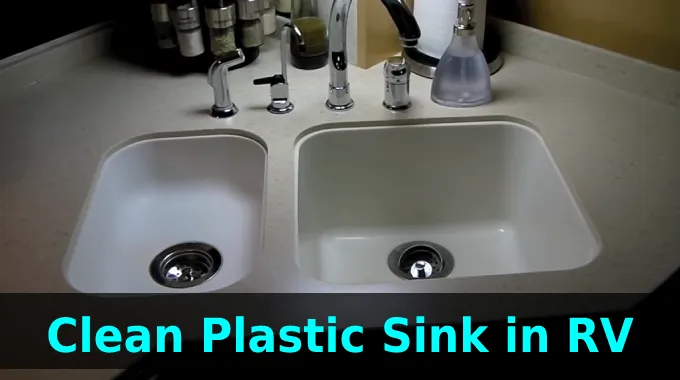
RV travel is a liberating experience, but the less fun part is keeping your home-on-wheels clean and tidy. One area that tends to be overlooked is the kitchen sink, especially if it’s plastic.
Although lightweight and easy to clean, these sinks can accumulate scratches and stains, which can be a pain to deal with. Unfortunately, many cleaning products contain toxic chemicals that harm the environment and are unaffordable.
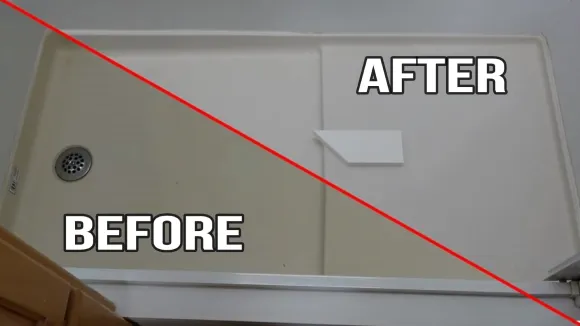
However, an all-natural and cost-effective solution is baking soda and water paste. So, if you’re after a safe, eco-friendly and budget-friendly way to keep your RV’s kitchen sink gleaming like new, try the natural goodness of baking soda and water paste.
Let’s step into the world of RV care. In this post, we’ll show you how to make your plastic sink shine like it did when first installed.
How to Clean Plastic Sink in RV: 6 DIY Steps
Cleaning your RV’s plastic sink is an essential task that should be done regularly to maintain its hygiene and appearance. Here are the steps you must follow to clean your RV plastic sink effectively.
Basic Supplies Needed:
You will need some basic supplies that are readily available in most households.
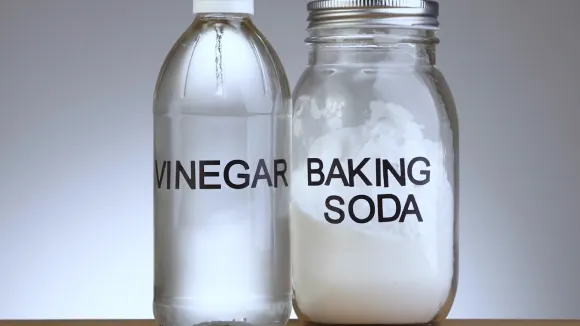
Baking Soda: Baking soda is an effective cleaning agent that can be used to clean various surfaces in your RV, including the plastic sink. Its abrasive nature helps to scrub off stains and dirt from the sink’s surface without causing any damage.
White Vinegar: White vinegar is another versatile cleaning agent that can clean different surfaces in your RV. It contains acetic acid, which helps dissolve mineral deposits and other stubborn stains on the sink’s surface.
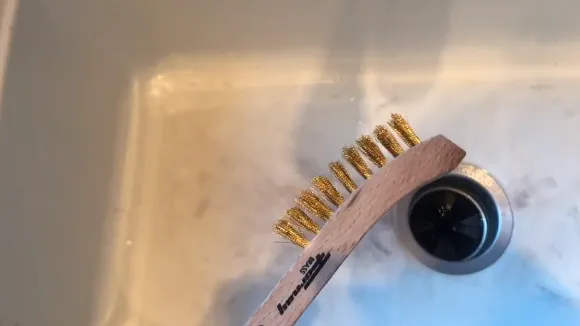
Soft-bristled Brush or Sponge: A soft-bristled brush or sponge is necessary for scrubbing off dirt and grime from the sink’s surface without scratching it. You can use an old toothbrush or any other soft-bristled brush you have at home.
Rubber Gloves: Rubber gloves are essential when cleaning your RV plastic sink as they protect your hands from harsh chemicals that may be present in the cleaning agents you are using.
Step 1: Remove any Debris and Food Particles from the Sink
The first step is to get all the food off the sink. This is crucial because leaving debris and food particles in the sink can lead to stains and bad odors.
Using a brush or sponge will help to remove debris and food particles. Gently scrub the sink’s surface, paying close attention to areas around the drain where debris accumulates.
Use a plastic scraper if stubborn stains or food particles won’t come off with gentle scrubbing.
Step 2: Create a Paste Using Baking Soda and Water
Create a custom paste to clean any size sink using baking soda and water! Simply mix the two together until thick, adjusting ratios depending on your needs. Enjoy effortless cleaning with this easy-to-make solution.
Once you have created the paste, apply it directly to the sink’s surface using a soft-bristled brush or sponge. Be sure to cover all areas of the sink, paying special attention to any areas with stubborn stains.
After applying the paste, you should let it sit for some time so that it can work its magic. The longer you leave it on, the more effective it will be at removing dirt and stains.
After the paste has worked for a bit, rinse the sink with warm water. To remove any residue, rinse thoroughly.
You can repeat this process until your RV plastic sink is completely clean. However, be careful not to overuse baking soda as it can be abrasive and cause damage if used too frequently.
Step 3: Apply the Paste to the Surface of the Sink
You’ll need a soft-bristled brush or sponge to clean the sink before you apply the paste. Then, mix baking soda and water until it forms a thick paste. You can use a brush or sponge to apply the paste to the sink. Make sure you cover all areas evenly.
Allow the paste to work its magic on those stubborn stains. The time you need to wait depends on how dirty your sink is. However, leaving it for about 15-20 minutes should be enough.
After letting the paste sit, rinse your RV plastic sink with warm water. Make sure to rinse thoroughly so that no residue is left behind. If necessary, repeat this process until you are satisfied with the results.
Step 4: Let the Paste Sit for Some Time
After taking the time to apply your baking soda paste, you must give it some space to do its work. Letting this mixture sit is key in eradicating any tough stains or dirt from adhering to the RV plastic sink surfaces.
The amount of time you should let the paste sit will depend on how dirty your sink is. For light stains, 10-15 minutes should be enough, but for tougher stains, you may need to let it sit for up to an hour.
While waiting for the paste to work, you can use this time to clean other areas of your RV or relax and take a break. Remember not to use the sink while the paste sits on its surface.
After letting the paste sit for the appropriate amount of time, it’s time to rinse off the sink with warm water. Make sure that all traces of the baking soda paste are removed from the surface before proceeding with any further cleaning steps.
Don’t worry if some stubborn stains are left after rinsing. You can repeat this process as often as necessary until your RV plastic sink looks brand new.
Step 5: Rinse the Sink with Warm Water
It’s time to give your RV’s plastic sink a refreshing rinse. Warm water will wash away any baking soda residue and loosen food particles leftover from the cleaning process, leaving you with sparkling results.
You can use a soft-bristled brush to scrub the sink while rinsing it gently. Avoid using abrasive materials as they may scratch the surface of the sink.
Rinse thoroughly with warm water until all traces of baking soda paste have been removed. You can also use a clean cloth or paper towel to wipe down the sink and remove any excess water.
Step 6: Repeat if Necessary
After rinsing the RV plastic sink with warm water, inspecting it and checking if there are still any stains or grime left. If there are, then you should repeat the cleaning process until the sink is completely clean.
You may need to repeat the process if the sink hasn’t been cleaned in a while or if it has accumulated heavy stains. In such cases, one cleaning round may not be enough to remove all the dirt.
Another reason could be that you didn’t use enough baking soda paste or vinegar solution on the first attempt. Using too few of these cleaning agents might not be sufficient to eliminate all the dirt.
It’s also possible that some sink areas require more effort and attention than others. For instance, corners and crevices can be difficult to clean thoroughly, so you may need to go over them again.
Alternative Method to Clean Your RV Plastic Sink Using Vinegar
Vinegar is another effective and affordable option to clean your RV plastic sink. It is a natural disinfectant that can help remove stains, odors, and bacteria from the sink’s surface. Here are the steps to follow:
Step 1: Mix Water and Vinegar in Equal Parts
Mixing water and vinegar in equal parts is an alternative method that you can use to clean your RV plastic sink. Vinegar is a natural disinfectant that can effectively kill germs, bacteria, and other microorganisms that may be present in your sink. It’s also safe to use on plastic surfaces as it won’t cause any damage or discoloration.
To start, you’ll need to mix equal parts of water and white vinegar in a container. You can use a measuring cup or eyeball the amounts depending on the size of your sink. Once the solution is ready, soak a sponge or cloth in it and scrub the sink’s surface.
Cover all areas, including corners, edges, and around the drain. If there are stubborn stains or grime buildup, let the solution sit for a few minutes before scrubbing again. The acidity of vinegar can help break down tough dirt and stains.
Step 2: Scrub the Surface of the Sink with the Sponge or Brush
Soak a sponge or cloth in the solution, then scrub the sink’s surface. Be sure to cover all areas, including hard-to-reach spots.
To begin, wet your brush or sponge with warm water and apply a small amount of baking soda or vinegar to it. Gently scrub the entire surface of the sink, paying extra attention to any areas that may be particularly dirty.
Be sure to use a soft-bristled brush or sponge, as using harsh abrasives can cause damage to your plastic sink. It’s also important to wear rubber gloves to protect your hands from any chemicals you may be using.
Step 3: Rinse Thoroughly with Warm Water
Now Rinse away the baking soda paste you applied to your plastic RV sink with warm water, making sure that all residue is gone. For extra cleaning power, a soft-bristled brush or sponge can help scrub off any unwanted buildup before it has time to set in.
Warm water rinsing is essential to remove any leftover debris and cleaning solution. Your sink will be easier to clean when you use warm water. It also helps sanitize your sink by killing bacteria and germs that may have accumulated over time.
Don’t forget to rinse the hard-to-reach corners and edges of your sink. Use a gentle stream of warm water to ensure that you don’t damage the surface of your plastic sink. Once you’ve rinsed off all the baking soda paste or vinegar solution, dry your sink with a clean cloth or paper towel.
Why Should You Clean Your RV Plastic Sink Regularly?
Keeping your RV plastic sink clean is important to maintaining a healthy and hygienic living space.
Prevents the Buildup of Bacteria, Mold, and Mildew: Keep your RV’s plastic sink sparkling clean to minimize the risk of grimy buildup and dangerous microorganisms. Keep it clean so bad odors, mold growth, and unhealthy bacteria don’t take hold, so it’s a safe haven for you wherever you go.
Extends the Lifespan of Your Sink: Stains and discoloration can give away your rig’s age, but diligent upkeep can help maintain its original brightness for much longer. Not only does it save you time in deep scrubbing down the road, but it also keeps that brand-new feel alive.
Improves Overall Performance: Food debris and other particles can slowly build up over time, leading to clogged drains or slow-draining water. Cleaning out these pesky particles will help keep your plumbing system functioning as it should.
Enhances Aesthetic Appeal: Keeping it well-maintained is easy to bring a spark of freshness and a welcoming atmosphere. A spotless sink can instantly give off vibes of neatness and coziness that will make any guest feel at home.
How Often Should Your RV Plastic Sink Be Cleaned?
Maintaining a clean and healthy living space in your RV is crucial, and cleaning your plastic sink is an important part of achieving this goal. However, when it comes to cleaning your RV sink, how often is enough?
Well, the frequency of your usage and the amount of debris accumulating plays a significant role in answering this question. For those who frequently use their RV sink, cleaning it at least once a week is recommended to prevent the growth of bacteria, mold, and mildew.
Yet, if you only use your sink occasionally, cleaning it every two weeks is sufficient. Remember, neglecting to clean your plastic sink can result in unpleasant odors and stubborn stains that are hard to remove. So keep your RV sink sparkling clean and refrain from giving bacteria a breeding ground to thrive.
Is It Okay to Put Bleach In an RV Sink?
While it may seem strange to add bleach to your sink, it is actually an effective way to sanitize your fresh water tank. However, it is important to remember that diluted bleach should only be added when necessary and in the proper dosage.
Before adding bleach, ensure all faucets and valves are turned off to prevent contamination. With just one cup of bleach per 10-15 gallons of stored water, you can rest assured that your water system is clean and ready for use.
Once the bleach is added, the tank should be filled with water and flushed before leaving the bleach in there for a few hours to sanitize the tank properly. Mixing bleach with other cleaning products can release harmful fumes, so don’t pour undiluted bleach directly into the sink.
Additionally, it is important to rinse the sink thoroughly after using bleach to prevent any residue or odor. When used properly, bleach can effectively sanitize an RV’s fresh water tank without damaging the sink or plumbing.
Keep Your RV Sink Sparkling: The Key to A Successful Road Trip
Maintaining a clean and hygienic RV plastic sink is crucial for any road trip. Not only does it improve the overall appearance of your vehicle, but it also prevents harmful bacteria from developing.
Using baking soda or white vinegar can be useful, it’s worth noting that frequent cleaning may be required depending on usage. Fortunately, it’s a straightforward process that can be accomplished in a short amount of time.
Transform your RV into a pristine oasis with ease by following the simple steps provided in this article. Enjoy peace of mind on every journey as you and your passengers stay healthy, hygienic, and happy.

