Last Updated on April 26, 2023
As an RV enthusiast, taking good care of your vehicle is essential. You may already know the importance of regular maintenance, but have you given attention to your rubber roof? Neglecting the roof can lead to costly repairs, but cleaning it regularly can extend its lifespan.
A rubber roof is designed to withstand harsh weather conditions but can easily accumulate dirt, dust, tree sap, and other debris over time. To keep it clean, clear debris and wet the roof with water. Apply a rubber roof cleaner and scrub gently with a soft-bristle brush. Finally, rinse off the cleaner with water.
Cleaning your RV’s rubber roof can be a breeze if you know the right steps. Follow this guide to keep your recreational vehicle looking sharp while protecting it from unwanted damage.
How to Clean Rubber Roof On RV: Steps to Follow

Keeping your RV rubber roof in tip-top condition is a must. Not only does it help maintain the aesthetic appeal of your vehicle, but regular cleaning also guards against premature wear and tear that may result in costly repairs down the line.
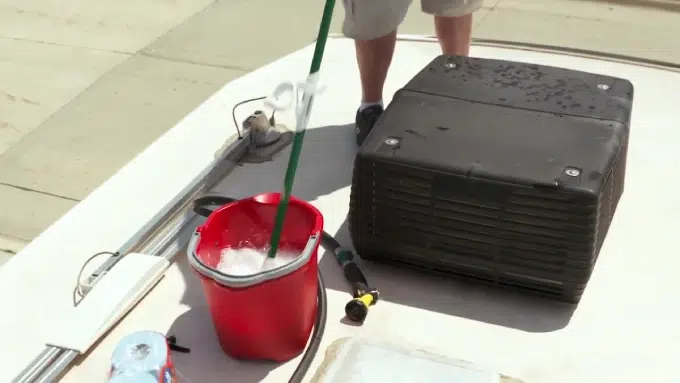
Materials required for cleaning an RV rubber roof
It’s crucial to have the right materials to clean your RV’s rubber roof. Here are the items you will need to get the job done effectively:
- Soft bristle brush: A soft-bristled brush is essential for scrubbing away dirt and grime without damaging the rubber material of your RV’s roof.
- Rubber roof cleaner: Using a specialized rubber roof cleaner is important because it won’t harm or degrade the rubber membrane like other harsh chemicals might.
- Hose or pressure washer: You’ll need a way to rinse off the cleaner once you’ve applied it. A hose with an adjustable nozzle or a pressure washer can help you achieve a thorough rinse.
- Bucket: You’ll need a bucket of water to dilute the cleaner and soak your brush.
Step 1: Clear Debris From the Roof
Before cleaning your RV rubber roof, it is important to clear any debris from the surface. This includes leaves, twigs, and dirt that may have accumulated on the roof. This is because debris can cause scratches or tears in the rubber material, which can lead to leaks and water damage.
To clear debris from your RV rubber roof, use a soft bristle brush or broom to sweep away any loose particles gently. It is crucial to be gentle when clearing debris as aggressive scrubbing can cause damage to the roof.
Another option is using a leaf blower or air compressor to remove debris. However, if using this method, be sure not to direct the airflow too close to the roof as this can also cause damage.
Clearing debris from your RV rubber roof should be done regularly, especially before cleaning. This will ensure that your cleaning process is effective and that your roof remains in good condition for years.
Step 2: Wet the Roof With Water
Wetting the roof with water is important in cleaning an RV rubber roof. Before applying any cleaner, removing any loose debris or dirt on the roof’s surface is essential. This can be done by using a hose or pressure washer to rinse off any loose debris.
Although you can make this step easier with a hose or pressure washer, don’t use too much pressure or the rubber material will be damaged. A gentle spray of water should be enough to wet the entire roof surface.
If you don’t have access to a hose or pressure washer, you can also use a bucket of water and a soft bristle brush to wet the roof. Dip the brush into the water and gently scrub over small sections of the roof until it is completely wet.
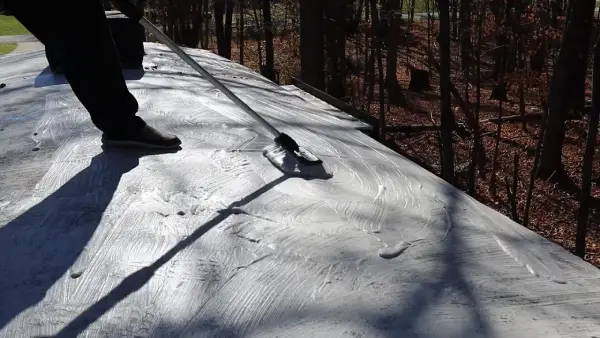
Step 3: Apply Rubber Roof Cleaner
Rubber roof cleaner is essential to cleaning your RV rubber roof. The cleaner will help remove any dirt or grime that has built up on the roof’s surface and restore its appearance. Here’s how to apply the cleaner:
- First, ensure you have cleared any debris from the roof and wet it thoroughly with water.
- Next, mix the rubber roof cleaner according to the instructions on the bottle and pour it into a bucket.
- Dip a soft bristle brush into the solution and scrub the surface of the roof. Start at one end and work your way across, covering all areas evenly.
- Pay extra attention to any areas with stubborn stains or dirt buildup, using more pressure if necessary.
- Once you’ve covered the entire surface, rinse off the cleaner thoroughly with water.
It’s important to note that not all cleaners are created equal. Be sure to choose one specifically designed for use on RV rubber roofs.
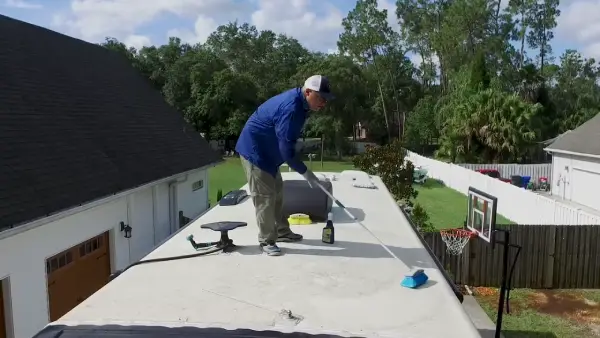
Step 4: Scrub the Dirt and Stains with a Soft Bristle Brush
Ensure you have all the materials above for cleaning your RV rubber roof. Once you have gathered all your materials, follow these simple steps:
- Apply the rubber roof cleaner onto the surface of your RV rubber roof.
- Allow the cleaner to sit on the rubber roof for a few minutes to loosen any dirt or grime.
- Use a soft bristle brush to remove dirt or stains on your RV rubber roof.
- Be gentle when scrubbing so as not to damage or scratch your RV’s rubber roof.
- Rinse off the cleaner using water from either a hose or a pressure washer.
- Ensure you rinse off all traces of cleaner from your RV rubber roof.
- Dry off any excess water using a towel or let it dry naturally.
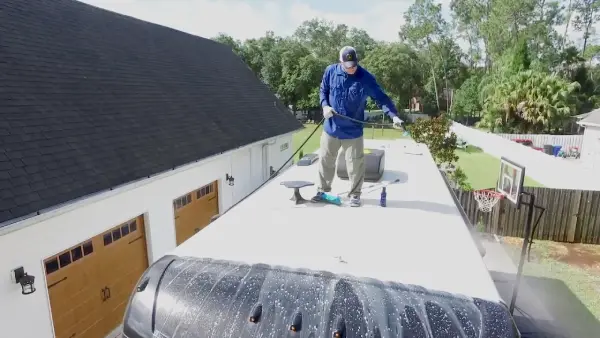
Step 5: Rinse off the Cleaner With Water
Once the dirt and stains are scrubbed with a soft bristle brush, the next step is to rinse off the rubber roof cleaner with water. This is an important step because leaving any residue of the cleaner on the roof can lead to damage over time.
When rinsing, using a hose or pressure washer set on low pressure is recommended to avoid damaging the rubber material. Start at one end of the roof and work toward the other, ensuring all areas are thoroughly rinsed.
It’s important to note that if you’re using a pressure washer, you should keep it at least three feet away from the roof surface to prevent any damage. Also, avoid spraying directly into any vents or openings on your RV.
Once you’ve finished rinsing off all of the cleaners, take a few moments to inspect the roof for any missed spots or areas that may need additional attention. If necessary, repeat steps 3-5 until you’re satisfied with the results.
After completing this step in cleaning your RV rubber roof, it’s time to dry the surface.
Step 6: Dry the surface
You can use a clean towel or allow it to air dry to dry the surface. If you choose to air dry, ensure there is no rain in the forecast and that the temperature is warm enough to facilitate drying.
Using a pressure washer to dry the roof may be tempting, but it can damage the rubber material. Instead, choose a soft towel or allow nature to take its course.
Reasons why it is important to clean your RV rubber roof
Keeping your RV rubber roof sparkling is essential for preserving its allure and extending its lifespan. Here are a few reasons why regular cleaning of the rooftop should be part of your maintenance routine:
1. Protects the roof from damage
One of the main reasons why it is essential to clean your RV rubber roof is that it protects the roof from damage. Over time, dirt, debris, and other contaminants can accumulate on the roof’s surface, leading to damage if left untreated.
The buildup of dirt and debris on your RV rubber roof can cause discoloration and fading, making your RV look old and worn out. Also, mold and mildew can grow on your roof if you live in an area with high humidity or frequent rainfall. These growths can weaken the roofing material and lead to leaks.
2. Increases lifespan of the roof
Over time, exposure to harsh elements such as UV rays, rain, snow, and wind can cause damage to your RV rubber roof. Dirt and debris can also accumulate on the surface, which can trap moisture and lead to mold growth or other types of water damage.
By regularly cleaning your RV rubber roof with a soft bristle brush and a specialized rubber roof cleaner, you can remove these harmful substances before they can cause serious damage.
In addition to increasing the lifespan of your RV rubber roof, regular cleaning can also help prevent leaks and water damage. When dirt and debris accumulate on the surface of your roof, it can create pockets where water can collect.
This standing water can then seep into small cracks or gaps in the roofing material, causing leaks or other types of water damage over time.
3. Prevents leaks and water damage
Cleaning your RV’s rubber roof regularly protects it against leaks and water damage. Ignoring the dirt, debris, leaves and other substances that can accumulate over time on its surface could lead to unfortunate pooling of water, which in turn may cause devastating damage inside your vehicle.
By regularly cleaning your rubber roof, you can ensure that water is able to flow off the surface properly and avoid any potential damage. In addition, cleaning your rubber roof helps to identify any potential issues before they become bigger problems.
For example, if you notice any tears or cracks in the rubber while cleaning, you can address them immediately instead of waiting until they cause a leak or more significant damage.
Tips For Maintaining An RV Rubber Roof After Cleaning
Proper maintenance is key for keeping your RV rubber roof in optimal condition! After a thorough cleaning, it’s important to take the extra steps to ensure lasting performance.
Keep your RV rubber roof in top shape with these tips:
1. Inspect Regularly for Damages
Regular inspection of your RV rubber roof is crucial to maintain its longevity and prevent major damage. Inspecting the roof regularly will help you detect any issues before they become severe and costly to repair.
To inspect your RV rubber roof, start by looking for cracks, tears, or punctures in the surface. These can occur due to harsh weather conditions or debris hitting the roof while driving. If you notice any damages, it is important to address them immediately to prevent further damage.
Another thing to look out for during inspection is any signs of water damage, such as discoloration or soft spots on the roof. This could indicate that water has penetrated the surface and may have caused damage to the underlying structure of your RV.
2. Avoid Using Harsh Chemicals and Cleaners on the Roof
On the roof, stay away from harsh chemicals and cleaners. This is because these types of cleaners can cause damage to the rubber material, leading to cracks, leaks and other problems.
Instead, look for a cleaner that is specifically designed for use on rubber roofs. These cleaners are usually formulated with gentle ingredients that won’t harm the rubber material. You can find these cleaners at most RV supply stores or online.
In addition to using a gentle cleaner, it’s also important to be careful when scrubbing the roof. Use a soft-bristled brush and avoid applying too much pressure. Scrubbing too hard can cause damage to the surface of the roof.
3. Keep Debris off the Top of Your RV
Keeping your RV’s roof clean is crucial for maintaining the cleanliness and integrity of your rubber roof. Debris, such as leaves, branches, and dirt, can accumulate on top of your RV and cause damage to the roof over time. These particles can trap moisture, leading to mold growth and water damage.
To prevent debris from accumulating on top of your RV, it is essential to inspect and clean the roof regularly. After cleaning your rubber roof with a soft bristle brush and rubber roof cleaner, remove any remaining debris with a broom or leaf blower.
You can also use a cover to protect your RV from debris when parked or not in use.
It is also important to avoid parking under trees or near areas where debris may fall onto your RV. If you must park in these areas, consider using a canopy or carport to provide additional protection for your vehicle.
How Often Should You Clean Your RV Rubber Roof?
Maintaining a clean RV rubber roof is essential to keep it in top condition and prolong its lifespan. For this reason, cleaning your RV rubber roof at least three to four times a year is recommended. However, cleaning frequency can vary depending on climate conditions and dust and debris exposure.
More frequent roof cleaning is recommended if you are located in a dusty or pollen-heavy area or frequently park your RV under trees or other foliage. It’s easy for dirt, grime, and debris to damage the protective layers of your RV rubber roof, leading to expensive repairs.
Does Wet And Forget Safe For RV Roofs?
Wet and Forget is a safe and effective cleaning solution for RV owners seeking a pH-neutral formula that won’t cause damage to their rubber roofs. With a pH-neutral formula, this safe and effective cleaning solution won’t damage your rubber roof like harsh solvents and petroleum-based cleaners.
Applying Wet and Forget’s unique blend of ingredients removes mold, mildew, algae, and other stubborn stains, leaving your RV roof looking like new. This roof coating won’t damage metal, fiberglass, vinyl, or acrylic, so you can rest assured that your RV’s roof will look great for years.
Say no to harsh chemicals and yes to Wet and Forget for gentle yet superior cleaning performance.
Securing Your Rubber Roof: Essential RV Maintenance
Now you know how important it is to keep your vehicle pristine. That’s why taking care of your rubber roof is crucial to RV maintenance. Not only can neglecting it leads to costly repairs, but it can also significantly reduce the lifespan of your RV.
So, how can you keep your rubber roof in top shape? Start by cleaning it thoroughly with the proper cleaning agents and avoiding harsh chemicals or abrasive tools. These simple steps can make a world of difference, allowing you to enjoy your RV for years to come.
Keep your RV in tip-top shape by prioritizing roof maintenance. After all, a rubber roof is integral to the health and longevity of any recreational vehicle.

