
Last Updated on May 25, 2023
With repeated use, the black tank sensors in your RV will end up caked with waste and buildup. Because of this, understanding how to clean RV black tank sensors is a valuable skill.
If the sensors are not kept clean, they will not be able to accurately gauge the level of waste in the tank, which could lead to overflows and other unforeseen circumstances.
The sensors may also malfunction if they are not cleaned regularly. There are a few different methods that are available for cleaning your RV’s black tank sensors, and each method has its own set of merits. Let us examine a few effective methods so that you may choose the one that is most applicable to your situation.
Instructions on How to Clean RV Black Tank Sensors
It’s crucial to keep your sensors clean, so you’ll should stay focused on the time to empty the tanks. Since the sensor monitors the level of wastewater in your tank, it is vital that it is functioning properly at all times.
The most important thing to bear in mind when cleaning the tank sensors is never to use harsh chemicals or abrasive cleaners. These can adversely affect the sensors and cause them to malfunction.
Instead, stick to using gentle cleaners that are safe for use on sensitive surfaces. Following are a few techniques you can use to clean your black water sensors:
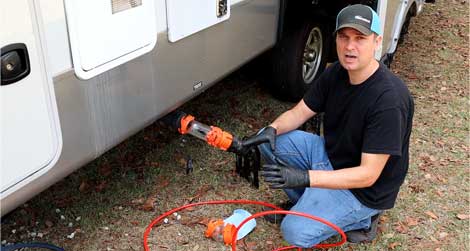
Method 01: Using a Tank Cleaning Wand
The cleaning wand is a specially designed tool for washing tank sensors. There is a flexible, durable shaft on the wand that can reach into tight spaces, while the bristles are made of soft nylon that will not interfere with sensors.
It also has a comfortable grip that makes it easy to hold. With a cleaning wand, you can sweep under the elements and get rid of any sediment that may be stuck to the sensors.
In order to wash away contamination or sediment, the wand sprays water at high pressure on the sensors. Below are step-by-step instructions for using this cleaning tool.
Step 01: Dump the Tank
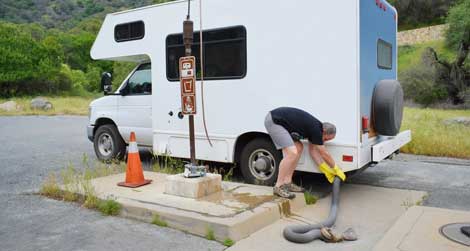
Before you start cleaning the holding tank, it is vital to dump all contents of your tank. If you’ve ever wondered how to properly dump your tank, here are some easy instructions. First, find a dump station. These are typically located in RV parks or campgrounds.
Once you’ve found a dump station, park your RV over the dump hole and make sure that the valve is in the closed position. Next, open the tank valve and let the contents empty into the hole. Ensure that you keep an eye on the level of the contents in the tank so that it does not overflow.
Close the valve after the tank is empty, and flush the system with clean water. Finally, be sure to remove any leftover water before disconnecting from the hose. By following these simple steps, you can easily and safely empty your RV’s black tank.
Step 02: Prepare Your Tank Cleaning Wand
After you dump the container, it’s time to prepare your cleaning wand. This requires you to connect your water hose to the wand. To connect the wand to a water source, you will need a standard garden hose. Screw the hose adapter onto the end of the wand. Next, attach the adapter to the faucet.
Immediately following the installation of the adapter, turn on the water to ensure that it is properly installed and that no leaks are present.
Step 03: Start Cleaning
Having connected the water source to the wand, you should now thoroughly clean the holding tank. Make sure that the pressure in your hose is turned on and then spray water in all areas of the container.
To begin, you will need to flash your RV toilet. Next, insert the wand inside the container and spray water until you see all the gunk and sediment at the bottom of your tank. You may need to repeat this step a few times to remove all dirt and debris from the caravan RV sensor.
Step 04: Dump Out the Remaining Water
The remaining water in the tank should be drained after cleaning. You will need to lower the dump valve into the dump station in order to empty the container. This will allow all remaining water to drain out.
If there is still some debris in your sensors, this will flush them away when you dump the water out of the waste tank. As a result of all these processes, the misreading sensor problems have been resolved.
Method 02: Using a Dishwashing Detergent
If you don’t have a tank cleaning wand, you can still clean the tank sensors with a dishwashing detergent. It has properties that can help to break down and remove any buildup on the tank sensor.
Also, this method is gentle and will not deteriorate the sensors. Here are detailed instructions on how to perform this task. Follow these steps and you should be able to clean your sensors quickly.
Step 01: Dispose of the Wastewater
As a first step, you should empty the contents of your waste tank. The tank can be emptied in various ways, but the most common way is to use a septic tank. In order to accomplish this, you will need to find a septic tank that is large enough to hold the sewage from your RV.
You will need to connect a hose from your RV to the septic tank after you’ve found a septic tank. As soon as the hose is connected, you will need to open the septic tank valve and let all the sewage flow into the tank.
After the sewage has been emptied into the septic tank, you’ll need to shut off the valve and remove the hose. After the hose has been disconnected, you can move on to the next step.
Step 02: Add Fresh Water to the Tank
Once you have dumped your tanks, it is time to clean them. To do this, you will need to fill the container with fresh water.
Filling the tank can be a simple process, as long as you have a water source nearby. The first step is to connect a hose to the fill port, which is usually located near the RV’s sewage dump valve.
The fill port should be opened once the hose is connected, allowing the water to flow through to the tank until the water level reaches the desired level. When the tank is full, close the fill port and unplug the hose. That’s all there is to it.
Step 03: Pour Dishwashing Detergent
After filling the container with water, add half a cup of detergent to the toilet. Be sure to close the toilet valve and flush the toilet.
By doing so, the detergent will be better mixed with the water. Then open the toilet valve to reach the mixture in the waste tank.
The detergent will help break the dirt and sediment. It also helps in loosening any leftover things from the sensors so you can easily wash them off.
The best part about using a dishwashing detergent is that it does not have any harmful effects on the sensors or wires, making it a great choice to clean your septic container sensors.
Step 04: Allow It to Sit
After adding the dishwashing detergent, let it sit inside the container. The sitting time allows the detergent to break down any build-up of grease or grime, making it easy to rinse away.
Dishwashing detergent is also effective at removing any fungi or algae that may be present on the sensors. For best results, be sure to follow the manufacturer’s instructions for the amount of detergent and sitting time.
Step 05: Empty the Tank
The tank should be drained after the specified time has expired. First and foremost, you must connect the RV to a sewer line. If you’re at a campground, this will usually be a connection point near your campsite. Once the RV is connected, open the valve to let the water start draining.
You may want to put down some absorbent material like newspaper or towels around the drain point, just in case there are any drips. Let the water drain until it’s completely empty, then turn off the valve and unplug the RV from the sewer connection.
Flush out the tank with freshwater to remove any residual waste. If done properly, draining the black water tank should be a quick and easy process.
Method 03: Using an Enzymatic Tank Cleaner
An alternative way to clean your sensors is by using an enzymatic cleaner. Enzymatic tank cleaners are formulations that contain enzymes specifically designed to break down organic waste. When introduced into the tank, these enzymes go to work degrading the waste material, which helps to prevent build-up and clogging.
Tank cleaners often contain other ingredients that are helpful in controlling odors and preserving the tank’s smell. Some of these formulations also contain unique surfactants that help to break down waste material even further. As a result, enzymatic tank cleaners can be an effective tool for cleaning tank sensors.
Step 01: Drain the Tank
To begin the process, you will need to drain all the water in your waste tank. You’ll need to find a good spot for draining the tank first. It’s important to choose a spot that is flat and level, and away from any trees, shrubs, or other obstacles. As soon as you’ve located a good spot, you need to open the tank’s valve.
Then, use a hose to connect the tank to a drainage point. Finally, open the valve on the drainage point so that the tank can empty completely. Disconnect the hose and close all the valves once the tank is empty.
Step 02: Pour the Tank Cleaner
Now it is time to pour the enzymatic cleaner into the waste tank. The RV’s black water tank should be filled with fresh water before the cleaning solution is poured in. You can use a water hose for this purpose.
After the tank has been filled with fresh water, pour the cleaning solution into it. The sensor cleaner should mix with the water, so you do not need to worry about stirring it up.
Step 03: Wait for One Hour
After you have poured the tank cleaner into your tank, it is important to let it sit for at least one hour. This will give the cleaner time to break down the waste and dislodge any buildup from the sides of the tank.
If you are cleaning a particularly dirty tank, you may need to let the cleaner sit for longer. However, be sure not to leave it in for more than 12 hours, as this can deteriorate the sensors.
Step 04: Drain It
Once one hour has passed, remove all water and sediment out of the tank. To properly drain the RV holding tank sensors in a dump station, you must open the drain valve.
Having drained the water, you may close the valve. The tank should be flushed with fresh water to eliminate any residual cleaner. It is best to use a hose for this task, as it will clean away any leftover cleaner. As soon as the tank has been rinsed out, it can be emptied as usual.
Method 04: Using Water Mixed With Chlorine Bleach
Water mixed with chlorine may also be used to clean RV holding tank sensors. This is also called the geo method.
It is a powerful oxidizing agent that can break down organic matter, including waste and toilet paper that can clog sensors. When used properly, it can effectively clean sensors and keep them working properly. Here is how to use it:
Step 01: Proceed to Dispose of the Tank
Before tank sensor cleaning, you must first drain all water out of them. The first step in the process is to locate a dump site. RV parks and campgrounds often offer dump sites. Once you’ve found a station, simply pull up and connect your RV’s sewage hose to the station’s dump pipe.
After this, you should open the valve on the black water tank and allow the waste to flow into the pipe. Upon emptying the black water tank, shut off the valve and detach the hose. Be sure to also rinse out your sewage hose with clean water before storing it away.
Step 02: Fill the Tank With Freshwater
After the black water holding tank has been emptied, you can begin to fill it halfway with water. Use a clean, potable water source. This could be a hose from a municipal water supply or a freshwater lake. Avoid using water from a dirty or contaminated source, as this could contaminate your tank.
Connect the hose to your RV’s black tank water inlet. Make sure that the connection is secure and that there are no leaks. Turn on the water supply and allow the tank to fill until it is half full.
Step 03: Add Chlorine Bleach
Once the tank has been filled halfway with clean water, you can now add bleach to it. To do this, remove the cap from the bleach container and take a measuring cup.
Pour about a half cup of chlorine into the RV tank. This amount of chlorine should be enough to clean your sensors. After adding the bleach, place the cap back on the container and set it aside.
Step 04: Wait for Five to Seven Minutes
After adding the chlorine to the tank, let it sit in there for about five to seven minutes. Waiting to add the bleach to clean the sensors of the tank is necessary in order to allow the bleach to have time to function. Bleach is a powerful disinfectant that can kill harmful bacteria and other microorganisms.
However, in order to be effective, it must be given time to work. If you add the bleach and then immediately flush the sensors, you will not give the bleach enough time to do its job. By waiting a few minutes before flushing, you will ensure that the bleach has a chance to disinfect the sensors, making them safer and more effective.
Step 05: Pour It Out
Drain all water and sediment from your waste tank after soaking your sensors for five to seven minutes.
To do this, open the drain valve to allow all dirty water and sediment to get removed from your sensors. Close the drain valve once this process is done to end the cleaning. This will help keep your sensors clean and free of odor.
Safety Precautions When Cleaning RV Waste Tank Sensors
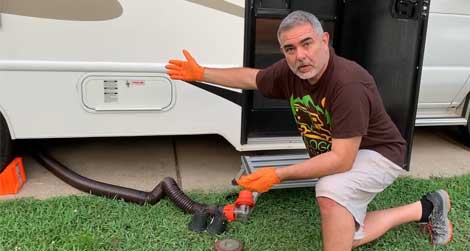
Always remember that these cleaning methods involve chemicals. If you are not careful, then the chemicals can harm you. Here are some safety precautions that you should follow when cleaning your RV black water tank sensor:
Wear gloves and eye protection when using chemicals. This will be enough for both chemicals to not harm you. If possible, have someone help you with this task.
For additional precautions, ensure that the area surrounding your black water tank is thoroughly cleaned in case one of the chemicals spills.
Keep the tank cleaning chemicals in a safe place where children cannot get into them. This will ensure that your black water tank sensor is clean and does not harm anyone who uses them.
Do not mix any cleaning methods together. This can cause chemical reactions that can harm you. Do not pour too much of the chemicals into the black water tank. This can cause chemical spills, which can harm you.
How Do the RV Tank Sensors Work?
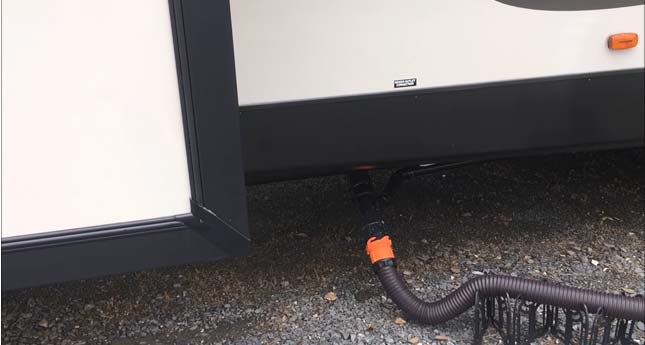
RV waste storage tank sensors are located inside the tank walls. The sensors are installed at different levels on the holding tanks in order to ensure accurate readings.
Sensors are usually mounted at positions 1/4, 1/2, 3/4, and on the top of the black water tank. The sensors continuously monitor the levels, sending a signal to your control panel when it is time to be dumped. For instance, if the wastewater level reaches the 1/4 mark, your monitor will display a low-level signal.
Upon reaching 1/2, you will receive a medium-level signal on your monitor. Whenever it reaches the 3/4 mark, a high-level signal will appear on your monitor.
Lastly, when the water reaches the top of the container, then the black tank sensor probes overflow or full level signal from your monitor.
Benefits of Cleaning the Black Tank Sensor on an RV
When you take proper care of your RV tank sensors, then you can expect to see several benefits. You will also be able to avoid having to make any expensive repairs in the future. Let’s check out some benefits that you can receive when you clean your black water tank sensor:
1. Accurate Readings
If you clean RV holding tank sensors, then the monitor will always give you correct readings. This is because contaminated and gunked-up sensors can cause sensor malfunction, resulting in inaccurate readings on the monitor, which can be frustrating.
The inaccurate levels may lead you to believe that it is time to dump when it isn’t. In order to avoid such a situation, you should clean the sensor in the black water tank.
2. Increased Lifespan of Sensors
When you clean your waste storage tank sensors, then you are ensuring that they have a longer life.
This is because cleaning them helps to remove any grime or gunk that can form on the sensors over time, which will cause them to stop working correctly. Cleaning your sensors helps them to function properly for a longer period of time.
3. Decreased Risk of Black Water Tank Overflows
Overflowing your waste tank can cause a big disaster and is also very unpleasant. If you do not clean your sensors, the risk of overflowing will increase because dirty sensors can provide inaccurate readings on when to empty them.
Maintaining clean sensors reduces this risk, ensuring that your container does not overflow. Accordingly, you should clean your tank sensor regularly.
4. Lower Maintenance Costs
By taking proper care of your waste tank sensors, you will be able to decrease your expenses on maintenance. This is because the sensors will last longer so you will not have to pay to replace them for a very long time.
Cleaning your sensors can help you to save money in the long run. When your sensors are working properly, there is a decreased risk of unexpected repairs, which can be costly.
5. Restored Peace of Mind
Cleaning your sensors will help you to have peace of mind when using them. You can relax knowing that the levels are always accurate, which means that you do not have to be worried about having too much waste in your tank or being underloaded either.
Getting rid of this stressor is as simple as cleaning your RV’s black water tank sensor. So, these are a few of the benefits you can expect to receive from cleaning the black water tank sensor.
If you have not been taking proper care of your sensors, then it is time to start doing so. Make sure to clean them on a regular basis to keep them working properly and help you enjoy all the benefits that come with them.
FAQs:
There are many questions that people ask about RV tank sensors. Here are some of the most frequently asked questions with their answers:
1. How Long Do RV Black Tank Sensors Last?
Most RV black tank sensors are designed to last for around three to five years. However, there are a number of factors that can affect the lifespan of these sensors, such as how often they are used and how well they are maintained. For example, sensors that are used regularly will generally need to be replaced more often than those that are used less frequently.
Besides that, sensors that aren’t properly maintained can experience more wear and tear, so they’d last less time. Ultimately, the best way to ensure that your RV black tank sensor lasts as long as possible is to use it regularly and perform routine maintenance.
2. When Should I Dispose Of My Black Tanks?
Most campers typically wait until their black holding tanks are full before disposing of them. However, this isn’t always the best option, as full tanks are more likely to leak or overflow. Solid waste can start to break down and release odors if it sits in the tank for too long.
For these reasons, it’s generally best to dispose of the tanks every 3-5 days, even if they’re not full. This will help to prevent leaks and keep your campsite smelling fresh. Of course, if you’re planning a long trip or expect to be without hookups for an extended period of time, you may need to empty your tanks more often.
3. What Is the Difference Between Black and Gray Tanks?
The gray water holding tanks and black RV tanks differ from one another. RV black water tank is attached to your toilet and is used to dispose of human waste.
In contrast, gray water tanks contain only wastewater. These holding tanks collect wastewater from sinks and showers.
4. Is It Harmful to Use Toilet Paper for RV Black Tanks?
If you use regular toilet paper, you can harm the waste disposal tank in your RV. While regular toilet paper may be fine for home toilets, it doesn’t break down as easily and can cause clogs in your RV’s tank. This is because the waste disposal system in an RV is different from a home toilet, the tank is typically smaller, and there’s less water used to break down waste.
As a result, using regular toilet paper can cause serious problems. A better alternative is to use RV-friendly toilet paper, which is designed to break down quickly and prevent clogs.
Conclusion:
Sensors on RV black containers can prove useful to RV owners, but only if they are working correctly. Cleaning them can help to stop sensor malfunction and restore their function and make your life easier.
We hope that you now have a better understanding of how to clean RV black tank sensors. Next time you are performing maintenance on your RV, don’t forget to give them a good clean. You can use any method that you feel comfortable with.


I have a 1998 Dutchman camper on a permanent site I would like to get the sensors cleaned I’m pretty sure it hasn’t been cleaned in a few years what is the best way to clean this tank and sensors
Please use a tank cleaning wand.