
Last Updated on April 12, 2023
Every RV must have caulk in order to prevent water damage and leaks, moisture, and other substances that may cause damage.
The caulking is usually placed on areas that are likely to be exposed to water, such as windshields, fiberglass windows, doors, roofs, and skirting.
However, like other types of sealant or adhesive material, it can dry up or crack after a few years due to exposure to uv rays, or extremely cold temperatures. When this happens, you need to replace the caulking as soon as possible.
Before replacing the caulking, you need to know how to clean RV caulking properly. Unless the old caulking is removed, replacing the new caulking can be tricky.
Due to this reason, we will discuss some effective methods that can be used to clean it. Keep reading to learn how it’s done.
Instructions on How to Clean RV Caulking
It can be extremely beneficial as an RV owner, to be aware of the proper way to clean the old caulking in order to make sure that you will be able to reapply it after removing the old one.
You can employ various methods to clean your RV’s rubber roof caulking and others caulk. We will show you some effective ways to do so that are not too much time-consuming.
Method 1: Using Sharp Tool and Heat Gun
One of the easiest ways to clean your RV’s old caulking is by using a sharp tool and heat gun. The following are the steps for cleaning old caulk with a sharp tool:
Step 01: Collect the Tools and Materials
First, get all the materials that you need. You will require a razor knife or putty knife or plastic blades, a disposable paintbrush, a hot air gun. These tools and materials are easy to find in most hardware stores.
Step 02: Prepare the Hot Air Gun
You will need to prepare the hot air gun in order to ensure that it is working properly. This way, you can use it efficiently and effectively.
In order to do this, plug the device into a power outlet or, if you choose a cordless hot air gun, insert the battery into it.
Turn on the hot air gun and allow it to warm up for about a few minutes until it becomes hot enough to apply onto the caulk.
Step 03: Apply Heat onto the Caulk
Once the hot air gun has been prepared, you can begin to use it. Clean the dirty area first. Then apply the heat onto the sealer that’s been applied to your RV roof or other areas.
Be sure to hold the hot air gun at a safe distance from the wax, and do not point the hot air gun directly at your RV. Allow the heat to melt the silicone caulk slightly.
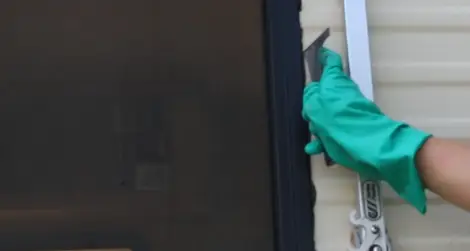
Step 04: Clean the Caulk with a Utility or Putty Knife
After allowing the heat to soften the caulk, you can start scraping it off. To do so, take your razor knife or plastic putty knife and be sure to have a firm grip on it.
While holding it firmly, scrape off the softened caulk. Be careful not to scratch the RV surface during this process.
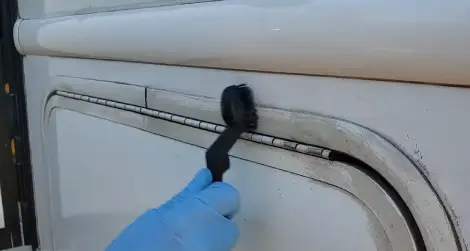
Step 05: Clean off the Remaining Caulk
After you have removed the softened caulk, it’s time to surface clean. You can do so by using a disposable paintbrush. This would allow you to brush off any dust and silicone caulking residue thoroughly and effectively.
Method 2: Mixture of Baking Soda and Vinegar

The second method you can use to clean the sealer is mixing vinegar and baking soda. This method is effective for cleaning sealants on RVs. Below are the steps to follow:
Step 01: Gather All the Necessary Tools and Materials
You will need to gather the materials and tools that you’ll be needing for this process. These include a sponge, baking soda, and vinegar.
To make things easier for yourself, it’s best to collect all these things beforehand so your work would not be interrupted halfway through cleaning the RV sealant.
Step 02: Combine the Baking Soda and Vinegar
Combine these two ingredients in a container. You can do this by adding baking soda into vinegar. You can dissolve two to three teaspoons of baking soda in 100 ml of vinegar.
Make sure that you mix them well to dissolve all the baking soda into the vinegar. This mixture is vital for cleaning your RV’s sealant efficiently and effectively.
Step 03: Apply the Mixture onto the Caulking
After you have successfully mixed vinegar and baking soda together, it’s time to apply the mixture to your RV sealant area. Remove any dirt from the area first.
Then you can make a border with butyl tape on both sides of the sealant before applying the mixer.
Take a sponge or a soft cloth and dip it into this cleaning solution. Be sure to hold it firmly as you wipe down the sealant area.
Step 04: Wait for Absorption to Occur
After you have wiped down the caulking area, wait for absorption to occur. In order for the mixture to be absorbed by the silicone sealant, it should be left for at least 2 to 3 minutes.
When the mixture has fully absorbed into the caulk, you can repeat the process. It will help to soften the caulk, making it easier to remove RV roof sealant or other sealants.
Step 05: Remove the Softened Caulk
After allowing the vinegar and baking soda mixture to sit for a few minutes, you can now remove it. Wipe off the top layer of caulk with a cloth or sponge. Make sure that you wipe it gently in order to prevent any damages from occurring.
Method 3: Using Sealant Remover
If you wish to remove caulks in an easy manner, you should consider choosing this method. The reason is that this method involves no excessive effort and works very well. To use this method, the only thing that you need to do is follow these steps:
Step 01: Obtain All the Necessary Equipment
The first thing you need to do is gather all the equipment and materials you will need in this process. These materials and equipment include a sealant remover, putty knife. After gathering them, you can go on to the next step.
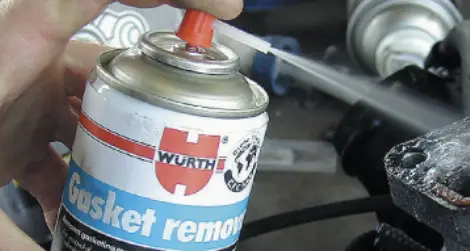
Step 02: Apply Caulk Remover onto Your Caulking Area
Now that you have gathered the equipment and materials, it’s time to get started. Remove the dirt from the area. Take your caulk remover and apply it to your caulking area. Make sure that you cover the entire area with a generous amount of remover.
Step 03: Wait for the Remover to Seep into the Caulking
After applying the remover to your caulking area, you can now leave it for some time. This will allow the remover to seep into the caulking entirely. A quality sealer remover will serve as a magic eraser.
Make sure that this process is done thoroughly to remove all of the existing caulking. Depending on the particular remover you are using, waiting times may vary.
Step 04: Scrape off the Softened Caulk
After allowing the fresh caulk remover to sit, you can now remove it. Take a putty knife and gently rub off all softened caulking from your RV.
Continue doing this until all traces of caulking are obliterated. Afterward, you can apply the new caulking for an effective seal. In this way, you can perform roof repair or other areas.
Safety Precautions When Removing RV Caulk
When it comes to RV caulking, you need to handle this task with utmost care. This is because the substances used to create caulk may cause health problems when they directly contact your skin.
In fact, exposure to some of these substances can even be fatal. That’s why you must take the following precautions advice while working on your RV sealer:
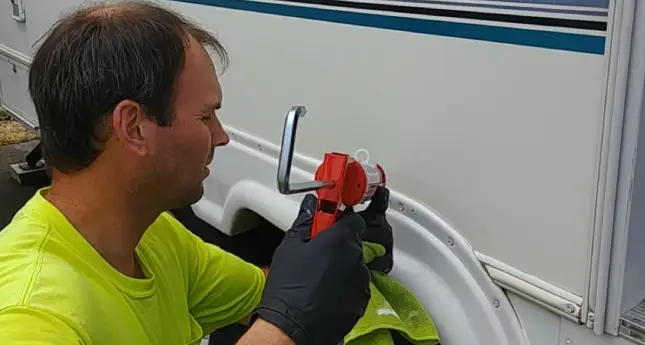
1. Wear Gloves
Wearing protective gloves is the first thing that you should do. The gloves will prevent your hands from coming in direct contact with the caulk.
This way, you would be able to remove the caulk and also add a new sealant with ease and prevent any physical harm from occurring.
2. Avoid Skin Contact with Caulk Substance
In addition to wearing gloves, it’s also best if you avoid direct skin contact with the caulk substance.
Some of these substances may be dangerous and could cause health problems and even death when in direct contact. This is why you should try your very best to protect yourself from any kind of harm that might occur.
3. Wear Mask
For your respiratory protection, it’s best if you wear a mask. This is to ensure that you would not inhale any of those caulk substances.
For instance, some of these substances could be hazardous to your health when inhaled. Others may lead to the development of respiratory problems. It’s best if you avoid breathing in any caulk substance as much as possible.
4. Ventilate the Area
In order to reduce your exposure to caulk substances, you should try and improve ventilation. This is so that these toxic substances would have a way of leaving the area more quickly.
In this way, you can reduce any health risks from occurring. It’s also best if you do this outside while removing caulk substances.
5. Wash Your Hands Thoroughly

Washing your hands after removing the caulk is very important as well. This is to make sure that any caulk substances on your fingers and palms would be washed off properly.
It’s best if you wash them with warm water and soap to completely remove any leftovers from your skin so that they will not be absorbed.
6. Keep Children Away
As much as possible, it’s best if children are kept away from the sealer removal area. This is because they might not be able to take these precautions seriously, which could lead to physical harm later on.
Furthermore, it is advisable not to allow them to come in contact with sealer remover or other sealing materials.
7. Avoid Contact with Your Eyes
In case contact with your eyes does occur, you should immediately rinse them out with water. To avoid any sealer remover contact, you should wear goggles to protect your eyes from coming into contact with it.
8. Use a Putty Knife with Caution
Working with a putty knife requires you to avoid cutting yourself as much as possible. This is because these knives can be sharp, leading to severe lacerations if used improperly. In order to prevent this from happening, it’s best if you always use a putty knife safely.
Frequently Asked Questions:
There are many questions about cleaning sealants in RVs that are frequently asked by many people. Here are some of the most common questions that are being asked:
1. When to Replace RV caulking?
RV caulking usually lasts for a few years. However, this can depend on the environmental conditions and how often you use your RV.
If it cracks or peels off after only a few months, then it might be time to replace the sealer with a new piece. This is because it cannot provide the necessary protection anymore. Generally speaking, it is advisable to replace the caulking twice a year.
2. How Long Does It Take To Remove Caulk?
This will depend on how much caulk you need to remove and how you intend to remove it.
In general, it can take anywhere from 2 to 3 hours, depending on the size of your RV. This is because you would need to allow enough time for the sealer remover to work effectively and break down all those chemical bonds that hold caulking together.
3. Are You Able to Caulk Over Old RV caulk?
If you wish, you can caulk over the old caulking. However, it is not recommended. This is because a new layer of caulking might not adhere to the old layer properly.
Conclusion
After reading this article, you should now have a better understanding of how to clean RV caulking.
Using any of these three methods will easily clean the old sealant on your RV. It can ensure that you would be able to achieve the best results in the end. By learning these essential precautions, you would be able to use sealer remover more efficiently.
Always wear protective gloves first and foremost. This will keep your skin protected from direct contact with caulking substances that might harm your skin.


Good article on the options for removing old caulk. Once that is complete there are several products available for RV owners to repair leaks and extend the life of their roof. We have an older RV with a rubber roof that was starting to leak in some damaged areas. Replaced some caulk around the AC and vents and recoated it myself two years ago with easy to use products made specifically for RVs that I found online and it has been good since. Still have some product left. It’s RV roof magic. The one coat process was a big benefit to me.
Thanks for sharing. 🙂