
Last Updated on May 4, 2023
Being an RV enthusiast involves much more than just hitting the open road. Proper upkeep is essential to protect your beloved vehicle. Disconnecting the battery should always be part of your maintenance and storage routine to ensure things go smoothly.
Although it may seem daunting, disconnecting your RV’s battery is a straightforward task that requires a few simple steps. Turning off all electrical connections, removing the negative cable, and properly storing your battery will keep your RV in top shape until your next big adventure.
Let’s embark on a journey of exploration, and we’ll be here to steer you in the right direction.
How to Disconnect RV Battery For Storage: 7 Steps to Follow
Disconnecting the battery of your RV is an essential step to ensure that it remains in good condition during storage. It helps prevent battery drainage, avoids electrical issues, and increases the battery’s lifespan.
Disconnecting an RV battery for storage consists of the following steps:
Step 1: Gather Necessary Tools and Equipment
You will need a few tools and equipment to disconnect your RV battery for storage to ensure the process goes smoothly. The necessary tools and equipment include:
- Safety gloves and goggles
- Wrench or pliers (depending on the type of battery terminal)
- Battery cleaner or baking soda solution
- Wire brush or scrub pad
- Corrosion inhibitor spray
These tools are essential in ensuring that you safely remove the battery from your RV without causing any damage to yourself or the vehicle. Safety gloves and goggles protect your hands and eyes from any acid that may splash out of the battery during removal.
A wrench or pliers will be useful when loosening the bolts that hold the battery cables in place. According to your RV’s type and model, you may need either a wrench or pliers to loosen these bolts.
A battery cleaner or a baking soda solution is necessary for cleaning any corrosion buildup around the terminals. A wire brush or scrub pad will help you scrub off any dirt, grime, or rust that may have accumulated on the terminals.
Finally, a corrosion inhibitor spray should be used after cleaning to prevent future corrosion buildup. This spray helps prolong your battery’s lifespan by preventing rust and other forms of corrosion from forming on its surface.
Step 2: Locate the Battery
Locating the battery in your RV is essential when disconnecting it for storage.
Typically, the battery is located in one of two places: inside a compartment on the outside of the RV or under the vehicle’s hood.
If your battery is located outside, look for a door or panel that can be opened to access it. This compartment is usually near the front of the RV and may have a latch or lock that needs to be released before opening.
On the other hand, if your battery is under the hood, you must pop it open and locate it. The location may vary depending on your RV’s make and model, but it’s typically found near the engine block.
Once you have located the battery, take note of its position and orientation. This information will come in handy when it’s time to reconnect it after storage.
It’s important to exercise caution when handling batteries as they contain corrosive materials and can produce dangerous gasses. Wear gloves and eye protection when working with batteries and avoid smoking or using open flames nearby.
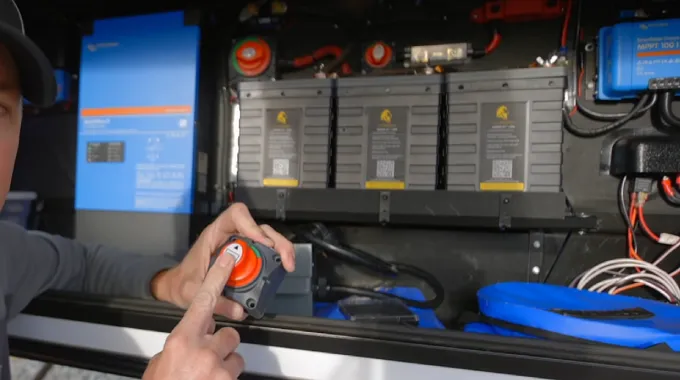
Step 3: Turn off All Electrical Connections and Accessories

Before disconnecting your RV battery for storage, it is crucial to disconnect all electrical connections. This step ensures that no devices or systems are drawing power from the battery, which could lead to drainage and reduce its lifespan.
To begin with, unplug all your electronics and accessories. Start by turning off all lights, fans, appliances, and other electronics that may be running in your RV. Next, unplug any devices that are connected to outlets or charging ports.
It’s also important to ensure that the RV’s engine is turned off before proceeding with disconnecting the battery. This eliminates any electrical shock or injury risk while handling the battery terminals.
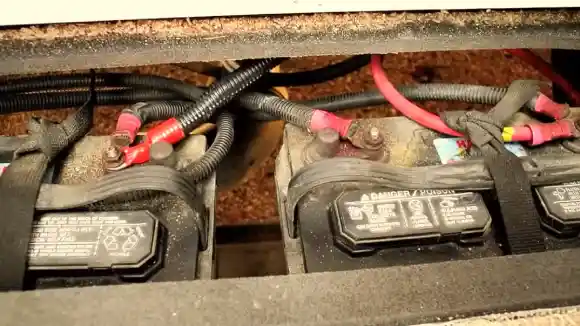
Step 4: Remove the Negative Cable from the Battery Terminal
This step is crucial as it helps prevent any electrical discharge or accidental short-circuiting that could damage your RV’s electrical system.
To begin, you will need a few tools, such as a pair of pliers or a wrench to loosen the negative cable clamp nut. Once you have gathered all the necessary tools, locate the battery in your RV. Your RV’s battery might be under the hood or inside a compartment outside or inside.
Before removing the negative cable, ensure that all electrical connections and accessories are turned off. This includes lights, fans, appliances, and other devices that can drain power from your battery during storage.
Next, use your pliers or wrench to loosen the nut on the negative cable clamp. Once loosened, gently pull the clamp away from the battery terminal. Be careful not to touch any metal surfaces with your hands or tools, as this can cause a short circuit.
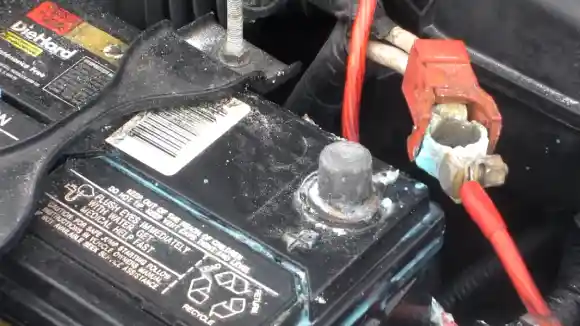
Step 5: Inspect the Battery and Terminals for Corrosion or Damage
Properly preparing your RV for storage is essential to ensure that your vehicle is in tip-top shape when you’re ready to hit the road again. One of the most critical steps is to inspect the battery and terminals for signs of corrosion or damage.
Corrosion can cause poor connections and reduce performance, while the damage can lead to issues due to exposure to extreme temperatures or physical impact. To get started, ensure the power is off, then locate the battery in your RV.
Most RV batteries are located outside the vehicle or inside a bench seat. Once you’ve found the battery, remove the cable and inspect the terminals for any white powdery substance or other signs of corrosion.
Don’t forget to check for cracks or leaks in the casing, as these could be signs of physical damage. If corrosion is present on the battery or terminals, cleaning them before storing them is important.
Step 6: Clean the Battery and Terminals (if needed)
You will need a wire brush, baking soda, water, and gloves to clean the battery and terminals. First, use the wire brush to remove any dirt or debris from the battery. Then mix a tablespoon of baking soda with a cup of water and apply it to the terminals using a brush.
The mixture will neutralize any acid buildup on the terminals.
After applying the baking soda mixture, rinse off the terminals with water and dry them using a clean cloth. If any corrosion is present on the terminals, use a terminal cleaner to remove it.
Cleaning your RV’s battery and terminals regularly can help prolong its lifespan by preventing corrosion that can lead to permanent damage. It is also essential to keep your batteries charged during storage using either a trickle charger or a solar panel.
Step 7: Store the Battery in a Dry, Clean, and Cool Place
To keep your RV battery in great condition, give it some TLC by storing it in a cozy and comfortable environment. Choose somewhere dry to protect against moisture and liquid damage, clean of dirt or grime with no extreme temperatures that could cause harm.
A dry environment is essential because moisture can cause corrosion on the battery terminals and reduce their lifespan. Additionally, a clean area will prevent any dirt or debris from accumulating on the battery and causing damage.
Temperature is also an important factor when storing your RV battery. Extreme heat or cold can affect the battery’s performance and shorten its lifespan. Therefore, storing the battery in a cool place with a temperature range between 32°F and 80°F.
Consider investing in a battery maintainer or trickle charger to ensure that your RV battery stays in good condition while in storage. These devices will always keep your battery charged without overcharging it, which can also damage the battery.
Lastly, ensure you store your RV battery away from any flammable materials such as gasoline or propane tanks. This will reduce the risk of fire hazards and keep your RV safe during storage.
Reasons Behind Disconnecting the RV Battery For Storage
Disconnecting your RV battery is essential for properly storing your vehicle. You should disconnect your battery before putting it away for several reasons.
ONE: Prevents Battery Drainage
Disconnecting the RV battery during storage is crucial to ensure that your battery stays effective and is ready for use when you need it again. One of the main reasons to disconnect the battery is to prevent battery drainage.
Even when your RV is not in use, electrical components still continue to draw power from the battery. These include alarms, clocks, and other devices with a standby mode.
By disconnecting the battery, you can prevent these devices from draining the battery completely. This is especially important if you plan on storing your RV for an extended period. A dead battery can be frustrating and costly to replace, so this simple step can save you time and money in the long run.
TWO: Avoids Electrical Issues
It is important to disconnect the RV battery before storing it to avoid electrical issues. Leaving the battery connected can cause a slow discharge, leading to a dead battery when you are ready to use your RV again.
Leaving the battery connected can also lead to electrical issues such as short circuits or power surges.
THREE: Increases Battery Lifespan
By storing your RV battery correctly, you can help extend its lifespan and prevent any unnecessary damage. Heat and moisture can be detrimental to a battery’s life, so storing it in a cool and dry place is essential. When not in use, disconnect the battery to prevent it from overheating and draining power.
Taking these simple precautions can make all the difference when it comes to the performance and longevity of your RV battery. So, the next time you store your RV, take these steps to ensure your battery is in tip-top shape and ready for your next adventure.
Tips for Maintaining RV Batteries During Storage
Proper maintenance is key if you want your RV batteries to keep running smoothly for years. Here are some insider tips on how to ensure the lasting health and performance of your trusty power supplies:
- Keep Batteries Charged with a Trickle Charger or Solar Panels: Keeping your RV batteries charged during storage is essential, as leaving them uncharged for extended periods can cause permanent damage. You can use a trickle charger or solar panel to maintain the battery’s charge level.
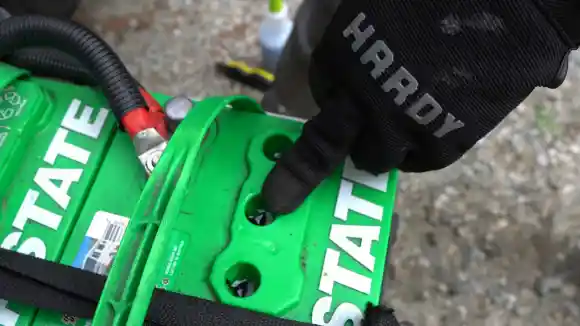
- Check the Water Levels in Flooded Lead-Acid Batteries Regularly: If you have flooded lead-acid batteries, it is important to check the water levels regularly. Low water levels can damage the battery plates and reduce their lifespan. Make sure to add distilled water if needed.
- Consider Investing in a Smart Charger: A smart charger is designed to automatically charge and maintain your RV battery. It adjusts the charging rate based on the battery’s condition, preventing overcharging and undercharging.
- Remove Batteries from RV if Not Used for an Extended Period: If you’re not planning on using your RV for an extended period, it’s best to remove the batteries and store them separately. This will prevent any parasitic loads from draining the battery and causing irreversible damage.
How Long Will An Unused RV Battery Hold Its Charge?
An unused RV battery’s capacity depends on several factors, like its age, storage conditions, and maintenance. Like car batteries, a relatively new and well-maintained RV battery can hold a charge for weeks or even months when disconnected from any power draws.
However, older batteries or those that have been improperly stored may lose their charge much faster. Generally, checking and recharging an unused RV battery every three to six months is recommended to ensure it remains in good condition and is ready to use when needed.
It is important to note that extreme temperature changes and frequent deep discharging can also significantly reduce an RV battery’s lifespan and ability to hold a charge for an extended period. Proper care, maintenance and a regular charging schedule are key to maximizing your RV battery investment.
Is It Necessary to Drain the RV Battery Before Storing It?
For RV owners, proper battery maintenance is essential to ensure optimal performance and longevity. While it may seem tempting to drain the battery completely before storing it, remember that this can cause irreversible damage, especially to flooded-cell lead-acid batteries.
Draining the battery beyond 50% of its capacity can already cause damage, with 80% being the limit before it’s too late. To avoid this outcome, it’s recommended to carefully monitor the battery’s state of charge during use and recharge it regularly to maintain its health.
Regular cleaning and inspection can also help ensure that your battery lasts for years to come. So, take proper care of your RV battery to avoid future headaches and costly replacements.
Secure Your RV’s Future: Properly Disconnect & Store RV Batteries
As with anything in life, there always comes an end, and for your RV battery, it’s no different. However, the way it reaches its conclusion depends on how well you maintain it during storage. Take the necessary steps to maintain your RV battery and you’ll be able to keep it going longer.
One of the best ways to extend battery life is by charging it using a trickle charger or solar panel. Don’t forget to check water levels regularly in flooded lead-acid batteries, invest in a smart charger, and remove the batteries from your RV if they are not used for an extended period.
By following these tips, you can ensure that your RV battery remains in good condition and is always ready to use when you need it. So remember, taking care of your RV battery is just as important as taking care of your RV itself.

