Last Updated on May 3, 2023
Are you an avid RV enthusiast? If so, you know the importance of having a reliable battery system to power your adventures. But what happens when your RV batteries lose their charge at different rates? This can cause major headaches and cut your trip short.
Luckily, there’s a solution: equalizing your RV batteries. The process of equalizing RV batteries involves disconnecting all loads and chargers and checking battery water levels and charging status. Then, connect the batteries in parallel, set the voltage, and monitor the process.
It will help you achieve a successful equalization process. To ensure your RV batteries are in perfect equilibrium, follow our easy guide offering step-by-step instructions.
How to Equalize RV Batteries | Easy 5 Steps
Equalizing RV batteries is crucial to ensuring the battery bank’s longevity and performance. The process involves balancing the charge levels of all batteries in the bank, ensuring they have equal voltage and capacity.
Tools and Equipment Needed
You will need tools and equipment to complete the process of equalizing your RV batteries. These items are essential for ensuring the job is done correctly and safely.
1. Battery Hydrometer:
You will need a good quality battery hydrometer to check each cell’s specific gravity. This tool measures the density of the electrolyte solution in each cell, which indicates the battery’s state of charge.
2. High-quality Battery Charger:
Another important piece of equipment is a high-quality battery charger. This device should be capable of delivering a constant voltage of at least 14 volts and have an output of around 10 amps per hour. It should also be able to provide a “float” charge once the equalization process is complete.
3. Voltmeter or Multimeter:
You’ll also need a voltmeter or multimeter to accurately measure the voltage across each battery cell. This tool helps ensure that all cells receive an equal amount of charge during the equalization process.
4. Jumper Cables:
A set of jumper cables will also come in handy when connecting your batteries in parallel. Make sure they are long enough to reach all your batteries comfortably.
With these tools and equipment, you can safely and effectively equalize your RV batteries, ensuring optimal performance and longevity for your power system.
Step 1: Disconnecting All Loads and Chargers
To properly equalize your RV batteries, it is important to disconnect all loads and chargers before beginning the process. This ensures that no external factors affect the batteries during the equalization process.
Disconnecting all loads means turning off all appliances, lights, and other electrical devices powered by your RV batteries. This includes turning off the main power switch to your RV. You should also unplug any chargers or other devices connected to the battery bank.
Once everything is turned off and unplugged, you can disconnect the battery bank from your RV. This involves removing any cables or wires connecting the batteries to your RV’s electrical system.
Step 2: Checking Battery Water Levels and Charging Status
Checking your RV batteries’ water levels and charging status is essential in equalizing them.
To check the water levels, remove the vent caps from each battery cell and inspect the level of electrolyte fluid. The fluid should cover the lead plates inside each cell. If it is below this level, add distilled water until it reaches the appropriate level.
Check the charging status of each battery by using a voltmeter. Connect the positive probe to the positive terminal of a battery and the negative probe to its negative terminal.
When a battery is fully charged, it should read between 12.6 and 12.8 volts. If a battery reads less than 12 volts, it may require charging before proceeding with equalization.
It’s important to note that if any of your batteries are damaged or cannot hold a charge, they should be replaced before attempting to equalize them. By checking these two factors before beginning the equalization process, you can ensure that your batteries are ready for optimal performance and longevity.
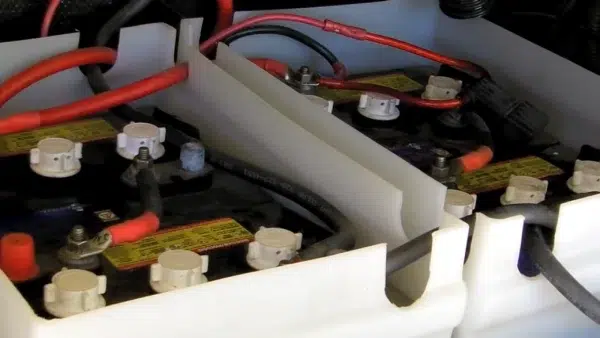
Step 3: Connecting the Batteries in Parallel
To connect the batteries in parallel, you will need a set of battery cables with connectors on each end. The cables should be long enough to reach all of your batteries. You will also need a wrench or pliers to tighten the connectors.
Connect the positive terminals of all the batteries using one cable and the negative terminals using another cable. Ensure you use the correct polarity when connecting the cables to avoid damaging your batteries.
Once all of your batteries are connected in parallel, they will start to equalize naturally as they balance out their voltage levels. This process can take several hours or even days, depending on how far apart your battery voltages were before you started equalizing them.
Step 4: Setting the Voltage
When equalizing RV batteries, one of the most important steps is setting the voltage correctly. This ensures the process is done safely and effectively without damaging your batteries.
Set your charger to deliver a constant voltage of around 16 volts. This will vary depending on your batteries’ specific type and size, so check manufacturer recommendations if you’re unsure.
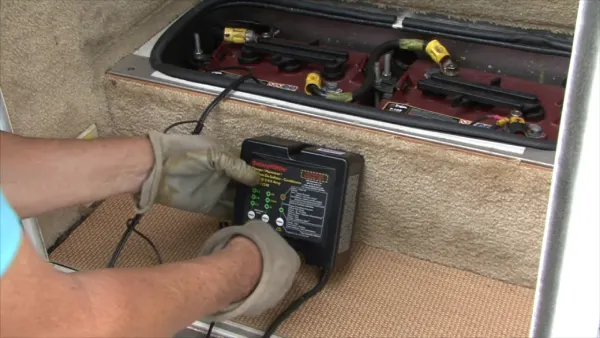
Step 5: Monitoring the Process
While monitoring the process, one important aspect to remember is to check the voltage levels regularly. The battery manufacturer recommends maintaining the voltage at a specific level for a particular duration. You should see the voltage slowly rise as the batteries charge and equalize.
Keep an eye on each individual battery’s voltage as well. If one starts to rise faster than others, it may indicate an issue with that particular battery.
It is also crucial to keep an eye on the temperature of the batteries during equalization. High temperatures can damage your batteries, so it is essential to ensure they don’t get too hot.
Check for any signs of gas buildup or excessive bubbling in the battery cells. If you notice any of these signs, it’s best to stop the equalization process immediately and seek professional assistance.
While monitoring, it’s also important to avoid overcharging your batteries. Overcharging can cause severe damage to your RV’s electrical system and even lead to a fire hazard.
Safety Precautions to Consider for RV Batteries Equalization
When it comes to equalizing your RV batteries, safety should always be your top priority. Here are some important precautions to consider before starting the process:
- Protective Gear: Always wear protective gear such as gloves and eye protection when working with batteries. This will help prevent any acid burns or other injuries.
- Well-Ventilated Area: Make sure you work in a well-ventilated area to avoid inhaling any harmful gasses that may be produced during the equalization process.
- Avoid Sparks and Flames: Keep all sparks and flames away from the battery bank while working on it, as batteries produce flammable gases that can ignite if exposed to sparks or flames.
- Disconnect All Loads: Before starting the equalization process, ensure all loads are disconnected from the battery bank to avoid any electrical shock or damage to equipment.
- Use Proper Tools: Use only proper tools and equipment when working on your RV batteries. Avoid using tools made of conductive materials such as metal, which can cause short circuits and other hazards.
By following these safety precautions, you can ensure a safe and successful equalization process for your RV batteries. Remember to always prioritize safety over speed or convenience when working with batteries!
Maintenance Tips for RV Batteries After Equalization
After equalizing your RV batteries, there are 3 tips you need to follow to ensure they are functioning properly.
Tip 1: Disconnecting the Battery Bank
You must locate the main battery disconnect switch to disconnect the battery bank. This switch is typically located near the batteries or conveniently inside your RV. Once you have located the switch, turn it off to disconnect all battery power.
It is important to note that some RVs may have multiple battery banks, so identify and disconnect all of them before proceeding with equalization.
Tip 2: Reconnecting Individual Batteries
After equalizing your RV batteries, reconnect them properly. This step ensures that each battery functions optimally and the system works efficiently. Here are the steps to follow:
- Begin by identifying which battery is connected to which cable. You can label them or take a picture before disconnecting them.
- Reconnect the positive cable first, followed by the negative cable. Ensure that the connections are tight and secure.
- Repeat this process for all the batteries in your RV until they are all reconnected.
- Once you have reconnected all the batteries, turn on your RV and check if everything works correctly.
It’s essential to note that if any cables or connections appear damaged or corroded, replace them before reconnecting the batteries. It’s also crucial to ensure that each battery has enough water levels after equalizing them.
Tip 3: Checking Battery Water Levels Again
Checking the water levels of your RV batteries is essential after you equalize them. This is because the equalization process can cause water to evaporate from the batteries, which affects their performance and lifespan.
You must remove the battery caps and inspect each cell to check the water levels. The water level should be above the top of the plates but not too high that it touches the bottom of the cap. If you notice that any cell has low water levels, fill it up with distilled water.
It’s important to use distilled water instead of tap water because it contains minerals and impurities that can damage your batteries. Also, avoid overfilling your batteries, which can cause electrolyte overflow during charging.
After adding distilled water, replace the battery caps and clean any spills or drips around them with a damp cloth. You should also wipe down the surface of your batteries to remove any dirt or debris.
Regularly checking and maintaining your RV batteries’ water levels will help prolong their lifespan and ensure they perform optimally when you need them most. It’s recommended to check your battery’s water levels every three months or before heading out on a trip.
How Batteries Become Unequal? 2 Reasons
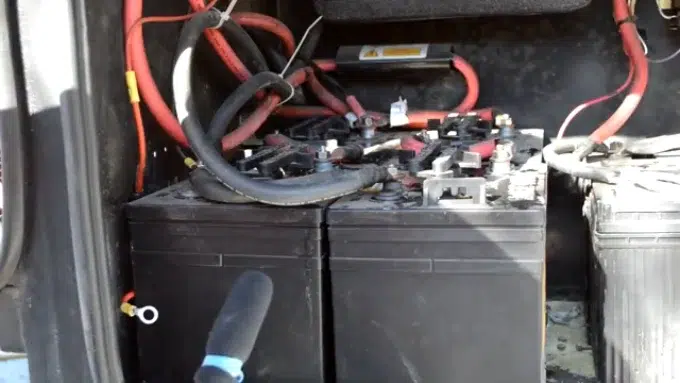
Batteries are an essential part of any RV system. They provide power for various devices and appliances, making them crucial for a comfortable camping experience.
However, over time, RV batteries can become unequal in terms of their charge level, which can lead to problems with power delivery and battery life. There are several reasons why RV batteries become unequal.
1. Difference in Usage Between RV Batteries:
One of the most common is the difference in usage between batteries. For example, if one battery is used more frequently than the other, it will discharge faster and require more charging cycles to reach full capacity.
2. Batteries Become Unequal:
Another reason why batteries become unequal is due to differences in temperature or age. Batteries exposed to extreme temperatures or in use for longer periods may lose their ability to hold a charge at the same rate as newer batteries.
Unequal batteries can cause problems with charging and lasting. If one battery is significantly weaker than the others, it may not be able to keep up with the demands of the system, causing other batteries to pick up the slack. This can lead to the premature failure of all the batteries in your system.
How often should you equalize RV batteries?
Equalizing RV batteries is crucial as it helps extend their lifespan while maintaining their performance efficiency. Experts recommend equalizing batteries at least once every month or once or twice a year, depending on the usage and condition.
It is important to note that over-equalizing batteries can be harmful and reduce lifespan. Thus, monitoring the battery’s condition regularly can help determine equalization needs.
What voltage do you equalize a battery?
Batteries are charged with a slightly higher voltage than their nominal voltage level during equalization. Typically, the equalization voltage for most lead-acid batteries is 2.50V per cell. The voltage level of the battery is closely monitored to prevent overcharging, which can lead to irreversible damage.
What is the equalization voltage for a 12v battery?
A 12v battery can be equalized by increasing the charge voltage to 14.6 volts every 10 discharge cycles for at least one hour. Determining the specific requirements for each battery is essential, as overcharging can damage the battery’s internal components.
It is always recommended to consult with a professional before performing any maintenance on the battery to prevent any operational issues. By following the manufacturer’s recommendations, you can ensure that the battery performs at its optimum level and maintains its longevity.
Equalize Your RV Batteries for Optimal Performance and Battery Health
Equalizing RV batteries is an essential process that every RV owner should know how to do. Understanding the different types of batteries and how they become unequal is crucial to ensure your RV battery bank is in good condition for optimal performance.
Before starting the equalization process, take all necessary safety precautions and have the right tools and equipment. Always recheck battery water levels to ensure everything is working correctly.

