Last Updated on June 11, 2023
A comfortable bathroom system is an important component of any successful RV trip. The RV holding tank lies at the center of this system, holding all of the waste generated during bathroom use. Regrettably, the holding tank may begin to leak over time, resulting in potentially hazardous and unpleasant circumstances.
As a result, fixing a leaking RV holding tank isn’t something that can be overlooked during RV maintenance. To tackle this essential maintenance task, there are a few steps you’ll need to follow. First, identify the source of the leak. Then, empty the holding tank. Finally, patch any small cracks or holes in the tank.
This post will walk you through each step of maintaining your RV’s bathroom system.
How to Fix a Leaking RV Holding Tank: Detailed Steps

A leaking RV holding tank can be a frustrating issue for any camper to face. Fortunately, you can take a few steps to fix the problem and return to enjoying your trip. Identifying and sealing the leak properly are the keys to successfully repairing a leaking RV holding tank.
The steps are as follows:
Step ONE: Identifying the Source of the Leak
Identifying the source of a leak in an RV holding tank can be daunting, but it is necessary to fix the problem effectively. Ignoring a leaking holding tank can lead to unpleasant odors and even more significant damage to your RV’s plumbing system.
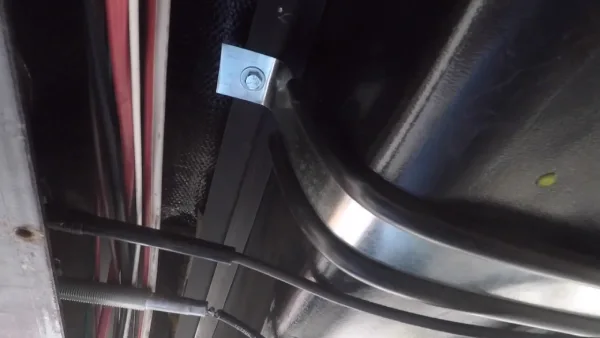
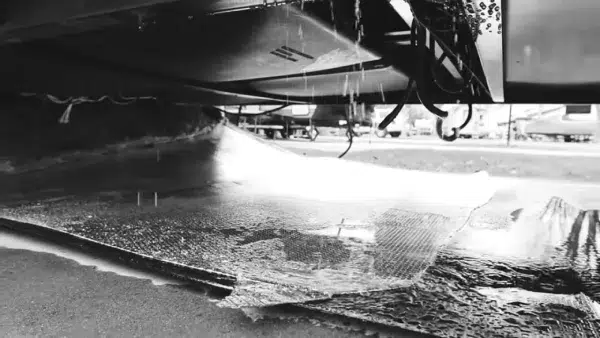
One way to identify the source of the leak is by visually inspecting the tank for any visible cracks or holes. You may also notice water dripping from underneath your RV, which could indicate a leak in the holding tank.
Another way to detect leaks is by using a flashlight and checking all connections and seals around the tank. If you are still unsure where the leak is coming from, add food coloring or dye to the water in your holding tank. This will help you pinpoint where exactly the water is escaping from.
After identifying the leak, gather the necessary tools and materials to fix it.
Tools and Materials Needed
Ensure you have the necessary tools and materials to complete the job. Don’t let a leak put a damper on your adventures. Here are some of the items you will need:
- Rubber gloves
- Safety goggles
- Wrench or pliers
- Screwdriver
- Putty knife
- Sandpaper or emery cloth
- Epoxy putty or sealant designed for plastic tanks
Step TWO: Emptying the Holding Tank
Emptying your RV’s holding tank is essential in fixing a leaking RV holding tank. Before you can begin repairing any cracks or holes, you must first empty the tank completely. Here are some steps to follow:
- Locate the Dump Station: The first step is to locate a dump station where you can empty your holding tank. Many campgrounds and RV parks have dump stations for their guests.
- Position Your RV: Once you have located a dump station, position your RV so that the holding tank is directly above the sewer inlet.
- Open the Valves: Next, open the gray water and black water valves to allow all the waste to flow out of the holding tank and into the sewer system.
- Rinse Out Your Tank: After all of the waste has been emptied from your holding tank, it’s a good idea to rinse out the inside of the tank with clean water using a built-in flush system or an external hose connection.
- Close Valves: Once the waste has been emptied and rinsed from your holding tank, close both valves.
Step THREE: Patching Small Cracks or Holes in the Tank
Once you have emptied the holding tank and identified where the leak is coming from, it’s time to patch any small cracks or holes. First, ensure the area around the crack or hole is clean and dry.
To make the patch stick, sand the area lightly with sandpaper. Next, apply a waterproof sealant over the damaged area.
Many sealants, such as silicone or epoxy, are available on the market. Be sure to choose one that is specifically designed for use on plastic tanks.
Once you have applied the sealant, cover it with a patch made from fiberglass mesh tape or PVC repair tape. Ensure the patch extends beyond the damaged area by at least an inch on all sides. Press down firmly on the patch to ensure it adheres well to the sealant.
Allow ample time for the sealant and patch to dry completely before testing your repair job. You may want to fill your RV’s holding tank with water and let it sit for several hours while checking for any leaks.
It is important to note that this method is best used for small cracks or holes in your RV’s holding tank. If you have larger damage, such as a split or multiple cracks, it may be necessary to replace that section of your tank entirely.
Step FOUR: Tank Section Replacement (Optional)
Replacing that tank section may be necessary if your RV’s holding tank has a large crack or split. First, you will need to purchase a replacement section of the tank. Check the damaged area’s size and shape carefully before buying a replacement piece.
You can find replacement tanks at RV supply stores or online retailers. Next, you must empty the holding tank completely and disconnect any plumbing or hoses connected to the damaged section. Use a saw or other cutting tool to remove the damaged section of the tank carefully.
Once you have removed the damaged section, clean up any remaining debris or adhesive from around the edges of the opening. Then, fit the replacement section into place and secure it with an adhesive designed for use with holding tanks. Follow all instructions provided by the adhesive manufacturer carefully.
Finally, reattach any plumbing or hoses that were disconnected earlier and test your system for leaks before using it again.
The Best Way to Prevent RV Holding Tanks From Leaking In the Future
Keeping your RV holding tank in good condition is essential to prevent leaks and avoid costly repairs. Keep your RV holding tank leak-free with these tips:
1. Regular Maintenance and Inspection
Regular maintenance and inspection of your RV holding tank are essential to prevent future leaks and avoid costly repairs. You can keep your tank in good condition and extend its lifespan by following a few simple steps.
Firstly, check the seals around the tank regularly for signs of wear and tear. These seals are typically made from rubber and can deteriorate over time due to exposure to sunlight, heat, and chemicals. If you notice any cracks or gaps in the seals, replace them immediately to prevent leaks.
Next, check the tank itself for abrasion or damage. Look for cracks or punctures on the tank’s surface and any areas where the tank may be bulging or deformed. If you notice any damage, immediately repair it before it worsens.
Thirdly, use compatible chemicals in your RV’s holding tank system. Certain chemicals can corrode or degrade the materials used in your tank, leading to leaks or other problems. Always read the labels carefully before adding any chemicals to your system.
Upgrade your RV’s holding tank system if you frequently experience leaks or other issues. Modern tanks are often made from stronger materials and feature improved sealing mechanisms that can help prevent leaks and other problems.
2. Proper Disposal of Waste
Proper waste disposal is crucial in keeping your RV holding tank free of leaks. When waste is not disposed of properly, it can cause damage to the tank and increase the risk of leaks. Always use designated dump stations for your RV’s holding tank to properly dispose of waste.
These stations are specifically designed to handle and dispose of RV waste safely and efficiently. Never dump your RV’s holding tank in a regular toilet or sewer system, as this can cause blockages and damage to the system.
It’s also essential to use the right type of toilet paper that is designed for use in RVs. Regular toilet paper can clog up the holding tank and cause damage over time. Look for RV-specific toilet paper that is biodegradable and breaks down easily in water.
3. Upgrading Your RV’s Holding Tank System
If you’re tired of dealing with leaking RV holding tanks, it might be time to consider upgrading your RV’s holding tank system. Upgrading your system can prevent future leaks and provide a more efficient and convenient way to manage waste on the road.
Installing a larger tank is one option for upgrading your RV’s holding tank system. This can be especially useful if you frequently travel long distances or spend extended periods camping without access to dump stations. A larger tank means fewer trips to the dump station and less hassle overall.
Another option is to install a more advanced monitoring system for your holding tank. This allows you to track your tank’s fullness so you know when to empty it before any potential leaks occur. Some monitoring systems even come with mobile apps that allow you to check your tank levels remotely.
If you’re looking for a more environmentally friendly option, consider installing a composting toilet or converting your existing toilet into one. Black water tanks don’t need to be used when composting toilets break down waste naturally. Plus, they’re odorless and require much less water than traditional flushing toilets.
Finally, consider installing a vacuum flush toilet system if you’re willing to invest in the latest technology. These systems use powerful suction to remove waste from the bowl, reducing the water needed and eliminating clogs and odors.
Can You Patch An RV Black Water Tank?
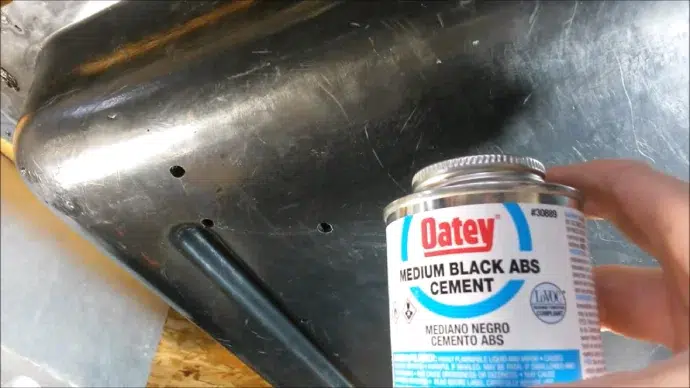
No one wants to deal with a leaky black water tank in their RV. Luckily, it’s not impossible to patch it up yourself with the right materials and techniques. The key is to start with a thorough cleaning and drying of the affected area using ABS cleaner.
From there, apply a layer of black ABS cement and press a fiberglass screen patch into it.
After a brief dry time, an additional coat of black ABS cement should be applied over the screen patch to cover and further secure it. This process can effectively repair small cracks or punctures in the RV black water tank, restoring its functionality and prolonging its lifespan.
It is important to note that any repairs done to the tank should be monitored closely and checked regularly to ensure their effectiveness and prevent further damage or leaks.
Are RV Black Water Tank Leaks Caused By Leaving The Valve Open?
Leaving the black water tank valve open is a serious offense that can cause a multitude of problems, including leaks. When the valve is left open, the liquid wastes flow out freely, leaving the solid wastes with nowhere to escape.
The solids accumulate in the bottom of the tank and can eventually form a clog. As a result, pressure builds up, leading to leaks and other related issues. Moreover, if left open for too long, the tank can fill to the point where the liquid wastes overflow and cause an unpleasant mess.
Therefore, it is always essential to close the black tank’s valve completely after emptying it, to prevent leaks and other problems.
How Often Should You Dump Your RV’s Black Tank to Prevent Leaks?
Taking care of your RV’s black tank is crucial for maintaining its longevity and functionality. According to experts, emptying the tank within a week of it being full is recommended, especially if you’re planning an extended camping trip.
Neglecting to do so can result in clogs and backups, unpleasant odors, and costly repairs. To prevent all of these issues, it’s essential to use high-quality chemicals like bacterial enzyme treatments to break down waste and avoid sticking to the interior of the tank.
Establishing a routine of regular black tank cleanings can prevent potential issues and ensure a hassle-free travel experience. Don’t take any chances regarding your RV’s black tank. Prioritize its maintenance to enjoy many joyful adventures in the future.
Don’t Be Intimidated by Leaking RV Holding Tanks
There’s no need to feel intimidated when fixing a leaking RV holding tank. With the right tools and knowledge, anyone can tackle this repair. Finding the leak and emptying the holding tank are crucial steps to fixing a leak, whether a small crack or a damaged section.
But don’t wait for a leak to happen before taking action. Regular maintenance and inspection are key to preventing leaks and preventing damage. Following the steps outlined in this post, you can confidently repair a leaking RV holding tank and avoid future problems.
Remember that prevention is always the best medicine, so inspect and maintain your tank regularly.

