Last Updated on April 12, 2023
If you’re looking to add some excitement to your RV experience, installing LED strip lights on your awning roller can do the trick. Not only will this upgrade make your outdoor living space more inviting, but it also adds an element of safety and convenience during nighttime activities.
Whether hosting a party or enjoying a quiet evening under the stars, LED strip lights can set the perfect ambiance for your RV adventures.
The installation process of LED strip lights on your RV awning roller is quite simple. You need to gather supplies, clear off any dirt or debris on the installation area of your awning roller, and measure out how much longer it needs for each side.
Then attach those strips with care, and lastly, connect that power supply as easily as could be. Let’s dive into more details so you can get started making every camping trip even brighter.
How to Install Led Strip Lights On RV Awning Roller: 7 DIY Steps
Adding led strip lights to your RV awning roller is the perfect way to light up those starry nights. Follow this easy step-by-step guide and you’ll be ready for some cozy outdoor ambiance in no time.
Step 1: Gather the Required Materials
To install LEDs on your RV awning roller, you will need the following materials:
- LED strip lights: These are flexible strips of LED lights that come in various lengths and colors. They are perfect for illuminating your RV awning roller at night.
- Power supply: You will need a power supply to connect the LED strip lights to electricity. Make sure you have a power supply that can handle the voltage and amperage of your LED strip lights.
- Connectors and wires: You will need connectors and wires to hook up the power supply to the lights. Make sure you have the right size connectors and wires for your specific LED strip lights.
- Adhesive tape or clips: You will need clips or adhesive tape to attach the LED strip lights to the RV awning roller. Choose strong adhesive tape or sturdy clips that can withstand outdoor conditions.
Once you have gathered all these materials, you can move on to preparing your RV awning roller for installation.
Step 2: Clean the Area Where You Want to Install the LED Lights
Before installing the awning roller LED strip lights, it is important to clean the area where you plan to install them. This will ensure that the adhesive tape or clips used to attach the lights will stick properly and securely.
To clean the area, use a mild soap and water solution to remove any dirt or debris. Be sure to dry the area thoroughly before proceeding with the installation. Avoid using harsh chemicals or abrasive materials that could damage the surface of your RV awning roller.
Step 3: Measure the RV Awning Roller’s Length
Before installing LED light strips on your RV awning roller, it’s important to measure the length of the roller. This will help you determine how much LED strip you need to cut and ensure that the installation is properly aligned.
You can use a tape measure or ruler to figure out how long your RV awning roller is. Start at one end of the roller and measure all the way to the other end. Be sure to take accurate measurements, as this will affect how well your LED strip lights fit on the roller.
It’s also important to consider any obstacles or obstructions that may be in the way when measuring your RV awning roller. For example, if brackets or supports are attached to the roller, you’ll need to measure around them to get an accurate measurement.
Step 4: Cut the LED Strip to Fit Your RV Awning Roller
Once you have measured the length of the RV awning roller, you can cut your LED strip lights and prepare for installation.
Using a pair of scissors or a sharp utility knife, carefully cut the LED strip to match the length of your roller. Be sure to follow any cutting guidelines the manufacturer provides to avoid damaging the strip.
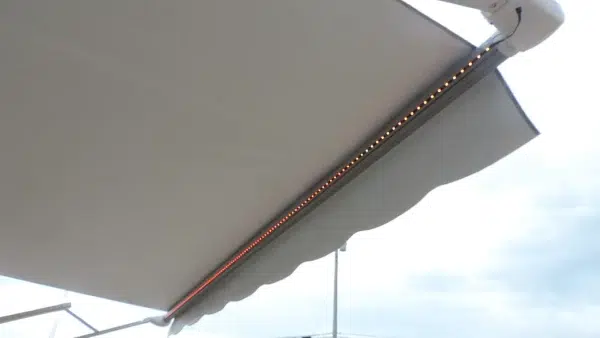
Step 5: Attach the LED Strip to Your RV Awning Roller
You have two options to mount the LED strip on your RV awning roller: adhesive tape or clips. Both methods are easy and effective, but each has its advantages and disadvantages.
Adhesive Tape:
Using adhesive tape is the easiest way to attach light strips to your RV awning roller. The tape is usually included with the LED strip kit and comes in a roll that you can cut to size. Here are the steps:
- Peel off the backing from the adhesive tape and apply it to the back of the LED strip.
- Carefully align the LED strip with your RV awning roller and press it firmly into place.
One advantage of using adhesive tape is that it creates a clean, streamlined look with no visible hardware. However, it may not be as secure as other methods, especially if your RV awning roller is exposed to wind or rain.
Clips:
Using clips is another popular method of attaching LED strip lights to RV awning rollers. Clips are small plastic pieces that snap onto both sides of the LED strip and then hook onto your RV awning roller. Here’s how:
- Snap one clip onto each end of your LED strip.
- Hook each clip onto your RV awning roller, making sure they’re evenly spaced.
One advantage of using clips is that they provide a more secure hold than adhesive tape, especially in windy conditions. However, they may be more visible than adhesive tape, which could detract from your overall aesthetic.
Ultimately, the choice between adhesive tape and clips comes down to personal preference. Both methods are easy to install and will provide a beautiful, functional upgrade to your RV awning roller.
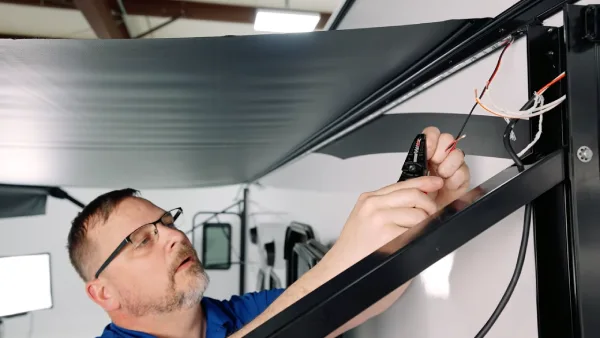
Step 6: Connect the Power Supply to Your LED Strip Lights
It’s time to connect your power supply after you cut your LED strip and attach it to the roller. This step requires connectors and wires, which can be purchased at most hardware stores or online retailers. Follow the manufacturer’s instructions carefully when connecting your LED strip lights to ensure a safe and secure connection.
To plug in your LED strip lights, identify both components’ positive (+) and negative (-) ends. Usually, the positive end is marked with a plus sign or a red wire, while the negative end has a minus sign or a black wire.
Next, use connectors and wires to connect the positive end of your LED strip lights to the positive end of your power supply. Similarly, connect the LED strip lights’ negative side to the power supply’s negative end. Make sure that all connections are secure and tight.
Once you have connected everything properly, turn on your RV’s electrical system and plug in your power supply. This will activate your LED strip lights and confirm that everything is working correctly.
Step 7: Test Your Installation
To ensure that your LED strip lights are properly installed within your RV awning roller, test your installation. This step will confirm that everything is working correctly and help you identify any issues that need to be addressed.
To test your installation, simply connect your LED strip lights to the power supply. Make sure everything is properly connected and secured in place. Then, turn on the power supply and confirm that the LED strip lights are functioning as expected.
Check each section of the LED strip lights to ensure that they are all lit up and there are no areas where the lights are dim or not working at all. If you notice any issues, double-check your connections and make sure everything is properly secured in place.
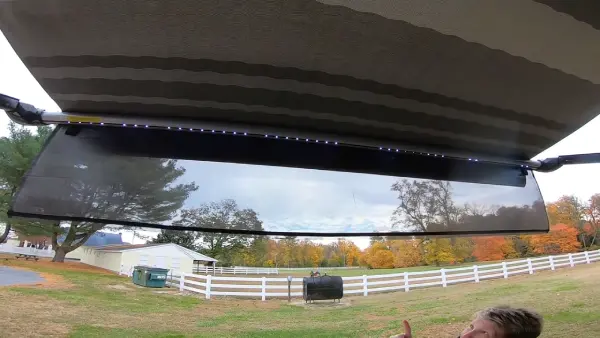
It’s also a good idea to test your installation at night so you can see how bright the LED strip lights are and how they look against the backdrop of darkness. This will give you a better understanding of how well they illuminate your RV awning roller.
Once you’ve confirmed that everything is working correctly, you’re ready to enjoy your new awning roller LED lights. Not only do they add a stylish touch to your RV, but they also provide practical lighting for outdoor activities during nighttime hours.
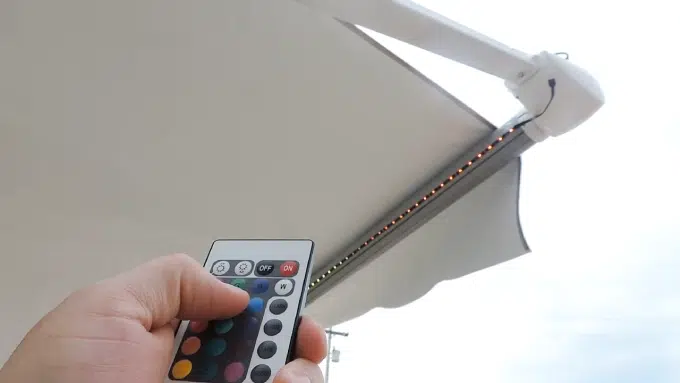
Can I control the LED strip lights remotely on my RV awning roller?
If your chosen LED strip lights have remote control capabilities, you can typically turn the lights on and off remotely on your RV awning roller. Many modern LED strip lights come with remote controls that allow you to change the colors, adjust brightness, and control the lighting modes from a distance.
The remote control usually communicates with the LED strip lights using infrared signals, so you need to have a clear line of sight between the remote and receiver to work properly.
Also, some LED strip lights may have smartphone apps or Bluetooth connectivity options that allow for even more flexibility in controlling them remotely.
How long do RV LED strip lights last?
RV awning LED strip lights are known for their durability and long lifespan. On average, a well-maintained, high-quality RV awning LED strip light can last anywhere from 30,000 to 50,000 hours of continuous use. This translates to several years of regular use before needing replacement.
But, the lifespan of RV awning LED strip lights can vary depending on factors such as the brand, quality, and usage patterns. Lower-quality or poorly maintained LED strip lights may have a shorter lifespan, while higher-quality LED strip lights that are properly installed and maintained may last even longer.
It’s important to follow the manufacturer’s instructions for installation, usage, and maintenance to ensure the longevity of your RV awning LED strip lights. Regular cleaning, avoiding overloading, and protecting them from harsh weather conditions can also help extend their lifespan.
Transform Your Outdoor Space With LED Strip Lights on your RV Awning Roller
Installing LED strips on your RV awning roller is a great way to add some extra lighting and ambiance to your outdoor living space.
Following the steps outlined in this article, you can easily gather the necessary materials, prepare the awning roller, install the LED strip lights, and test your installation to ensure everything works correctly.
Remember to measure the length of your RV awning roller and cut the LED strip accordingly. Use adhesive tape or clips to attach the LED strip securely to the awning roller. Connect the power supply and test everything before enjoying your new lighting setup.
With just a few simple steps, you can transform your RV’s outdoor area into a cozy, inviting space perfect for relaxing or entertaining guests. So why wait? Gather your materials and get started on this fun DIY project today.

