
Last Updated on March 11, 2023
An RV’s exterior can be a challenging task to paint. With the right preparation, however, it is possible to achieve a professional-looking paint job on your RV’s fiberglass exterior.
For best results, choose a paint that is suitable for use on fiberglass and take care to prep the paint before beginning application. Paying attention to small details such as edges and corners can make all the difference in achieving an even finish with no imperfections or blemishes.
This blog post provides a step-by-step guide for cleaning and preparing the surface, selecting and applying paint, and details for finishing touches and maintenance. Let’s get started.
How to Paint RV Exterior Fiberglass: Easy Steps
Preparation for Paint RV Exterior Fiberglass
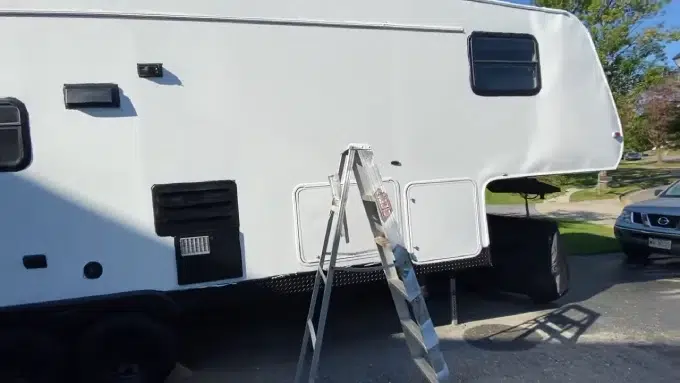
Preparing your RV for painting is a necessary step to maintain the condition of your vehicle. By taking the time to clean, sand, and mask off areas properly, you can ensure that your finished product has a professional look and will last longer over time.
Cleaning the Surface:
To properly prepare your RV for painting, it is essential to clean the surface thoroughly. This involves using an appropriate cleaning solution to remove dirt, debris, and oxidation from the paint surface.
Additionally, it’s essential to use a soft cloth or sponge when washing so as not to damage the fiberglass exterior of the RV. It’s also beneficial to rinse off any soap residue with clean water after washing to avoid any streaks or discoloration on the surface when dry.
Sanding and Priming the Surface:
Once the surface has been cleaned, it should be sanded down with fine-grit sandpaper until smooth. This will help remove any scratches or imperfections while also creating an even surface for priming and painting later on in the process.
After sanding is complete, a primer should then be applied, which will seal in any remaining dirt or debris while also creating an ideal base coat for paint application later on in the process.
Applying Masking Tape or Stencils (if Desired):
If desired, masking tape or stencils can be applied before painting to achieve specific shapes or patterns, along with lines for stripes or other graphics on your RV’s exterior fiberglass bodywork.
Additionally, this method is excellent for protecting window frames and trim around doors from getting painted by accident when spray-painting larger sections of your RV’s exterior bodywork.
After applying masking tape or stencils, apply multiple thin layers of paint across each section, ensuring that edges are evenly covered to prevent drips from occurring once removed.
Selecting and Preparing the Right Paint
It’s essential to make sure that the paint you use is suitable for the job and that you properly prepare the surface before applying the paint. During this discussion, we’ll explore what type of paint is best for painting fiberglass surfaces on RVs and how to prep them for optimal results.
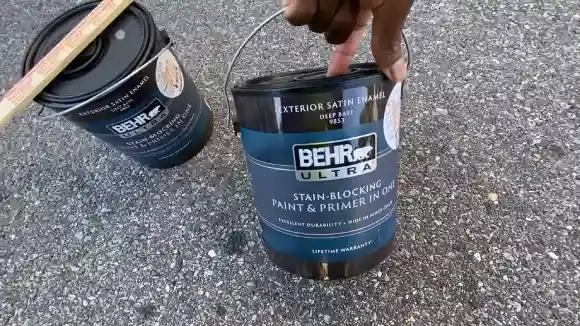
Choosing a Type of Paint that is Suitable for Use on Fiberglass:
When selecting a type of paint for your RV’s fiberglass exterior, it’s essential to consider several factors, such as durability, flexibility, and UV protection. For optimal results and long-term performance, it’s best to use a two-part urethane or polyurethane paint system that can be custom matched or tinted to the desired color.
The advantage of using these paints is that they are highly resistant to cracking, peeling, fading from UV exposure, and other factors that can damage painted surfaces over time.
Prepping the Paint before Application:
Preparing the surface before painting is one of the most important steps in ensuring good adhesion and a long-lasting finish. First off, it’s important to clean both dirt and grease off with a mild detergent solution.
After cleaning, any existing coating should be removed with sandpaper or a chemical stripper if necessary (although this will depend on what old coating was there).
Finally, once all previous coatings have been removed and the surface has been thoroughly cleaned and dried out – it’s time to apply primer followed by topcoat after sufficient drying time between each coat.
To give your RV’s fiberglass exterior a new coat of paint that will last, make sure you use the right kind of two-part urethane/polyurethane paint system and do a good job preparing the surface before you start painting.
Applying the Paint to the RV Exterior
Painting your RV exterior can be a great way to protect it from the elements and give it an updated look. It’s essential to be sure you are mixing, shaking, and stirring the paint properly before application to ensure the best results. Here’s how to paint the exterior of your RV.
Mixing, Shaking, and Stirring Properly Before Application:
Before beginning, it’s essential that you mix, shake and stir your paint thoroughly to determine the proper consistency. This is especially important when using oil-based paints, as they require vigorous mixing to achieve an even distribution of color and protection.
Use a plastic paddle or stick attached to a drill to ensure all pigments have been blended correctly.
Assessing the Conditions Before Beginning Application:
It’s essential that you assess the temperature and humidity before beginning to paint. If temperatures are too high or low, this can affect how the paint dries and its overall quality. The ideal temperature range for painting is between 60-90 degrees Fahrenheit, with low humidity levels being excellent too.
In addition, if any wind is present, this could create problems such as blowing dust onto wet paint, which should be avoided at all costs.
Deciding Whether a Brush or Roller Should Be Used For Application:
When applying paint onto fiberglass surfaces like those found on RVs then, it’s recommended that you use either a brush or roller, depending on the size of the area being covered. A meeting is usually best for smaller areas, such as corners, while rollers are better suited for larger sections, like sides and roofs.
Make sure you choose the right type of brush/roller for your project by selecting one made from synthetic bristles, as these hold up better against harsh weather conditions than natural ones do.
Applying Several Coats As Needed:
Depending on the finish you’re looking for, you may need to apply several coats of paint onto your RV’s exterior fiberglass surface to achieve a durable result that lasts longer over time.
Try not to rush through this process, as each coat needs enough time in between applications so that they can dry properly without running into each other, which could lead to an uneven finish or chipping later down the line.
Letting Each Coat Dry Fully Before Applying More:
After each coat has been applied, it must be allowed some time to dry completely before adding more layers on top of it. Otherwise, issues such as clumping could occur due to moisture build-up underneath coats still drying off below them.
To speed up this process slightly, use quick-drying primers with each layer so that air circulation is improved, leaving more time between coats for them to dry out thoroughly at their own pace without needing assistance from additional chemicals like turpentine, etc.
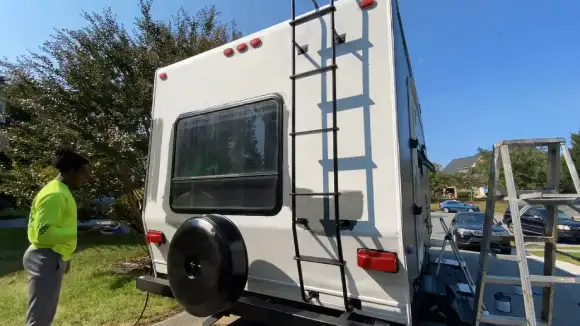
Taking Careful Note Of Edges/Corners/Areas Where Detailing Is Necessary:
Make sure to pay special attention when painting the exterior fiberglass surfaces of an RV. These areas can be easily worn down, so you’ll want to use a small brush to get into all the tight spaces. Doing this will help it last longer and avoid leaving behind marks with bigger brushes.
Finishing Touches and Maintenance
Finishing touches should be done to ensure a beautiful, lasting finish, while maintenance is important to keep your paint looking its best. Let’s discuss both in depth.
Inspecting and Touch-up Work if Necessary:
After you’ve applied the final coat of paint and allowed it to dry, it’s time to inspect your work for any flaws or imperfections. If any are found, use touch-up paint and a brush or roller to address these areas. Be sure to allow the touch-up color ample time to dry before moving on with the finishing process.
Sealing with a Clear Top Coat if Desired:
To further protect your painted exterior and give it a glossy finish, consider applying a clear topcoat sealant. This type of sealing will help extend the life of your exterior paint job and make cleaning much more accessible.
Before applying the sealant, be sure that all areas have been thoroughly cleaned and dried so that no debris gets trapped underneath.
Maintaining Properly with Regular Waxings and Cleanings:
For your RV’s exterior paint job to look its best over time, regular waxing and cleanings should be done throughout the year. It’s essential not only for its appearance but also for protecting it from potential UV damage caused by prolonged exposure to sunlight.
For best results, use carnauba wax, which will provide superior protection against sun damage and dirt build-up that can cause premature wear on your RV’s exterior paint job over time.
Do I need to prime the fiberglass before painting?
If you have a fiberglass project that needs to be painted, it is essential to prime the surface before you start. Priming will help create an even surface and make sure the paint sticks. It can also protect against moisture damage and corrosion.
When choosing a primer, make sure it is made of fiberglass and is compatible with the type of paint you’re using. Follow all manufacturer instructions when applying the primer, and let it dry completely before painting your project. By properly priming your fiberglass, your finished product will look great for years.
Do you need special paint for the fiberglass?
When painting fiberglass, it is important to use the right paint. Acrylic latex paint is the best for this job because it will stick well and last a long time. Other types like epoxy, urethane, or polyurethane can be used, too, depending on what you want it to look like.
Before you start painting, make sure to clean and sand the surface with medium-grit sandpaper. To apply the paint evenly, use a spray gun or roller, and if you want extra protection against wear and tear, add a primer or sealer before painting.
Can you paint an RV with a brush?
You can paint an RV with a brush. Painting the exterior of your RV is not only doable; it’s possible without hiring anyone. You will need to prepare the surface before painting, which includes cleaning and sanding the surface to ensure that the paint adheres properly.
You should also use a primer before applying the paint, as this will help protect the surface from damage and fading over time. When painting with a brush, make sure to use even strokes and take your time for the best results.
Is wrapping an RV cheaper than painting it?
When it comes to making your RV look nice, you may be wondering if painting or wrapping is cheaper. It depends on the condition of the exterior and what you want for an outcome. Vinyl wraps are more affordable than painting and last longer.
They also protect from sun damage, scratches, and other wear and tear. If there’s damage to the paint job, maybe painting is best because it’s more permanent. Think about all your options before deciding what works for you and your budget.
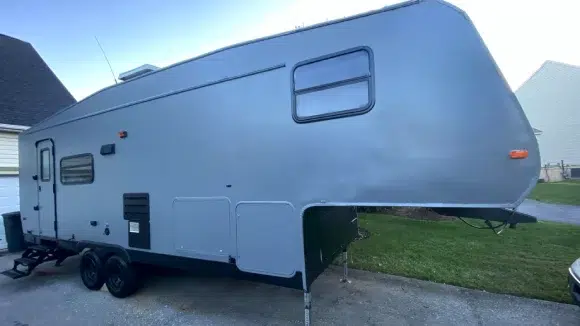
Paint Your RV’s Exterior Professionally
Following these steps, you can paint your RV’s exterior fiberglass like a pro. With proper preparation, suitable materials, and plenty of patience, you’ll be able to give your RV a new look that will last for years.
Whether you’re repainting or starting from scratch, painting your RV’s exterior fiberglass is a rewarding experience that can help improve both its looks and longevity. Take advantage of this opportunity to give your beloved camper a new look.

