
Last Updated on April 20, 2023
If you’re new to the world of RVs, then you might not be familiar with how to remove a Thetford RV toilet. No one wants to think about removing their RV toilet, but sometimes it’s necessary. RVs have a reputation for being difficult to clean, but with a little know-how, it’s not as bad as it seems.
A Thetford RV toilet can provide years of trouble-free operation if properly maintained. Occasionally, you may need to remove the toilet for cleaning or repair. The process is relatively straightforward and can be accomplished in a few minutes with the right tools.
This guide will walk you through the steps of removing a Thetford RV toilet, so you can get your RV ready for your next adventure.
How to Remove a Thetford RV Toilet : DIY Step Guide
Thetford RV toilets are a common sight in many recreational vehicles. While they are generally reliable, they can sometimes need to be removed for cleaning or repair. Fortunately, the process is relatively straightforward and only requires a few tools.
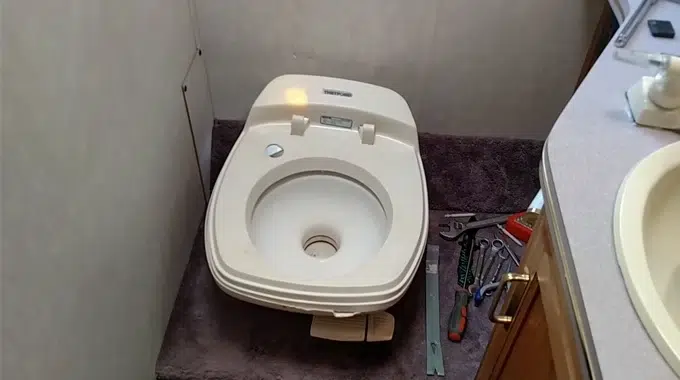
List of Tools:
Thetford RV toilets are generally easy to remove and replace. In order to do the job properly, you will need a few tools. Here is a list of the tools that you will need:
- Adjustable wrench
- Phillips head screwdriver
- Flat head screwdriver
- Pliers
- Rags or old towels
- Gloves (optional)
Disconnect the Water Supply Line from the Toilet:
The first thing you want to do is shut off your water and drain the pressure from the RV. Make sure your water pump for your freshwater or tank is turned off as well. You don’t want to be pumping water out when you take the toilet out.
Flush the Toilet to Empty the Bowl and Tank:
Before you can start to remove your Thetford RV toilet, you need to flush it out. This will help to avoid any messes and make the removal process easier. To do this, simply flush the toilet like you would any other toilet. Once the bowl and tank are empty, you can begin to remove the toilet.
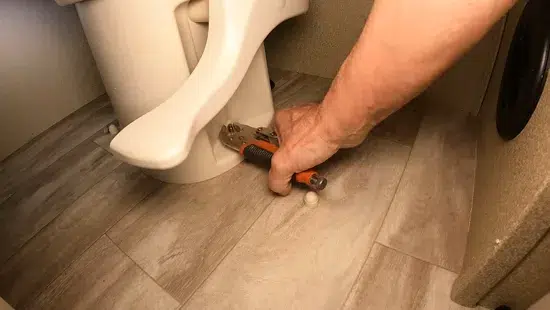
Unscrew the Bolts:
Unscrewing the bolts that secure the toilet to the floor is an important step in replacing a toilet. The bolts keep the toilet securely attached to the floor, so it’s important to make sure they’re removed before attempting to replace the toilet.
There are usually two bolts, one on each side of the toilet. Use the adjustable wrench to loosen the bolts on the floor that hold the toilet in place. They’re typically easy to remove, but if they’re stuck, you may need to use a wrench or pliers to loosen them.
Once the bolts are removed, use the Phillips head screwdriver to remove the screws that hold the mounting plate in place. To remove the screws, start by inserting the tip of the screwdriver into the head of the screw.
Then, turn the screwdriver in a counterclockwise direction. As you turn the screwdriver, you will feel it start to loosen. You should be able to remove it once it is loose enough to remove it by hand. Repeat this process for each of the screws until the mounting plate is free.
Remove the Wax Seal:
There are a few different ways that you can remove a Thetford RV toilet, but one of the most common methods is to use a wax seal. This seal helps to keep the toilet firmly in place, and it also prevents leaks.
To remove the wax seal, you will need a few tools, including a putty knife, a screwdriver, and a hammer. First, you will need to insert the putty knife under the edge of the wax seal and pry it up.
Once you have lifted up one side of the seal, you can use the screwdriver to carefully remove any screws that are holding it in place. In the end, use the hammer to tap on the putty knife and break the seal completely.
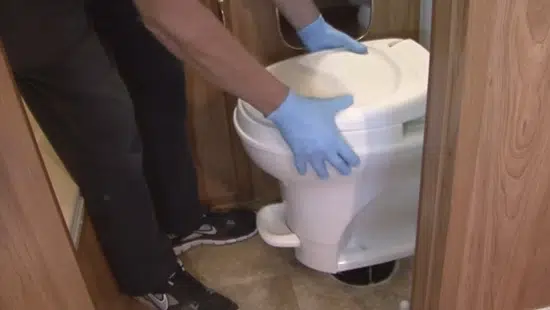
Remove The Commode:
Once the seal is broken, you should be able to lift the toilet straight up and off the floor flange. If necessary, you can then use a plunger to clear any particles from the flange. If the toilet is heavy or stubborn, you may need a helper to assist you. Ensure that the area around the flange is clean with a cloth or brush before reinstalling the toilet.
With these steps followed, your Thetford RV toilet will be successfully removed.
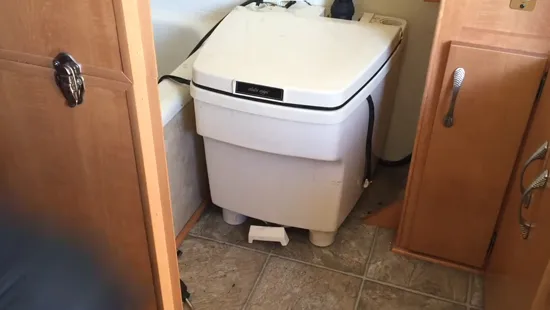
How Do I Know What Kind of RV Toilet I Have?
There are generally two types of RV toilets – the gravity flush and the cassette toilet. Gravity flush toilets work like a typical household toilet, using water from the RV’s fresh water tank to flush the waste down the drain.
Cassette toilets, on the other hand, use a small holding tank that must be emptied manually. The type of toilet you have will likely be determined by the size and model of your RV.
What are the Different Types of Thetford RV Toilet?
Thetford is a leading manufacturer of RV toilets, and they offer a variety of models to suit the needs of different RVers. One of their most popular models is the Classic RV Toilet, which offers a simple, reliable design that is easy to use and maintain.
For those who want a little more luxury, Thetford also offers the Premium RV Toilet, which features a taller bowl and a comfortable seat. And for those who need an ADA-compliant model, Thetford offers the Accessible RV Toilet, which has an extra-wide bowl and grab-bars for added safety.
Why Do You Need to Remove Your Thetford RV Toilet?
Thetford RV toilets are designed to be removed for easy cleaning. In fact, it is recommended that you remove and clean your Thetford RV toilet at least once a year. There are several reasons for this.
- First, removing the toilet allows you to access and clean all of the nooks and crannies that can trap waste and odors.
- Second, it helps to prevent clogs and leaks by allowing you to inspect the seals and connections.
- Third, it gives you the opportunity to clean or replace the Holding Tanks, if necessary.
- To change or replace a damaged/broken Toilet.
Ultimately, taking the time to disassemble and maintain your Thetford RV toilet will prolong its lifespan and keep it functioning properly for years to come.
Where is the Model Number on a Thetford Toilet?

A Thetford toilet’s model number can be found on the back of the unit, near the bottom. It is usually stamped into metal or plastic and may be difficult to see.
If you need to find the model number, you can try using a flashlight to illuminate the area. Once you have found the model number, you can use it to order replacement parts or contact customer service.
How Do you Remove a Toilet Flange From a Camper?
Most campers have a similar plumbing setup to a traditional home, including a toilet flange. The flange is the part of the toilet that connects to the sewer line, and it needs to be properly sealed in order for the toilet to function properly. If you need to remove the flange for any reason, the process is relatively simple.
First, stop the water flow to the camper. Next, flush the toilet to drain the tank and bowl. Then, use a putty knife to loosen the wax seal around the flange. Then, unscrew the bolts that hold the flange in place and lift it out of the camper. With a little bit of effort, you can easily take the toilet flange off a camper.
How Do You Change a Thetford Toilet Seat?
If you’re like most people, you don’t think much about your toilet seat. But if it becomes loose, cracked, or otherwise damaged, it can be a major annoyance. Fortunately, changing a Thetford toilet seat is a relatively simple process that anyone can do.
The first thing you’ll need to do is remove the old seat. This is usually done by unscrewing the nuts that attach the seat to the bowl. Once the old seat is removed, you can install the new one by following the instructions that came with it. In most cases, this simply involves screwing the new seat into place.
How Do You Change a Thetford Toilet Valve?
One common problem with Thetford toilets is a leaking valve. If your toilet is leaking water, it is likely that the valve needs to be replaced. Luckily, this is a relatively easy repair that can be completed in a few simple steps.
First, turn off the water supply to your RV. Then, use the toilet flush to empty the tank. Next, remove the bolts that hold the valve in place. Carefully remove the old valve and sealant and discard them. Clean the area around the opening with rubbing alcohol to prepare it for the new sealant.
Apply a generous amount of sealant to the new valve and insert it into the opening. Use the bolts to secure the valve in place. Lastly, turn on the water supply and check for leaks. If there are no leaks, your repair is complete.
So, Let’s Change Your RV Toilet Today!
Now that you know how to remove a Thetford rv toilet, it’s time to get started. Make sure to have all of your supplies ready before you begin. Also, Keep in mind that you will need to have a new toilet ready to install before you remove the old one. This process shouldn’t take more than an hour or two, and then you’ll be able to enjoy your RV like never before. Thanks for reading.

