Last Updated on April 20, 2023
RV toilets are essential to every RV, but dealing with calcium buildup can be frustrating. Over time, mineral deposits accumulate in the toilet bowl, making it difficult to keep clean and potentially leading to unpleasant odors. So it’s crucial to know how to remove calcium from RV toilets.
By following specific steps like emptying the toilet bowl, applying vinegar or natural cleaning solution, letting it sit for a specific period based on the severity of calcium buildup, and scrubbing and rinsing the toilet bowl, you can effectively remove calcium buildup from your RV toilet.
Throughout this article, we’ll explore these efficient techniques to help you remove stubborn calcium stains and keep your RV toilet sparkling clean.
How to Remove Calcium from RV Toilets: DIY Steps
Removing calcium buildup from RV toilets is necessary to maintain your toilet’s hygiene and functionality. Here are the steps you need to follow to remove calcium buildup from your RV toilet:
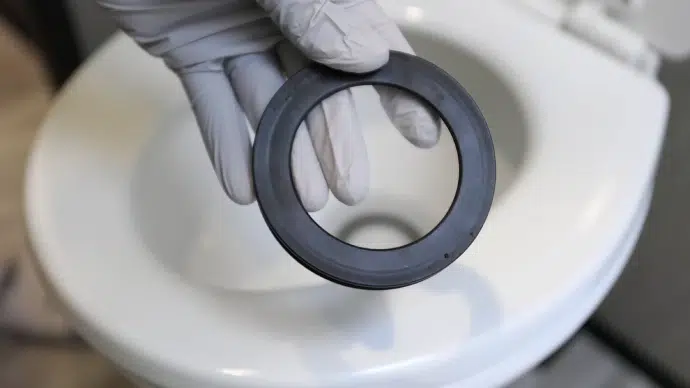
Tools and Materials You Need
You will need a few tools and materials to remove calcium buildup from your motorhome toilet. These items are essential to ensure that the process is as smooth and efficient as possible.
Firstly, wearing protective gear such as gloves and goggles while cleaning is important to avoid any potential harm from the cleaning solutions or debris.
Next, you will need a good-quality scrub brush that effectively cleans the toilet bowl without damaging its surface. A stiff-bristled brush is recommended for removing tough stains.
White vinegar or Lime Away are the most effective cleaning solutions for removing calcium buildup in RV toilets. White vinegar is a natural and eco-friendly solution that can dissolve mineral deposits without causing damage to your toilet bowl. Lime Away is a chemical cleaner specifically designed to remove calcium buildup.
It’s important to note that Lime Away may be more effective than white vinegar when dealing with severe calcium buildup. However, it contains harsh chemicals and should be used with caution.
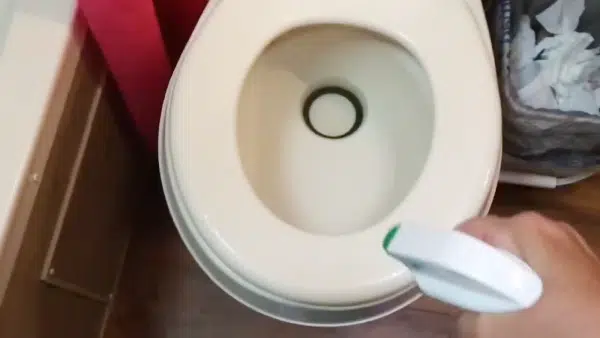
Step 1: Empty the Toilet Bowl
To remove calcium buildup from your RV toilet, the first step is to empty the toilet bowl completely. This will give you a clear view of the areas that need cleaning and prevent any interference with the cleaning process.
For this, turn off the water supply to the toilet and flush it until all the water has been drained out. You can also use a plunger to push out any remaining water in the bowl. Once you have emptied the bowl, you can apply the cleaning solution.
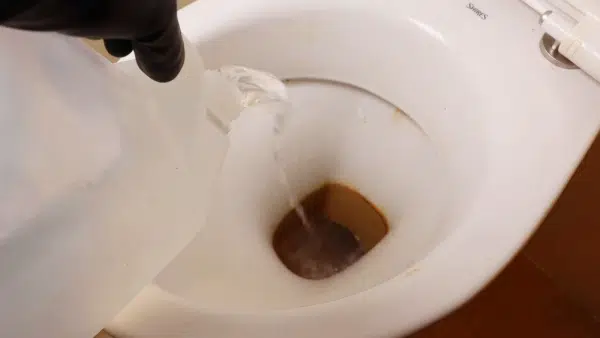
Step 2: Apply Vinegar or Lime Away Solution to the Toilet Bowl
When removing calcium buildup from your RV toilet, applying a solution of vinegar or Lime Away is an effective method. These solutions are known for their acidic properties, which can dissolve the calcium deposits in your toilet bowl.
To apply the solution, start by emptying the toilet bowl as much as possible. You can do this by flushing the toilet and using a plunger to remove any excess water. Once emptying the bowl, put on gloves and goggles to protect yourself from splashes.
Next, pour white vinegar or Lime Away into the bowl until it covers all the calcium buildup. The amount you use will depend on how severe the buildup is. For minor buildup, you may only need a small amount of solution; for more severe buildup, you may need to use a larger amount.
After applying the solution, let it sit in the bowl for a specific period.
Step 3: Let the Solution Sit for a Specific Time Period
Leaving the solution sit for a certain amount of time is essential for removing calcium from RV toilets. This allows the cleaning solution to penetrate and dissolve the calcium deposits, making them easier to remove.
The time you should let the solution sit will depend on the severity of the calcium buildup. For mild buildup, 30 minutes may be sufficient. Nevertheless, you may need to let the solution sit for several hours or even overnight for more stubborn deposits.
To determine how long you should let the solution sit, start with a shorter time and check on the progress periodically. If there is still significant buildup after 30 minutes, continue to let the solution sit and check on it every hour until it has dissolved enough to be scrubbed away.
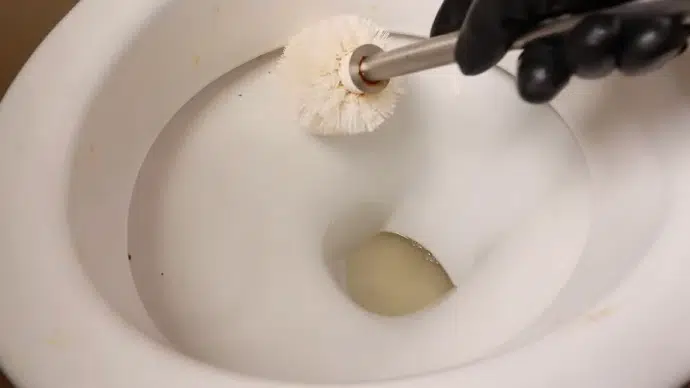
Step 4: Scrub and Rinse the Toilet Bowl
To effectively remove calcium buildup from an RV toilet, it’s important to scrub and rinse the bowl properly. After applying a solution of white vinegar or Lime Away, use a scrub brush to scrub the inside of the bowl gently. Be sure to pay extra attention to areas with heavy buildup.
Once you’ve finished scrubbing, rinse the bowl thoroughly with water. You may need to repeat this process several times, depending on the severity of the buildup.
It’s important to note that harsh chemicals and abrasive materials should be avoided when cleaning an RV toilet, as they can cause damage. Stick to using gentle cleaning solutions and tools like a soft-bristled brush or sponge.
Tips for Preventing Future Calcium Buildup in RV Toilets
Here are some other tips to help you prevent future calcium buildup in your RV toilet:
01. Regular Cleaning Schedule
Maintaining a regular cleaning schedule for your RV toilet is crucial in preventing calcium buildup. The longer you let the buildup sit, the harder it becomes to remove. A weekly cleaning routine can help prevent stubborn stains and buildup from forming.
02. Recommended Cleaning Products and Techniques
To prevent calcium buildup in RV toilets, it is essential to establish a regular cleaning schedule. There are several cleaning products and techniques available that can help keep your toilet free from mineral deposits.
CLR Calcium, Lime & Rust Remover is recommended for removing calcium buildup. This product is specifically designed to dissolve calcium and lime deposits and can be used on various surfaces, including porcelain toilets.
Another effective product is Bar Keepers Friend Cleanser & Polish, which contains citric acid that helps break down mineral deposits.
For daily maintenance, using a mild abrasive cleaner like baking soda or Borax can help prevent the buildup of minerals. Simply sprinkle the powder into the bowl and scrub with a toilet brush before flushing.
It’s important to note that harsh chemical cleaners like bleach should be avoided as they can damage the rubber seals in your RV toilet. Additionally, using metal brushes or abrasive pads can scratch the surface of your toilet, making it more susceptible to future buildup.
In addition to using the right cleaning products, there are some techniques you can follow to ensure a thorough cleaning. For instance, let the cleaning solution sit for at least 30 minutes before scrubbing and rinsing. This will give it time to break down any stubborn mineral deposits.
03. DIY Cleaning Solutions for Daily Use
One effective way to prevent calcium buildup in RV toilets is by using DIY cleaning solutions on a regular basis. These solutions are not only cost-effective but also easy to make and use.
One popular DIY solution is a mixture of baking soda and vinegar. To prepare this, mix half a cup of baking soda with one cup of vinegar and pour the mixture into the toilet bowl. Let it sit for about 30 minutes before scrubbing with a brush and flushing.
Another option is to use lemon juice and borax solution. Mix half a cup of borax with one cup of lemon juice and apply it to the toilet bowl. Allow it to sit for an hour before scrubbing and flushing.
For those who prefer natural cleaning solutions, essential oils such as tea tree oil or eucalyptus oil can be added to water or vinegar to create an effective cleaning spray. Simply mix a few drops of essential oil with water or vinegar in a spray bottle and use it to clean the toilet bowl regularly.
It’s important to note that while these DIY solutions effectively prevent calcium buildup, they may not be as potent as commercial cleaners when dealing with severe buildup. In such cases, it’s recommended to use stronger cleaners such as Lime Away or CLR, following the manufacturer’s instructions carefully.
How Does Calcium Buildup Affect RV Toilets?
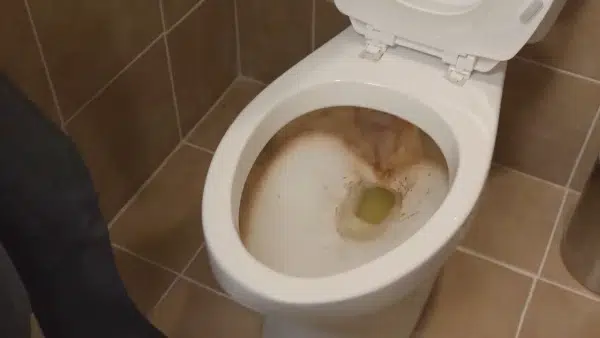
Calcium buildup is a common problem that affects RV toilets. Over time, minerals from hard water can accumulate in the toilet bowl and create a thick layer of white or yellowish deposits. This buildup looks unsightly and can cause problems with flushing and water flow.
One of the main ways that calcium buildup affects RV toilets is by reducing their efficiency. As mineral deposits accumulate inside the pipes and around the bowl’s rim, they can restrict water flow and make it harder for waste to be flushed away. This can lead to clogs, slow draining, and unpleasant odors.
In addition to affecting the performance of RV toilets, calcium buildup can also damage their components. The minerals in hard water can corrode metal parts such as valves and seals, leading to leaks and other issues.
Also, if left untreated for too long, calcium buildup can become so severe that it is impossible to remove without replacing the entire toilet.
Fortunately, there are steps you can take to prevent and remove calcium buildup in your RV toilet, which we already discussed. By using the right tools and cleaning products, you can keep your toilet functioning properly and avoid costly repairs down the line.
How often should you remove calcium buildup from your RV toilet?
The frequency at which calcium buildup should be removed from an RV toilet will depend on several factors such as local water hardness and usage rate.
Regardless of these factors, cleaning an RV toilet at least once per year is recommended to prevent mineral deposits and calcium buildups from occurring.
When cleaning the unit, use a mild detergent and soft cloth to scrub away any residue or sludge before flushing the system with hot water. And using vinegar or lemon juice regularly can help to reduce the risk of mineral buildup in an RV toilet.
Keep Your RV Toilet Clean and Efficient with Regular Calcium Buildup Cleaning
As you can see, removing calcium buildup from RV toilets is an inevitable task that all RV owners should be familiar with. Since calcium buildup can cause serious damage to your RV toilet if left unattended.
And following the steps outlined in this article will help you successfully remove calcium buildup from your RV toilet, leaving it sparkling clean and functioning properly.
Remember, prevention is key to maintaining a healthy and functional RV toilet. Regular cleaning using recommended products or DIY solutions can prevent future calcium buildup. These tips and techniques give you a clean and efficient RV bathroom for all your adventures.