
Last Updated on May 1, 2023
Window screens play an important role in keeping the interior of your RV clean. They keep out bugs, dirt, and other debris while you are driving. However, over time these screens can become dirty.
Thus, cleaning your RV’s window screens is a very important task that should not be overlooked. If you do not clean your window screens, a lot of grime and debris can accumulate on your RV, which will make it appear dirty.
Furthermore, dirty screens can impair your ability to see the outside world as well as cause health issues. It is therefore imperative that you have a clear understanding of how to remove RV window screens for cleaning.
Keep reading this post because it will guide you through all of the steps involved in cleaning RV window screens.
How to Remove RV Window Screens for Cleaning? Step By Step Guide
In order to thoroughly and effectively clean RV window screens, first, you need to understand how to remove them. Therefore, you will be able to move the RV screen out of the way so that it can be cleaned easily and efficiently.
The following are the steps to take when it comes time to remove your RV’s window screen:
Step 01: Prepare for the Job
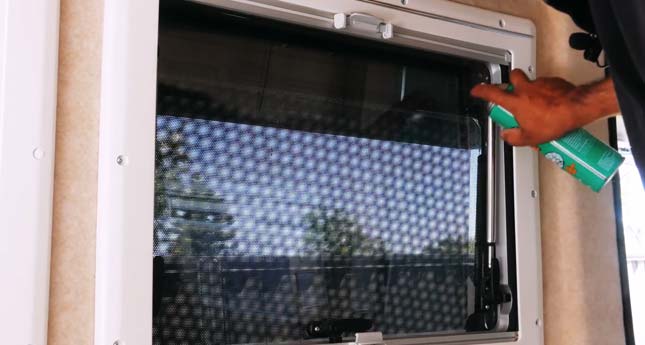
Before you start removing your screen, it’s important that you prepare yourself and your surrounding area. Doing this will help to ensure that your window screen removals go smoothly, without any problems or accidents occurring.
For removing the screen, you will need a putty knife. Therefore, you should gather a putty knife prior to beginning the work. This will enable you to take on the job without any problems or delays.
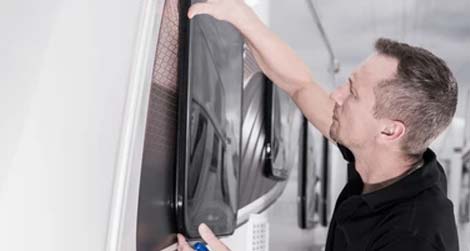
Step 02: Remove the Screens
Now that you have prepared yourself and your surroundings, it’s time to move on to removing the screen themselves. To do this, you have to start by locating the fastening mechanism in the window track that secures the screens in place.
Once you find these, use your putty knife to pry the fastening mechanisms. Insert the tip of the knife between the window screen and the underlying screen frame. Next, push down the putty knife and pull one side up on the sliding window screen. Be careful when doing this job.
When you do this, the fastening mechanisms should disengage from their slots. Consequently, the screen will come loose and you will be able to easily remove window screens. Repeat this step for all of the nets on your RV.
How to Clean RV Window Screens?
It is quite simple to remove the window screens, as you can see. Once you have successfully removed your screens, you are now ready to go ahead with the washing process. Washing your screen is very easy. Here are the steps that you need to follow:
Step 01: Gather Your Supplies
In order to clean your RV window screen, you will need a large bucket, water, some mild detergent, a brush as well a dry clean soft cloth or paper towel. Prior to moving on to the next step, ensure that all the necessary supplies have been gathered. This will ensure that you are ready for the cleanup work.
Step 02: Mix Up Your Cleaning Solution

Once you have gathered your supplies, start by filling the bucket with some water and pouring in an adequate amount of liquid dish soap or detergent.
Mix together to create soapy water until it has been completely dissolved. Now that your window cleaning solution has been prepared, you are ready to start working.
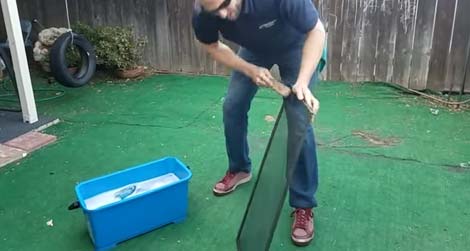
Step 03: Submerge the Screen In the Bucket
The next step is to submerge the screen surface and corners in your washing solution. Put them into the bucket and let them soak for a few minutes. This will enable the grime and debris to loosen their grip on the window screen.
Step 04: Clean the Screens With a Brush
After letting your screens soak for several minutes, you are now ready to begin washing them. Get your brush and start gently scrubbing off all of the gunk that has loosened through soaking.
Make sure you thoroughly clean window screens. This will ensure that you are able to get rid of all grime, debris as well as germs that may have accumulated on them.
Step 05: Rinse the Screens
Once you have fully cleaned your screens, it’s time to rinse them. Remove the screens from the solution and then rinse them thoroughly with warm water.
Be sure that you get rid of all traces of the washing solution on the screen. Once you have done this, you are ready to dry your screens and put them back in place.
Step 06: Dry the Screens
Taking care of your screens isn’t over yet. You have to ensure that they are dried completely before you put them back into place. Failure to do so will result in mildew and other moisture-related problems occurring on the screen.
To dry out your screens, stuff a microfiber cloth or towel in between each window screen. This will draw out any remaining moisture from the area. Leave the cloth or towel in place until the screen is fully dry.
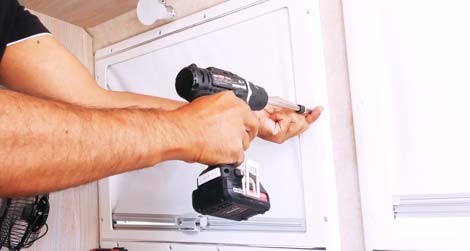
Step 07: Put Back Your Window Screens
Finally, your screens have been cleaned and dried, it’s time for you to put them back into place in the same way.
This is a relatively easy process since you do not have to readjust the fastening mechanisms again. All you need to do is slide the screen back into their slots and let them fit snugly. Don’t forget the tight fit.
The process outlined above can be used to clean any type of window screen. It’s quick and efficient, allowing you to get the job done in a short time frame.
Benefits of Cleaning Your RV Window Screens
The installation of window nets is a necessity for every RV house. The purpose of these covers is primarily to keep bugs, grime, and debris from entering the RV. Unless properly maintained, they can easily become dirty and clogged with debris.
Consequently, they will be unable to accomplish their intended functions, resulting in a loss of efficiency. It’s vital that you maintain your screen on a regular basis. There are several benefits of doing so. Here are some of them:
1. Your Screens Will Last Longer
A clean and well-maintained window screen is much more durable than one that has not been given the proper attention.
By keeping them clean, you are ensuring that they don’t easily tear or rip. As such, they will be able to withstand heavy use for a much longer period of time.
2. Improves the Efficiency of Your RV
In addition to being more durable, your windows screen also performs better when it’s clean. This is because a grime-free screen will be able to serve its intended purpose much more efficiently.
When bugs and other debris cannot get through the screen, they cannot accumulate at the bottom of the RV either.
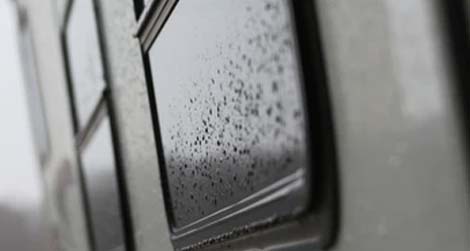
3. Prevents Mildew from Forming
Another benefit of regularly washing your screen is that you reduce the risk of mildew forming on them. Since grime can retain moisture, it will be more likely to do so if the screen is dirty.
If left unchecked, this will result in the growth of mold and mildew on your screen, which is unhygienic and could even damage the material making up the screen itself.
4. Helps Keep Your RV Smelling Fresh
Regularly washing your screen also has an indirect effect on the smell of your RV. When dirt accumulates on your screen, it leads to a build-up of odors over time, causing the inside of your vehicle to have a stale and musty kind of odor.
By removing the collected grime from the screen, you will be able to maintain a fresh-smelling RV.
5. Improved Visibility
When your window nets are dirty, they can interfere with your visibility while driving. This is especially true when the dirt and dust on the screen have been allowed to accumulate for a long period of time.
Washing them will improve the clarity of your windshield, allowing you to have a much better view while driving during both night and day.
6. Enhances the Overall Look of Your RV
Another indirect benefit of washing your screen is that it enhances the overall quick look of your RV. A clean window screen will give your ride a much cleaner appearance, which can make you feel better about taking it on the road.
It also makes it easier for other people to admire it when you are parked somewhere, allowing everyone who sees your vehicle to do so with pleasure.
Frequently Asked Questions:
A number of questions are frequently asked by RV owners regarding their window nets. Here are some of them:
1. When Should RV Window Screens Be Replaced?
In general, RV owners should consider replacing their window nets if they are badly damaged or worn down. If there is any tearing or ripping present on the material itself, it’s advisable to replace them immediately.
2. How Often Should RV Window Screens Be Cleaned?
In terms of cleaning your screen, it largely relies on how frequently you use it. If you use your RV on a regular basis, then it’s advised that it be cleaned at least once or twice a month. Whenever you notice that your screen is dirty, you should clean it as soon as possible.
3. How Long Does an RV Window Screen Generally Last?
The length of time that a window screen will last is dependent on how it’s used and it’s quality. The typical screen can last for approximately ten years with proper care and regular washing.
Conclusion
After reading this article, we hope you have a better understanding of how to remove RV window screens for washing.
As you can see, maintaining your RV’s screen isn’t difficult at all. By regularly washing them, you will be able to enjoy the full benefits that come with having a good-looking screen.
However, if your screen is in terrible shape, it should be replaced. Do this today to enjoy all of the benefits that come with window nets that are free from dust and grime.

