
Last Updated on September 19, 2023
Sanitizing your RV water tank is crucial to ensure safe drinking water for you and your loved ones while on the road. Over time, bacteria and other microorganisms can accumulate in your RV’s water system, potentially causing health problems.
Fortunately, sanitizing your RV water tank is a simple and effective task, and hydrogen peroxide is an excellent sanitizing agent that’s easy to use.
Sanitizing your RV water tank with hydrogen peroxide is relatively simple and can be done by following a few steps. You need to determine the proper amount of hydrogen peroxide required based on the size of your tank and recommended concentrations.
After calculating the amount of hydrogen peroxide needed, mix it with water in a separate container. Then, add the solution to the empty water tank using either a funnel or a hose and let the solution sit.
Drain and flush out any remaining solution from all taps until no more bubbles appear after letting the solution sit for a while. Let’s look at the steps in more detail.
Step-by-Step Guide on Sanitizing Your RV Water Tank Using Hydrogen Peroxide
Ready to keep your RV water tank healthy and free of germs? We’ve got you covered. Follow these simple steps for sanitizing using hydrogen peroxide and get ready for a cleaner drinking experience on the road.
Step 1: Gather Necessary Supplies
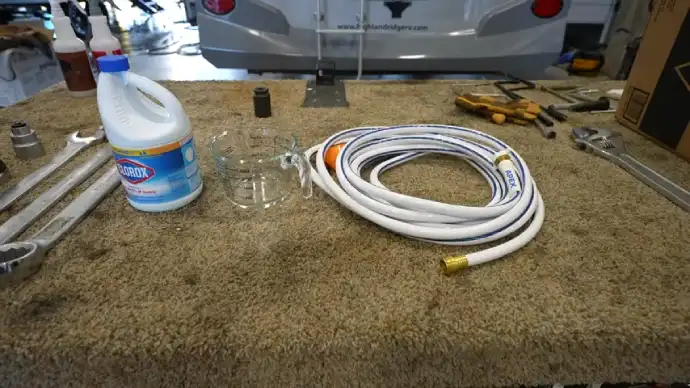
To properly sanitize RV water tanks with hydrogen peroxide, you will need to gather a few necessary supplies. Below is a list of items you should have:
Hydrogen peroxide (concentration)
You will need to acquire some hydrogen peroxide. Hydrogen peroxide is a powerful sanitizer that can be used to clean and disinfect your RV water tank effectively. When using hydrogen peroxide for this purpose, it is important to choose the right concentration.
Measuring cup
A measuring cup is required to accurately measure how much hydrogen peroxide is needed for your RV. Any standard measuring cup will work for this purpose.
Funnel
Using a funnel helps prevent spills and ensures you get the hydrogen peroxide mixture into the tank. It also makes it easier to measure out the correct amount of solution without wasting any.
When choosing a funnel, look for one that fits securely into your RV’s water tank opening. You don’t want it to be too big or too small, as this can cause problems when pouring the solution. A funnel with a long neck and a wide mouth is ideal.
Hose(s)
You will also need a hose that is long enough to reach from your water source to your RV’s water intake valve. It’s important to note that not all hoses are created equal.
You should use a potable water hose that is specifically designed for drinking water and safe for human consumption.
A regular garden hose may contain harmful chemicals or bacteria that could contaminate your drinking water supply. Potable water hoses are made of safe drinking water materials and have been tested and certified.
Water source
When sanitizing an RV water tank with hydrogen peroxide, it’s important to consider the water source you’ll be using. The best water source for this process is city water or well water that has been tested and deemed safe for consumption.
Avoid using untreated water from lakes, rivers, or other natural sources, as they may contain harmful bacteria that can compromise the effectiveness of the sanitization process.
Safety gear (gloves, goggles, mask)
Hydrogen peroxide can be harmful if it comes into contact with your skin or eyes, so gloves and goggles will protect you from any accidental splashes.
Also, a mask will prevent you from inhaling any fumes that may be produced during the sanitization process.
Step 2: Drain the Water Tank
To drain the water tank, start by turning off the water pump and opening all faucets, including any outdoor shower or hose connections.
Then, locate the drain valve on your RV and attach a hose to it. Place the other end of the hose at a safe location where you can dispose of the old water properly.
Once you have attached the hose, open the drain valve and let all of the old water flow out. You may need to move around your RV to ensure that all of the water has been drained from every part of your plumbing system.
After you have drained your RV’s water tank, removing any debris that may be left behind is important. To do this, flush out all of your plumbing lines with fresh water.
This will help dislodge any debris that may be stuck in your pipes and prevent it from contaminating your newly sanitized system.
Step 3: Determine Proper Amount of Hydrogen Peroxide
Before pouring the hydrogen peroxide into your RV’s water tank, it is important to determine how much you need.
To calculate the amount of hydrogen peroxide needed for your RV water tank, you’ll need to know the size of your tank.
Generally, you’ll need 1/4 cup of 3% hydrogen peroxide for every 15 gallons of water in your tank. For example, if you have a 45-gallon water tank, you’ll need 3/4 cup of hydrogen peroxide.
It’s important to note that different concentrations of hydrogen peroxide require different amounts. For example, if you’re using a 35% concentration of hydrogen peroxide, you’ll only need about 2 ounces for a 45-gallon water tank.
Always be sure to follow the manufacturer’s instructions when working with hydrogen peroxide and wear appropriate safety gear like gloves, goggles, and a mask.
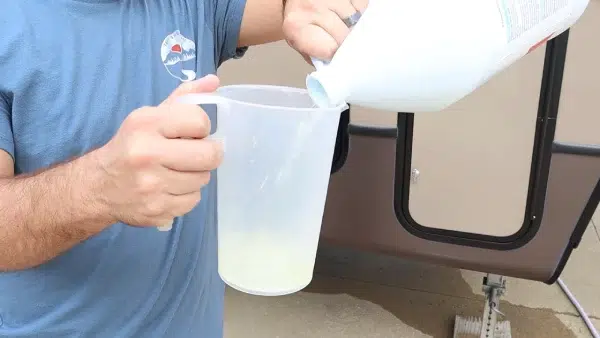
Step 4: Mix Hydrogen Peroxide With Water
Pour the appropriate amount of hydrogen peroxide into a clean container to mix the solution properly.
Then add the required amount of water and stir well until thoroughly mixed.
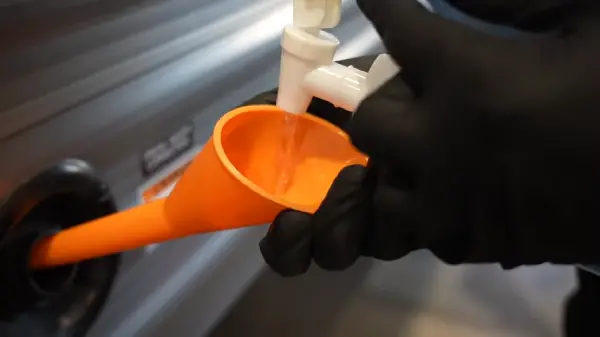
Step 5: Add the Solution to Your Empty Water Tank
To add the solution, you will need a funnel or a hose. Using a funnel is the easiest method, as it allows you to pour the solution directly into the tank without any spills. But, using a hose may be necessary if your RV’s water tank is difficult to access with a funnel. When using a hose, ensure it is clean and free from any contaminants.
Connect one end of the hose to your water source and insert the other end into your RV’s water tank. Slowly pour in the hydrogen peroxide solution until it reaches the recommended concentration level.
Step 6: Circulate and Let Stand Solution in Tank
Now, circulate the solution throughout your RV’s plumbing system. One way to do this is by running faucets and flushing toilets until you detect a strong odor of hydrogen peroxide.
This process helps to ensure that every part of the plumbing system has been treated with the solution, including any hard-to-reach areas.
Step 7: Leave It For Two Hours Or Overnight
After adding the hydrogen peroxide solution to your RV water tank, it is important to let it sit for a couple of hours or overnight. This allows the solution to effectively sanitize and disinfect the entire tank, including hard-to-reach areas.
During this time, it is recommended that you run all faucets and flush all toilets to distribute the solution. This will ensure that all water lines are also properly sanitized.
It’s important to note that the longer you let the solution sit, the more effective it will be in killing bacteria or other harmful microorganisms in your water tank.
But be sure not to exceed 24 hours, as prolonged exposure to high concentrations of hydrogen peroxide can damage your RV’s plumbing system.
Step 8: Flush Out Treated Water and Refilling
After you sanitize your RV water tank by adding hydrogen peroxide, it is important to flush out the treated water and refill it with fresh water. This will ensure that any remaining hydrogen peroxide is removed from the plumbing system and that the water is safe for consumption.
To begin, drain and flush out the treated solution from your RV’s plumbing system. This can be done by opening all faucets and flushing toilets until the water runs clear. Make sure to drain any hot water tanks or heaters.
Once you have flushed out the treated solution, refill your RV’s water tank with fresh water from a clean source. Using a hose equipped with a filter is recommended to prevent any debris or contaminants from entering the tank.
Step 9: Test The Water Quality
To test the water quality, start by checking if there is any residual odor of hydrogen peroxide. If you can still smell it, flush out your RV’s plumbing system again with clean water until the odor disappears completely.
Next, confirm that no other foul smell or taste remains in the water. This indicates that the sanitization process was successful and that your RV’s water system is now safe to use.
It’s important to note that water quality testing should be done before using it for drinking or cooking purposes. There’s nothing more important than your family’s safety.
How often should I sanitize my RV water tank with hydrogen peroxide?
To maintain the quality of your RV water supply, it is recommended to sanitize the water tank with hydrogen peroxide every six months.
But it is crucial to ensure you do this at least once a year if you do not use your RV frequently. This routine sanitization is necessary to keep your water system free from harmful bacteria, fungi, and other contaminants that grow in the tank over time.
If you notice any odd taste, smell, or color in your water, it is mandatory to sanitize your RV water tank immediately, irrespective of the last time you did it. This regular cleaning protects your family’s health by keeping drinking water free from hazardous substances.
Can I use other chemicals with hydrogen peroxide to sanitize my RV water tank?
Mixing hydrogen peroxide with other chemicals when sanitizing your RV water tank is generally not recommended, as this can result in dangerous reactions.
Hydrogen peroxide is a powerful oxidizer and can react with other chemicals to produce hazardous gases or compounds.
Following the manufacturer’s instructions and using hydrogen peroxide alone to sanitize your RV water tank is best.
If you are unsure about the compatibility of hydrogen peroxide with other chemicals, consult a professional or contact the manufacturer for guidance.
Keep Contaminants Out of Sight and Mind with Sanitized RV Water Tank
Keeping your RV’s water tank sanitized is essential to maintaining a safe, clean drinking supply. With hydrogen peroxide and following the steps we suggested above, you can keep those harmful bacteria, plus any other contaminants, out of sight and, hopefully, mind.
Remember to gather all necessary supplies, including safety gear such as gloves, goggles, and a mask. Empty the tank and remove any debris before determining the proper amount of hydrogen peroxide needed for treatment.
Once you’ve mixed the solution and added it to your empty water tank, be sure to let it circulate and sit for at least two hours or overnight. Afterward, drain the treated water and test the quality of your drinking water by checking for any residual odor or unpleasant taste.
Overall, regularly sanitizing your RV’s water tank is beneficial for your health and helps prolong the life of your plumbing system. So make sure to follow these simple steps to keep yourself and your loved ones safe while on the road.

