
Last Updated on April 15, 2023
With regular use, it’s not uncommon for an RV awning arm to become bent. Storms, high winds, and even accidental contact with objects can all result in this type of damage.
Regardless of the cause of the bent awning arm, you should know how to straighten the bent RV awning arm. This way, you can get your awning back in working order and avoid having to replace the entire unit.
You may be pleased to learn how easy it is to straighten a crooked arm on an RV. With a few tools and following the proper steps, you can have your awning working like new again. We will go over what you need and how to get the job done quickly and easily.
How to Straighten Bent RV Awning Arm in Precise Steps?
If you find that your RV awning arm is bent, there are a few things you can do to try to straighten it out. To begin with, you will need some tools and supplies. It will be necessary to use an adjustable wrench and a screwdriver to disassemble the RV’s awning arm.
There will also be a need for a heat gun, which is used to heat up the arm of the awning so that it can be straightened more easily. Using a hammer and a metal chisel, you can shape the arm of the awning.
Finally, you need a vise, which will be used to hold the awning arm firmly in place while you work on it. When you have gathered all of your supplies, you are ready to begin straightening the awning. Below are the steps you need to follow.
Step 01: Remove the Awning Arm from the RV
Assuming that you have collected the necessary supplies and tools, the next step is to remove the RV’s awning arm. To do so, you need to first open the awning all the way.
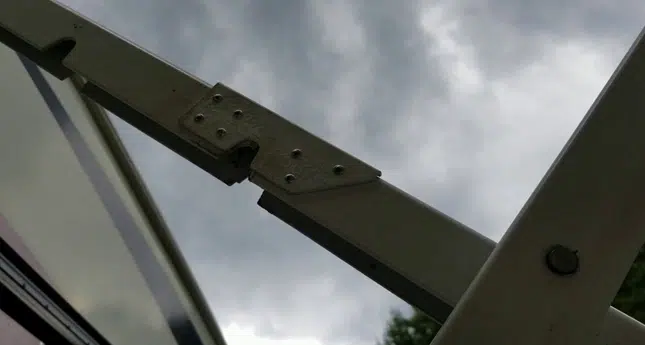
Upon fully extending the awning, locate the nut, bolt, or screws that secure the affected awning arm. If there is a cover over the nut or bolt, you will require to take it off before proceeding.
With the cover off, use your adjustable wrench to loosen it, and then unscrew the bolt or nut. In the case of electric awnings, a wiring harness has to be disconnected before the awning arm can be removed.
It may be necessary to detach the fabric from the awning tube in some models. Make sure to keep all the hardware in a safe place, as you may have to reinstall the awning later. Once the hardware has been disassembled, pull the awning arm away from the RV trailer.
Step 02: Heat up the Awning Arm
Now that the awning arm is free from the RV, it’s time to heat it up. This will help to loosen the metal and make it easier to straighten. Simply take your heat gun and turn it on to the highest setting.
Hold it about six inches away from the awning arm and move it back and forth until the entire awning arm is heated up. Be careful not to overheat the arm, as this could lead to its destruction. You just want it to be hot enough to make the metal more pliable.
Step 03: Straighten the Awning Arm
Once the awning arm has gotten hot, you can begin straightening it out. The best way to do this is to place the awning arm in a vise. Attach one end of the bent arm to the vise.
Ensure that the vise is tight enough to hold the arm in place but not so tight that it cracks the arm. After you have secured the arm, you should use your hand to hold the other side of the part.
You should gently push the rod in the opposite direction of the bend. As you do this, the awning arm should start to straighten out. If it is not, you may need to reheat it and try again.
Step 04: Reshape the Awning Arm
Despite straightening the arm, there is a possibility that it will not be perfectly shaped. If this is the case, you can use a hammer and chisel to gently reshape it. It is important to be careful while doing this, as you don’t want to break the awning arm.
Lightly tap the chisel with the hammer until the rear arm is in the desired shape. It is imperative, therefore, that the arm is evenly reshaped before being fitted back onto the RV.
Step 05: Paint the Awning Arm
Due to the heating and reshaping process, the paint surface of the awning arm may be affected. In order to protect the metal and prevent rusting, you should apply a fresh coat of paint to the arm.
Using a paint stripper, remove any existing paint from the arm. Following the removal of the old paint, sand the arm until it is smooth. Coat the arm with a primer and allow it to dry.
When the primer has dried, you can apply paint with the color of your choice. Ensure that the paint you choose is appropriate for the material of your awning arm. It is advised to use spray paint since it provides an even coating. Allow the paint to be completely set before proceeding to the next step.
Step 06: Reattach the Awning Arm
After allowing the paint to cure, it is time to reconnect the awning arm. Begin by lining up the holes in the awning arm with corresponding holes on the support bracket.
Next, insert the bolts and washers, and tighten them in place with a wrench. Upon ensuring that the arm is securely attached, repeat the process for the other awning arm.
Finally, test the awnings by opening and closing them several times. With any luck, they should now be straight and operate smoothly. Your RV awning repair has been completed successfully.
If your awning arms are still bent after following these steps, it may be necessary to replace them. Luckily, awning arms are relatively inexpensive and can be found at most hardware stores.
Replacing the awning arms is a fairly simple process and can be done in a matter of minutes. Simply carry out the procedures outlined above, but instead of straightening the arms, you will be attaching new ones.
Frequently Asked Questions:
There are a few questions that are commonly asked about bent awning arms. Below, we will attempt to answer some of these questions.
1. How can I Prevent My Awning Arms from Bending?
One way to prevent the bend of your awning arms is to make sure that they are properly supported. You can do this by adding reinforcement brackets or by installing crossbars.
A further tip for preventing awning arms from becoming bent is to ensure that they are not exposed to high winds. If you live in an area with strong winds, you may want to consider using a wind sensor, which will automatically retract your awning when the wind gets too strong.
Regularly inspecting awning arms for damage is another method to prevent bent awning arms. Look for any cracks, breaks, or other signs of wear and tear.
If you see any defects, make sure to repair them immediately. By taking these simple precautions, you can help ensure your awning material will stay in good condition for a long time.
2. What Are the Signs That My Awning Arms Need to Be Replaced?
There are several signs that indicate that you should replace the awning arms on your recreational vehicle. One sign is if the awning fabric sags in the middle when fully extended.
This means that the arms are no longer supporting the fabric properly and are in need of replacement. If you notice any breaks, we recommend replacing the awning arms as soon as possible to avoid further deterioration.
As the awning arms become rusted, this is also an indication that they should be exchanged. Rust can cause the awning arms to break and will also shorten their lifespan. Whenever you observe any of these signs, it is advisable to replace your RV’s awning arms at the earliest opportunity.
3. Should I Lubricate the Awning Arm?
It is always a good idea to keep the awning arm lubricated. In this manner, you can keep it moving smoothly and prevent it from seizing up. There are a number of different ways in which the awning arm can be lubricated, but the best way is to use a silicone-based lubricant.
Apply the lubricant to the arm and then wiggle it from side to side to spread it evenly. You should do this every few months to ensure that the arm remains in good working condition.
4. Can I Adjust the Tension on the Awning Arm?
The arms on your RV awning can be adjusted to provide the right amount of tension. In this way, you can prevent the awning fabric from flapping in the wind and causing unnecessary wear and tear.
To adjust the tension, start by loosening the adjustment knob at the base of the arm. Next, slide the adjusting sleeve up or down the arm to increase or decrease the tension.
Once you have the desired amount of tension, tighten the adjustment knob to secure the sleeve in place. By carefully adjusting the tension of the camper awning’s arms, you can help to extend the life of your awning and keep it looking its best.
Conclusion
As soon as you notice that the awning arms of your RV are bent, we hope that you now possess knowledge about how to straighten bent RV awning arms.
You just need to follow the steps we have outlined in this article. The result will be that your awning arms will function as new. This simple repair will save you time and money in the long run.
Do not wait if you notice a tear in your RV awning. Take action now and be prepared for your upcoming excursion. Remember that if the arms are severely damaged, it is best to replace them entirely. Your awning will then be able to provide the level of support that it requires.

