Last Updated on April 20, 2023
RV owners often experience a noisy and annoying creaking noise coming from an RV toilet, but luckily the problem can often be resolved easily. From worn seals and gaskets to improperly installed floor flanges, numerous causes could contribute to a creaky RV toilet.
With the proper guidance and equipment, anyone can quickly repair their noisy toilet and ensure their next road trip is quiet and comfortable. Keep reading to learn more about why your RV toilet may be making a noise and what you can do to fix it.
Why Does My RV Toilet Make Creaking Noise: Common Causes
Crumbling RV toilets are a frustrating and annoying problem for any RV owner. The good news is that this issue has several common causes, most of which can be easily fixed with some basic tools and knowledge.
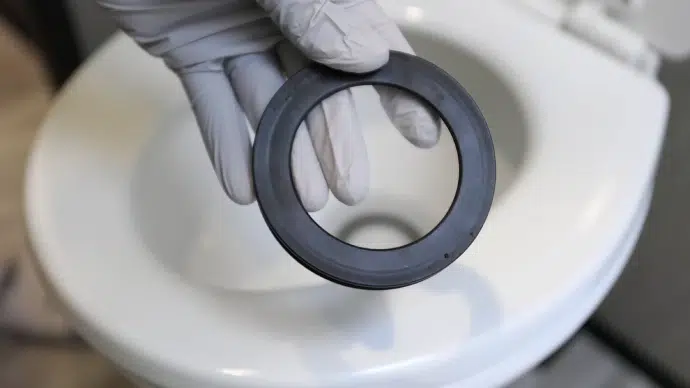
Worn Seals and Gaskets
Worn Seals and Gaskets are a common cause of a creaky RV toilet. These components are essential in preventing leaks and ensuring proper toilet functioning. Over time, seals and gaskets can become worn out due to constant exposure to water, waste, and cleaning chemicals.
When the seals and gaskets wear out, they can no longer create a tight seal between the toilet bowl and the waste tank or between the water valve and the toilet bowl. This can result in water leaks, foul odors, and a creaky sound when flushing or sitting on the toilet.
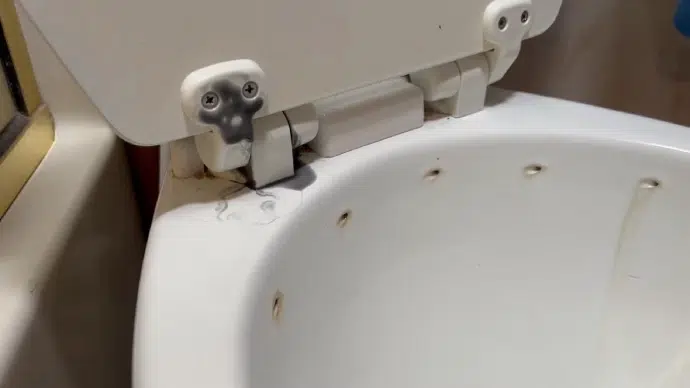
Loose or Damaged Mounting Bolts
Loose or damaged mounting bolts can be responsible for creaking RV toilets. Over time, the bolts that secure the toilet to the floor can become loose due to regular use and vibration during travel. This can cause the toilet to shift slightly, leading to an annoying creaking sound.
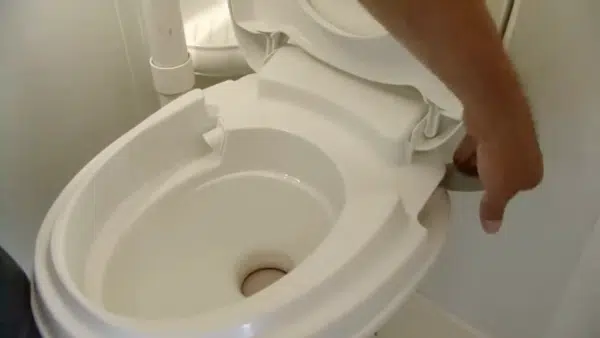
Improperly Installed Floor Flange
An improperly installed floor flange is another common cause of a creaky RV toilet. The floor flange connects the toilet to the waste pipe and secures it. If it is not installed correctly, it can cause the toilet to shift or wobble, leading to noises.
One potential issue with the installation of the floor flange is that it may not be level. If it’s not level, it can cause the toilet to rock back and forth when weight is applied, creating creaking sounds. Additionally, if the bolts used to secure the flange are not tightened enough, this can lead to movement and noise.
Malfunctioning Water Valve
A malfunctioning water valve can also cause a creaky RV toilet. The water valve controls the water flow into the toilet bowl, and if it is not functioning properly, it can cause the toilet to make strange noises.
One common issue with water valves is that they can become clogged or blocked with debris over time. This can prevent water from flowing smoothly through the valve, which can cause it to make a noise as it struggles to let water through.
Another issue with a malfunctioning water valve is that it may not open or close properly. If the valve does not open fully, there will not be enough water in the bowl to create a proper seal, which can lead to a creaking sound.
On the other hand, if the valve does not close completely, water will continue to flow into the bowl even when it is not needed, which can also lead to noise.
Inadequate Lubrication
Inadequate lubrication can also contribute to creaking RV toilets. The moving parts of the toilet, such as the flush valve and ball seal, need to be lubricated regularly to prevent friction and wear.
Without proper lubrication, these parts can become stiff and difficult to move, resulting in a creaky noise when using the toilet.
Tips for Fixing a Creaky RV Toilet

Fixing a creaky RV toilet can be a frustrating experience, but fortunately, several tips can help you solve the problem. Here are some steps you can take to fix your noisy RV toilet:
Inspect for Damaged Seals and Gaskets
With constant use and exposure to cleaning chemicals, these seals and gaskets can wear out over time. When this happens, air can escape through small gaps in the seal, causing a creaking or squeaking noise.
To fix this issue, you must inspect for damaged seals and gaskets. Carefully remove the toilet bowl from the base by unscrewing the bolts holding it. Once removed, check for any signs of wear or damage on the seals and gaskets. If they appear cracked or brittle, they must be replaced with new ones.
It’s important to note that not all RV toilets have replaceable seals and gaskets. Sometimes, you may need to replace the entire toilet if this is not an option.
Regular maintenance of your RV toilet can help prevent this issue from occurring in the first place. Make sure to clean your toilet regularly using only recommended products and avoid using harsh chemicals that can damage the seals and gaskets.
Tighten or Replace Mounting Bolts
Mounting bolts can become loose due to frequent use and cause the toilet to wobble, resulting in a creaking noise. Damaged bolts can also contribute to the problem.
To fix this issue, you can start by checking the tightness of the bolts using a wrench. If loose, tighten them until they are snug but not over-tightened. Over-tightening could damage the toilet or cause it to crack.
If tightening the bolts doesn’t solve the problem, you may need to replace them altogether. To do this, turn off the water supply and disconnect it from the back of the toilet. Then remove any caps covering the bolts and unscrew them using a wrench. Take note of their size and length to purchase new ones that match.
When installing new bolts, ensure they are tightened evenly on both sides to avoid any wobbling or uneven pressure that could cause future problems.
In some cases, replacing only one bolt may not be enough to fix the issue. It’s best to replace all of them at once to ensure uniformity and prevent future problems.
Proper maintenance is key in preventing loose or damaged mounting bolts from causing your RV toilet to creak. Regularly check for any signs of wear and tear and address them promptly before they become bigger issues.
Reinstall the Floor Flange Correctly
The floor flange is the piece that attaches the toilet to the wastewater pipe on the floor. If not installed correctly, it can cause movement and shifting of the toilet, leading to that annoying creaking noise.
To fix this issue, you must reinstall the floor flange correctly. Here are some steps to follow:
- Remove the toilet: Remove the toilet from its mounting bolts before reinstalling the floor flange. This may require turning off and disconnecting the water supply, draining any remaining water from the tank and bowl, and removing any screws or bolts holding it in place.
- Inspect the existing flange: Once you have removed the toilet, inspect the existing floor flange for any damage or wear and tear. You must replace it with a new one if it is damaged or cracked.
- Clean up: Before installing a new flange, clean up any debris or old wax around where it will be placed.
- Install new flange: Place a new wax ring on top of the waste pipe on the floor and then carefully lower the new floor flange onto it. Ensure it fits snugly into place and is level with your flooring.
- Secure flange: Use screws or bolts to secure your new floor flange firmly.
- Reinstall toilet: Reattach your RV toilet by aligning its base over your new floor flange and tightening all mounting bolts securely.
Repair or Replace the Water Valve
To fix a creaky RV toilet caused by a malfunctioning water valve, you have two options: repair or replace. The best course of action will depend on the severity of the problem and the age of your toilet.
If the valve is simply dirty or has debris buildup, you may be able to clean it with a specialized cleaner designed for RV toilets. Simply remove the valve from the toilet and soak it in the cleaner according to the manufacturer’s instructions. Once clean, reattach the valve and test your toilet to see if the creaking noise has been resolved.
If cleaning doesn’t work, you may need to replace the water valve entirely. This process involves removing the old valve and installing a new one. You can purchase replacement valves at most RV supply stores or online retailers.
When replacing your water valve, be sure to choose one compatible with your specific make and model of RV toilet. Follow manufacturer instructions carefully to ensure proper installation.
Apply Appropriate Lubricant
When fixing a creaky RV toilet, applying appropriate lubricant is an important step to help eliminate the noise. Lubrication helps reduce friction between moving parts, allowing them to move smoothly and quietly.
Several types of lubricants are suitable for use on RV toilets. One standard option is silicone spray, which is easy to apply and provides long-lasting lubrication. Another option is petroleum jelly or Vaseline, which can be applied directly to the moving parts of the toilet.
Before applying any lubricant, cleaning the toilet thoroughly to remove any dirt or debris causing the creaking noise is essential. Once the toilet is clean, apply a small amount of lubricant to the hinges, bolts, and other moving parts of the toilet.
Be sure not to over-apply, as this can attract dirt and debris, which can cause more problems in the future.
It’s also important to note that not all parts of an RV toilet require lubrication. For example, rubber seals should never be lubricated as this can cause them to deteriorate and leak. Refer to your RV owner’s manual or consult a professional if you’re unsure which parts require lubrication.
Why is my RV toilet creaking?
RV toilets may creak due to a faulty seal caused by mineral buildup or hard water. This often occurs when the blackwater tank is full, and the air is forced out of the pipes as it drains.
The noise created by this process can sound like a squeaking or creaking noise. In addition, if there is an issue with the flushing mechanism, it may also create a creaking noise when used.
Can a soft-close RV toilet seat be repaired?
Soft-close RV toilet seats can be repaired or replaced. Various DIY tutorials are available online that demonstrate how to do this efficiently and safely. When repairing or replacing a soft closed RV toilet seat, you’ll need access to the right tools, parts, and materials.
Depending on the type of wear and tear on your existing seat, it may require replacement instead of repair for it to function correctly again.
Is it normal for an RV toilet to make noise?
An RV toilet’s noise can indicate issues such as clunking, bubbling, or burping sounds. Clunking noises could suggest an issue with the flushing system or the water pump, which needs attention. If you hear bubbling noises in your RV toilet, this could be a sign of a blockage in the pipes or the vent connected to it.
Additionally, normal noises associated with an RV air conditioner include blowing fans and clicking compressors, but any excessive or unusual noises may require maintenance to fix them correctly.
Make Road Trips Stress-Free with Proper RV Toilet Care
Repairing an RV toilet is often not as daunting as it may seem. You can ensure that your RV toilet operates smoothly and quietly by inspecting worn parts, tightening or replacing bolts, re-installing the floor flange correctly, repairing or replacing the water valve when necessary, and applying appropriate lubricants.
So whether you’re planning your next road trip or just enjoying some time in the great outdoors, taking care of your RV’s toilet is an important part of ensuring a comfortable and stress-free experience on the road.