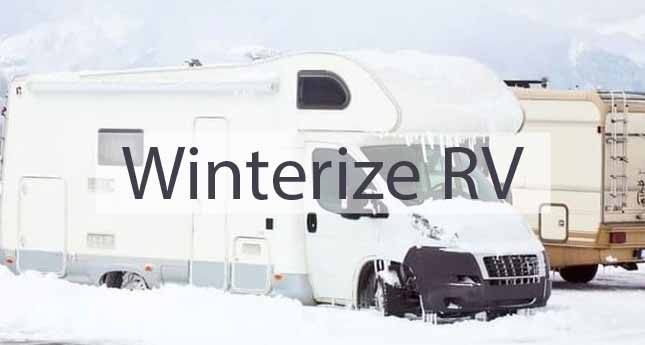
Last Updated on May 30, 2023
While it’s possible to use campers all-year long, it’s very important to note that they are not equipped to handle extreme temperatures like regular homes. This makes it crucial to prepare it for the frozen months. Learning how to winterize your RV will let you roll out in it without a hitch when the weather gets warmer.
If you’re worried about the complication of the task, don’t be. While you will need to do some serious work to prep your leisure vehicle for the winter, the process isn’t considered as rocket science.
The most important thing to know is that there are different ways how to winterize your RV. The tasks you need to do depend on what your plans for the winter are. This is why you should already make up your mind regarding winter camping months in advance.
What should you do, then, to prevent the harshest season from harming your RV? We’ve listed them below.
13 Winterize RV Checklist for Weekenders and Recreational RVers

Most recreational RVers don’t plan on camping during the winter months because of the cold weather. This means that they need to store their vehicles properly to avoid damages. To do this, here are some of the most important things to remember:
1. Get Rid of the Water in Your RV
Water is possibly the biggest threat to your motorhome’s integrity during the winter months. When they freeze, they will expand and can crack your pipes. This will require a good amount of repairs and cause delays if you have plans when spring rolls in. So to minimize the chances of pipes bursting, you should make sure to do the following:
2. Drain the plumbing completely
Since you won’t be using your rig during the cold months, there’s no reason for you to keep water inside its tanks and pipes. Head to a local RV dump, turn off the power inside your rig, open the system drain valves, then turn on all of the faucets and water valves to let the water out. Don’t forget to flush out the water in your toilet and water heater, as well.
3. Use compressed air to clear the plumbing system
Letting the water out of your plumbing is not enough to get rid of everything that’s stored in them. Odds are, a small amount can still be left behind after draining them. So to make sure that you’ll clear out your water lines, grab a compressor with a blow plug to push out all of the remaining water.
Make sure to connect the blow plug to the city water inlet and not the fresh water tank. Also note that 30 PSI will already suffice to get the job done so you don’t have to risk damaging your plumbing system.
4. Get some RV antifreeze in the water lines.
To better protect your plumbing system, pumping RV antifreeze through it is essential. You have two ways to go about this. If you’ve already done the tip above, you can opt to just pour a good dose of this solution into your pipes.
Another way to make sure that antifreeze gets to your water lines is by pumping them through your plumbing. You can do this with the help of an external hand pump or by using the internal pump of your RV. Note, however, that you’ll need to install a pump bypass kit when doing this to prevent the antifreeze from getting into your fresh water tank.
5. Dismantle the Components for Weatherproof Storage
Again, because you won’t be using your RV during the frozen months, it makes perfect sense to just stash away some of its parts inside your home. This way, you won’t risk freezing and damaging it when left outside with little to no insulation. This is why experts recommend removing batteries, radios, alarms, and detectors before the temperatures drop.
You should also remember to fill your propane tank. This can help ensure that it can withstand the weather better. Take it out and store it outside your RV if it’s removable. This will prevent its scent from luring in spiders and other insects.
If you’re going to store your RV in a storage lot over the winter, make sure to remove other valuables as well. Take out TVs, playing consoles, sound systems, tools, and other expensive-looking items as well. This can help minimize the odds of break-ins.
6. Prep Your Engine
To prepare your engine for dormancy, you should also remember to do the following:
- Fill the fuel tank as it can help prevent condensation.
- Add a fuel stabilizer then run the engine on idle for a few minutes. This will allow the substance to set in.
- Fill the radiator with automotive antifreeze.
- Check the brake fluid and oil levels. Refill if necessary.
- Check the windshield washer solution and make sure that it contains factory-formulated antifreeze.
7. Turn Off Electrical Components
To protect the electrical system of your camper, it’s imperative that you turn off its main circuit breaker. You should also unplug all of the appliances and disconnect all cables. If you have a generator on board, check the manual for the specific instructions for storage.
8. Close Off Every Opening
Because it will be cold outside, insects and pests will look for places to hide in during the cold months. Your RV can be the perfect spot for them so you have to take measures to prevent them from getting in.
You should never skip checking for and closing off all the gaps, holes, cracks, and small openings in your unit so pests won’t get in. Don’t forget to look under your unit as well so you can completely minimize their odds from getting in.
Make sure to check and cover exhaust pipes and vents. You should also remove your air conditioning shroud and replace it with a special cover.
9. Pest Control
Due to their size, pests might be too hard to completely prevent from getting inside your RV while it’s in storage. So you should also take pest control measures to manage the problem.
Experts recommend stuffing aluminum foil and steel wool into the openings and holes to prevent critters from getting in. You can also try using moth balls but they can smell awful and effectiveness is not 100% guaranteed. Peppermint oil is an aromatic alternative, so you can opt for that as well.
10. Clean Up Your Unit

You should never leave your motorhome dirty if you’re not using it for months. This can lead to a lot of issues which can be bad for your health or damaging to its structure. So before you close up shop for the cold months, make sure to remember to empty and clean the fridge, oven, bedroom, and bathroom. Remove soiled clothes, beddings, food, toiletries, and anything that can freeze or cause bacterial growth.
11. Implement Moisture Control Measures
Moisture is one of the biggest enemies RVers have all year round. It’s more crucial to control it during the colder months, though, as it can cause mold growth, rotting, and corrosion. Taking measures to prevent these when you winterize your RV can make a huge difference in keeping your unit in top shape.
A good way to control moisture while your camper is not in use is to leave a couple of moisture absorbers inside your unit. These will soak in the dampness from the air and trap it effectively inside a container.
12. Prep the Tires
While you should expect your tires to get some flat spots while it’s in storage, you should still take some measures to minimize the damage it can get during the winter months. There’s quite a few important tips that can help you do this which include the following:
- Only park on a concrete surface so your tires won’t sink into the ground when the winter thaw kicks in.
- Use leveling jacks according to your manufacturer’s instructions to raise the rig off the ground the right way for long periods. You can also use outside jacks or blocks to provide support for your unit.
13. Cover Up
While your camper is made of heavy-duty materials, the winter months can still take a toll on it. So, to minimize the damage that it can get from the changes in temperatures, exposure to snow and sleet, and damp air, it’s best to cover it up.
There are lots of specialized covers for RVs made specifically for this purpose that you can get from RV supply stores. However, you can also use other heavy-duty breathable material. The latter is actually a preferred option as it can also help ward off the growth of mold and mildew.
If your unit has an awning, it’s important to cover that part as well. These things may use tough materials but it can still get damaged by the weight of snow and the harsh weather.
Winterize Your RV 14 Checklist for Full-Time RVers
Those who are RVing for the first time in the winter should also learn everything they can about the activity before having a go at it. This can be a very challenging feat for the inexperienced. The fact that you’ll live inside a thinly insulated vehicle in freezing temperatures should convince you to prepare well.
How do you do this? Here are some of the most useful tips seasoned full-time RVers recommend:
1. Go Somewhere Warm
Since you can travel anywhere in your RV, why not just skip the risk of freezing to death in the winter by going somewhere warm? The Southern states are great destinations in the cold months since they have moderate weather this time of the year. If you’ll be driving around the country anyway, try scheduling your visit to the sunny regions in the winter.
2. Cover Up
To ensure your comfort and prevent the low temperatures from freezing you and your RV solid, you should add some layers to your unit. One of the best ways to do this is to add skirting to your unit.
An RV skirt is an exterior addition that you can attach to your rig to cover its underside. You can purchase them from supply stores or have some custom-made for your unit. You can also DIY using plywood, rigid insulation, or vinyl.
Seasoned full-time RVers recommend skirting because it helps keep the underside of your unit warm. This helps keep your floor warm and can help better protect your pipes, battery bay, and other vital components from the cold winds. It can also reduce heating costs making it an even more attractive addition to your rig.
To make the most out of this addition, make sure to minimize gaps between each panel. Some experts also recommend burying the skirting in the ground if possible. This can further reduce air flow and provide further stability to the add-on.
Remember the following points, however, for the best results:
- Don’t forget to remove the skirting if you’re going to move your motorhome. Driving with a skirting attached can damage the skirt and your unit.
- Do not use straw or hay bales as skirting. They may seem like great options because they’re from natural materials but they’re fire hazards. They can also attract pests to take shelter under your rig.
- Take rodent control measures to prevent these critters from getting cozy under your RV.
4. Beef Up Your Insulation
Your unit may seem cozy most of the year but its construction will be hardly enough during the cold months. Adding some insulation will be necessary if you intend to use it in the winter.
To make sure that you won’t freeze inside, here are some areas that you should pay close attention to:
5. Windows and Screen Door

Aside from not being thick enough to keep the cold from seeping in, these areas can get also drafty. This is why you have to be creative in blocking the cold air that can enter through them. To do this, give the following a try:
- Shrink-wrap your RV screen door.
- Add weatherstripping on the door.
- Install thick curtains to block the cold further.
- Use rigid insulation on some the windows that you don’t use for natural lighting.
6. Plumbing System
Water is also an enemy for full-time RVers in the winter. It can easily cause a burst pipe because it expands when frozen. This is why, as mentioned above, it’s essential to get all the water out from your system if you want to properly winterize your RV.
But because you’re going to use your RV in the cold months, you can’t just empty your tanks and live without running water for months. So what can you do?
Insulating your water pipes is an important task that you should do every winter. This will help keep your pipes from freezing and bursting so you absolutely have to do this. Even with skirting, the sub-zero temperatures can still take a toll on your plumbing system. So if you want running water, you should make an effort to cover your pipes with heat tape.
You should also take the same measures that you do at home to keep pipes from freezing. Letting the faucet drip when the temperature is going to drop can help immensely, too.
Keeping exterior drain pipes from freezing can be a major challenge, though. Because of their location, insulating them won’t be enough to keep them from freezing. As a result, lots of RVers swap out their flexible drain hoses to PVC pipes. They’re less likely to become brittle in cold weather, so they won’t easily disintegrate in the winter.
7. Hatch Vents
Adding insulation to your ceiling or hatch vents is also essential during the winter. The cold will get inside your unit if these parts are left alone, so make sure to do this.
8. Prepare Your Engine for the Cold Months
Whether you intend to move your RV or not during the cold months, it’s still very important to prepare your engine for the cold. This way, you can be sure that it will still run smoothly once the ice thaws.
9. Get Good Heaters
Keeping the cold out of your RV won’t be enough to make your motorhome cozy inside. You’ll still need to heat it up. Unfortunately, they don’t usually come with heaters installed so you’ll need to get stand-alone units for this purpose. Some of the items that you should consider getting are:
Electric Space Heaters
There are lots of great options available for these products but you have to make sure to find the most efficient ones. This way, you can be sure that they’ll do a good job in heating the interiors of your unit. They can also help you keep your electric bills down.
Mini space heaters are available, too. You can use these on water tanks so you can always keep the water inside above freezing temperatures.
No matter where you intend to place them, though, make sure to avoid overloading your circuit. Having several heaters plugged in and running all at the same time isn’t just costly, but it can also strain your electric system.
Propane Heaters
These are great to have if you want to eliminate the possibility of overloading your electrical system or you’re visiting places without electric hookups. They’re powered by propane so you don’t need to plug them in.
These items are available in different types. You can choose from vented and vent-free as well as portable or permanent varieties. It’s up to you which one you think will work best for you.
Vent-free types have garnered mixed reactions, however. As they need specific instructions for use, you have to make sure to read the manual before using them. They can also create moisture and create a buildup of carbon monoxide inside your RV. You’ll need to counter both effectively if you want to safely use these items.
Vent-Free Fireplace
If you want to go all out for your motorhome, you can also have a vent-free fireplace installed. These will provide good heating while adding an elegant touch to your camper. Full-time RVers can definitely find this a cozy addition to their units.
Tank Heaters
Tanks that are mounted below the floor of a leisure vehicle can definitely freeze during the winter. One way to avoid this is by getting a tank heater. Make sure to choose one according to the size of your tanks and your intended use for it.
10. Position Your Windows Towards the Sun
If you have the space, you should position your RV in a way that it will get sunshine for most of the day. Park it so its biggest windows and doors will face the sun so you can take use the sunlight to heat your home while it’s still light out.
11. Take Measures to Deal with Moisture and Condensation
As mentioned above, moisture is an RVers mortal enemy. It has a negative impact on indoor air quality and can cause rot and mold growth inside your RV for most of the year. It gets worse during the cold months as it can also cause your windows to freeze.
Frost can be damaging to your window’s structural integrity, though. It can also make your RV feel even colder, so this should be avoided.
Using a dehumidifier helps deal with this problem. You can place moisture absorbers all over your interiors to remove the dampness in the air. You should also ensure proper ventilation for propane heaters to prevent condensation from clinging to your windows.
12. Use Your Oven
If you have an oven in your rig, bake during the winter months. Not only will this let you enjoy the tastiest meals for miles around but it will also help warm up your interiors. It’s basically hitting two birds with one stone.
13. Consider Going Waterless Altogether
If you can live without running water in your leisure vehicle, you can also opt to drain your water tanks altogether. Doing this can better prevent burst pipe. It can also be a great way to let you try roughing it out in the harshest weather, so it can give you a memorable experience like no other.
14. Mind Your Tires
The cold weather and supporting a lot of weight can also take a toll on your tires. Checking its pressure regularly can help ensure that it’s in good condition.
To extend the life of your tires, you should try to use stabilizing jacks when your RV is parked. These provide additional support to your rig when occupants move about. As a result, it can reduce the pressure on your tires, letting it rest easy until its next use.
Conclusion
These are just some of the most popular tips how to winterize your RV. Seasoned RVers, gear manufacturers, and outdoor experts can tell you more specific information about RVing in the winter. So make sure to try to read more about the topic to help you prepare for such an adventure.

