Last Updated on May 4, 2023
Painting a plastic RV sink can be a great way to give it a fresh look without replacing it. With the proper preparation and application techniques, you can achieve lasting results that will give your sink the makeover it deserves.
Here, we’ll go over the steps for preparing and painting a plastic RV sink, as well as some tips for caring for it afterward. So if you’re wondering if you can paint your plastic RV sink, read on.
Can You Paint A Plastic RV Sink: 11 Factors

Preparing the Sink for Painting
Before you start painting, there are a few steps that must be taken to ensure the paint sticks and lasts. Here, we will discuss the steps for preparing the sink for painting, including removing old paint and primer, cleaning thoroughly, sanding the surface, applying epoxy primer, and covering areas that will not be painted.
Removing Old Paint and Primer:
To ensure that your paint job is successful, it is important to remove any old paint or primer from the surface of your sink. This can be done with a wire brush or sandpaper. If using a wire brush, make sure to wear appropriate safety gear, such as gloves and glasses.
When using sandpaper, use only fine grits (120-220) to avoid scratching the surface of your sink. Be sure to wipe away any dust particles after you have finished sanding with a damp cloth.
Cleaning the Surface Thoroughly:
Once all of the old paint and primer has been removed from your sink, it is important to give it a thorough clean before proceeding with painting. Use an appropriate cleaner, such as mild detergent or TSP (Trisodium Phosphate) solution, and then rinse off with water.
Wipe away any remaining residue with a damp cloth or paper towel until completely clear of dirt and debris.
Sanding Down the Surface to Create Better Adhesion:
Sanding down your sink is essential for the new coating of paint to adhere properly. Start by using coarse grit sandpaper (80-100) first to remove any rust that may have formed on your skin’s surface. Once all rust has been removed, switch to finer grits (120-220).
Be sure not to use any paper which is too abrasive, as it could cause more harm than good when trying to get an even finish on your skin’s surface.
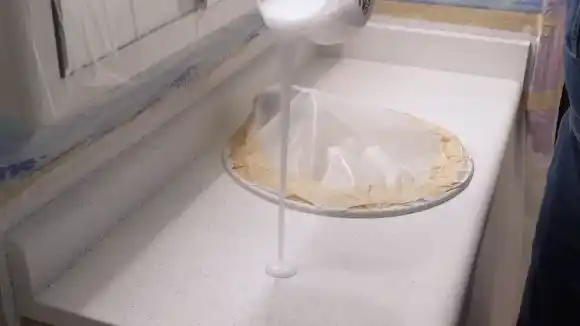
Applying an Epoxy Primer (Optional):
An epoxy primer can be used in some cases where extra adhesion is required or when variances in temperature are expected during the use of the painted sink, such as outside on patios, etcetera.
Make sure that if you choose this option, you follow instructions carefully, as two-part primers may require mixing at specific ratios for them to work correctly and remain durable throughout their lifespan.
Before applying, make sure that all surfaces are clean, dry, and free from dust particles before application which can hinder adhesion. Also, remember that this step may not be necessary depending on how long you plan on having this paint last, so consult instructions beforehand if unsure.
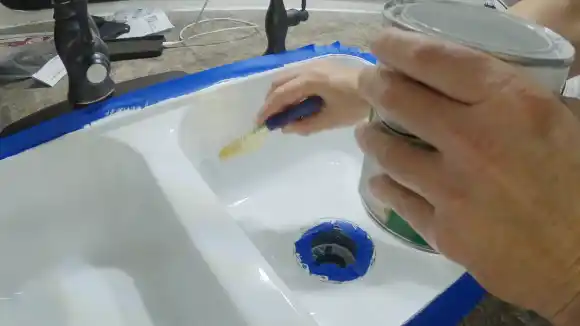
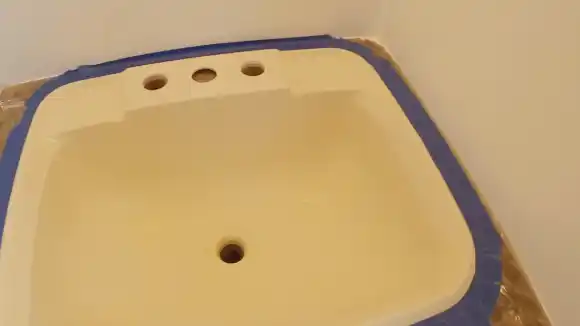
Covering Any Areas That Should Not Be Painted With Masking Tape Or Newspaper:
Masking tape or newspaper can also be used for covering certain areas which should not come into contact with paint during application. This could include taps or drains which need no coatings applied so they can continue functioning correctly after installation.
As well as this masking tape can also be used around borders where coats need not go giving those areas clean edges when the painting is complete.
Good quality masking tapes will help keep edges sharp. However, the newspaper could also work just as well, given its flexibility even around awkwardly shaped surfaces such as corner basins, etcetera.
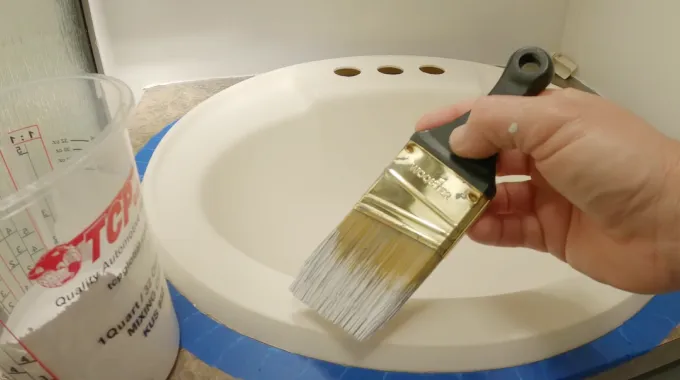
Applying Paint to the Sink
Painting your sink is a great way to update the look of your bathroom and add a unique touch. With the right paint and process, you can make your sink look brand new. Here’s how to apply paint to your sink in three easy steps.
Choosing the Right Type of Paint for the Job
When it comes to selecting paint for your sink, there are several options available. You’ll want to choose a latex-based or oil-based enamel paint that’s designed specifically for use on metal surfaces.
This paint will resist fading, chipping, and cracking while providing an attractive finish that’s easy to clean. Additionally, ensure the paints you select are lead-free, as they are much safer than paints with lead content.
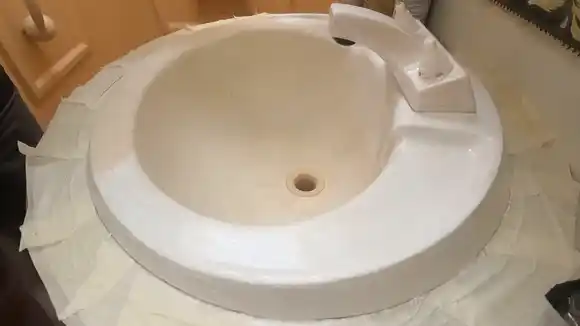
Dry The First Coat Completely Before Applying Additional Coats
Once you have the right paint selected, it’s time to begin applying it. Start by cleaning and sanding down the surface of your sink so that it is smooth and free from any contaminants or debris that could affect adhesion.
Next, apply a base coat of paint with even strokes and allow it to dry completely before adding additional coats if desired. It is best to use thin coats of color rather than thick coats, as this will help ensure even coverage throughout without having areas that are too thick or too thin.
Clear Coat After You Get The Color You Want
Finally, once you have achieved your desired color with multiple layers of paint, consider applying a clear coat over the top for added protection and shine. A clear coat will protect against scratches and other damage while giving your sink an extra layer of luster.
When selecting a clear coat product, be sure that it is compatible with both latex-based and oil-based enamels so that no damage occurs during the application or curing process. Once all products have been applied correctly, you should be left with a beautiful, freshly painted sink.
Caring for a Painted Plastic RV Sink
Caring for a painted plastic RV sink is essential to keep it looking fresh and new. Not only does proper maintenance help maintain the aesthetic appeal of the sink, but it also helps protect it against damage and wear caused by everyday use. Here are some tips for keeping your RV sink looking its best for years.
Avoiding Harsh Chemicals When Cleaning and Washing Dishes in the Sink
It is essential to avoid using harsh chemicals when cleaning or washing dishes in your painted plastic RV sink. Harsh chemicals can cause fading and discoloration over time.
Instead, opt for mild soaps, detergents, and cleaners designed specifically for washing dishes in an RV sink. These products will not strip away paint or damage the surface of your sink as harsher chemicals would.
Clean Your Sink After Every Use with Mild Soap and Water
To keep your painted plastic RV sink looking new, you should wipe the outside with mild soap and water after each use.
This will remove any food residue or dirt accumulated on the surface, which, if left unattended, could lead to permanent staining or discoloration. Additionally, drying off the sink with a clean towel will prevent any water spots from forming on its surface as well.
Repair Scratched or Damaged Areas to Prevent Further Damage
Touching up areas that have been scratched or damaged with touch-up paint is key for preserving your painted plastic RV sink’s appearance over time. Be sure to match up the color of your touch-up paint as closely as possible to ensure a seamless repair job once dry.
It is also essential to clean off any dirt or debris from around the area before applying touch-up paint to get optimal results when finished.
What Kind of Paint Doesn’t Stick to Plastic?
If you want to paint plastic, it’s essential to use the right paint. Look for paints that are made for plastic surfaces and come in spray or brush-on varieties. You’ll also need primer and a top coat to help the paint stick better and protect it from scratches.
Try using multiple thin coats instead of one thick coat. Some special paints don’t need a primer or top coat, but be sure to prep the surface properly before painting so your project looks its best.
Can You Paint Directly on Plastic?
Painting directly on plastic is possible, but it requires some special preparation and the right kind of paint. Plastic surfaces are smooth and non-porous, so they don’t absorb stains easily. To get the best results, you’ll need to use a primer and top coat formulated for plastics.
Start by cleaning the plastic surface with soap and water, then sanding it lightly to create a rough texture that will help the paint stick better. Once the surface is prepped, apply a spray primer and let it dry before painting with your chosen color.
Finally, finish off with a top coat of spray paint designed for plastics to ensure your project lasts. With these steps, you can create beautiful painted designs on plastic surfaces.
How do You Whiten a Yellow Plastic Sink?
If you have a yellow plastic sink that needs whitening, there are several methods you can use to restore its original color. The most common method is to use a mixture of bleach and water. Simply fill the sink with a solution of 8 parts water and 1 part bleach, then let it sit for 15-30 minutes.
You can also use a combination of baking soda, vinegar, and Dawn dish soap. Fill the sink with warm water and add one tablespoon of Dawn, two cups of vinegar, and one cup of baking soda. Allow the plastic containers to soak for 15-30 minutes before rinsing them off with clean water.
Additionally, you can try using hydrogen peroxide or oxygen bleach to clear any yellow stains from your plastic sink.
Can you Spray Paint a Sink?
Sinks can be painted, and It doesn’t matter if it is stainless steel or plastic. First, sand and prime the surface. Then wipe out any oils and scuff up the surface before spraying. Use Rustoleum Automotive spray primer and then your chosen color of spray paint.
Follow all instructions on the product label for best results. Painting your sink is an easy way to make your bathroom look new without spending too much money.
Make Your Plastic RV Sink Look New
After following these steps, you should have a beautiful new painted plastic RV sink. Use the right paint and clear coat for added protection and shine.
Also, remember to avoid harsh chemicals when cleaning and washing dishes in the sink, and wipe the outside with mild soap and water after every use. With proper care and maintenance, your painted plastic RV sink should provide you with many years of service and beauty.

