Last Updated on March 11, 2023
Painting a recreational vehicle (RV) is not as complicated as it may seem. With the right preparations and tools, an RV can be painted quickly and easily with a roller.
Before beginning to paint an RV with a roller, it’s essential to gather the necessary supplies and materials, make sure the temperature is appropriate, and take appropriate safety measures by using a ladder or foam roller for protection.
Once these steps are complete, you can apply primer, paint, and other desired finishes. So, let’s get started and learn how to paint an RV with a roller.
Can You Paint RV With A Roller: 4 Primary Steps
Painting the exterior of an RV with a roller can be daunting. It requires careful preparation and attention to detail to achieve good results. The following steps will help you achieve the best finish when rolling paint on your RV.
Gather Necessary Supplies and Materials
When painting an RV with a roller, gathering all the necessary materials is essential before beginning the project. These materials include primer, paint, drop cloths, painter’s tape, foam roller, ladder or step stool (if needed), and clean-up supplies such as rags and soap.
The primer should be chosen based on what type of paint will be used. Acrylic paints usually require a water-based primer, while oil paints require an oil-based primer. It is essential to select the correct sheen for the paint being used; matte finishes are best for RV exteriors because they do not reflect light and can help save money on energy bills.
Clean the Surface to Ensure Proper Adhesion of Paint
Before beginning any painting project, it is essential to ensure that the surface is properly cleaned to achieve maximum paint adhesion. This means washing it off with soap and warm water using a sponge or rag for an RV exterior.
A pressure washer can also be utilized if available. Once cleaned, allow the RV’s surface to dry completely before starting any painting process.
If cleaning with a pressure washer, lightly sand off any chipped areas and then use a mild detergent to remove grease stains or other contaminants from the surface before painting to ensure maximum paint adhesion when finished.
Make Sure the Temperature Is Appropriate for Painting
It is essential when preparing to paint an RV that the temperature conditions are suitable for painting ideally; temperatures between 50–90°F are best for applying enamel or latex-based paints (check specific product instructions).
Not only does temperature affect how much time you have before needing to apply another coat of paint, but also whether or not solvents will evaporate quickly enough from each layer of paint to create a strong bond between coats as well as cause any runs or sags in the finish due to too slow an evaporation rate at cooler temperatures.
Additionally, cooler temperatures can cause some types of paints (especially oil-based) not to cure completely, leading to chipping and peeling down the road and complications such as bubbling/cracking in extreme cases over time.
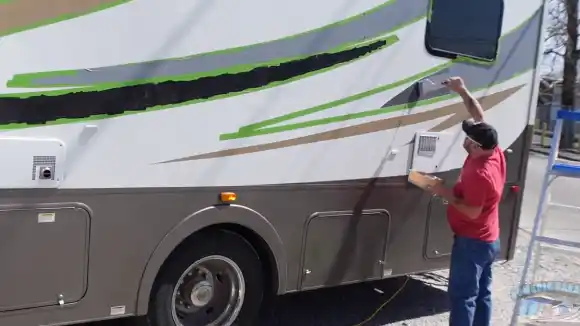
For a smoother finish, consider using a ladder or foam roller
When painting an RV, using a ladder or foam roller is essential. This helps prevent drips and gives smoother coverage. Conventional rollers have more air pockets which can cause spottier coverage when dried.
Ladders are better than stepping stools since they give you access around curves and corners easier, especially if you are working on larger projects like RVs.
How to Paint an RV with a Roller: 5 Steps
Painting your RV with a roller will give it new life and protect it. You can achieve professional results with patience.
Let us give you a step-by-step guide on how to paint your RV with a roller, including how to apply primer, cover unwanted areas, let the paint dry, and clean up supplies & materials. Get your paintbrush out, and let’s get painting.
Apply Primer
When painting an RV with a roller, it is essential to apply primer before beginning the painting process. Primer acts as a base coat and can help improve the paint’s adhesion and make it last longer.
Before applying primer, clean and prepare the surface by removing dirt, grease, and other contaminants. Once this is done, you should use a high-quality acrylic or latex primer that is designed for outdoor use.
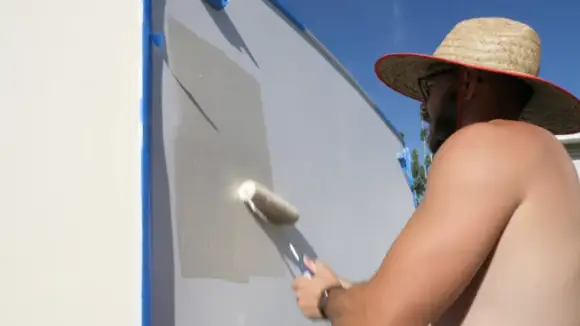
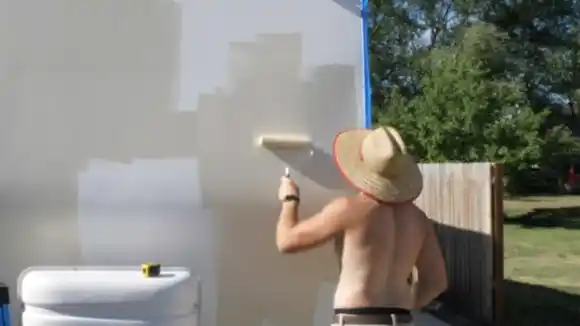
When applying the primer, use light strokes with a paint roller for even coverage and two or three coats if necessary. Allow each coat to dry before applying additional coats.
Take Your Time
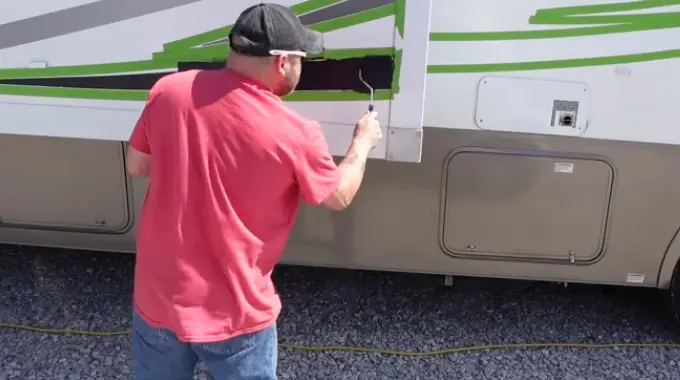
Take your time when painting an RV with a roller to ensure even coverage. Start at one corner of the RV and work outwards using light strokes with the roller.
Ensure that all areas are adequately covered without any missed spots or thick patches of paint. Additionally, you may want to use different-sized rollers depending on the size of the area being painted. For example, corners can be challenging to reach with larger rollers, so using a smaller one may work better.
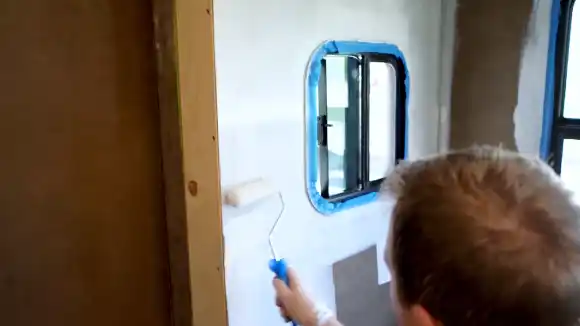
Cover Unwanted Areas
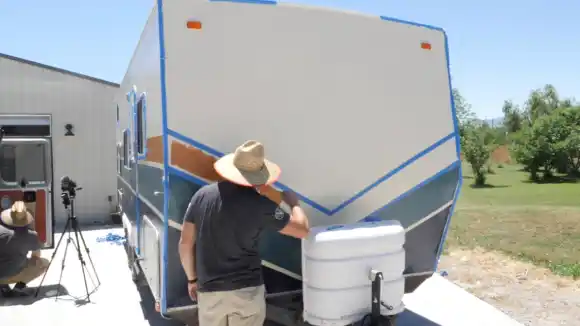
You should cover any areas you don’t want to paint before you start painting an RV with a roller, like windows and trim pieces. Using painter’s tape or masking tape around these areas will help ensure they are not accidentally painted over while working around them.
Additionally, cover any adjacent surfaces, such as furniture or nearby walls, that may also be affected by over-spray from the painting process.
Let Paint Dry
Once you have finished applying paint onto an RV with a roller, allow it to dry completely before adding another layer or coat of paint if necessary. This will help ensure that there are no smudges or streaks left behind from wet paint when moving around on top of dried layers of paint previously applied to the surface of the RV.
To speed up drying time for thicker layers of paint, you can use fans or open windows for ventilation but be careful not to blow dust into freshly painted sections.
Clean Up Supplies & Materials
After we finish painting the RV with a roller, cleaning up our supplies and materials is essential. This will stop any accidental damage from happening when we use them again. For example, dried paint on rollers could make them unusable until they are cleaned off again later.
When cleaning up, we should be thorough now since it might cause more issues if we rush through it. Doing it right now is better than waiting and causing problems later. So let’s clean up our supplies and materials properly now.
Maintaining the Paint Job on Your RV
You must maintain its paint job to protect your RV against wear and tear from the elements. To maintain the exterior protection of your vehicle, you should regularly wash and wax it, schedule maintenance checkups, and repair any cracks or holes. The following tips will help you maintain your RV’s paint job:
Regularly Wash and Wax Your RV’s Exterior Surface
You can maintain the paint job on your RV by regularly washing and waxing its exterior surface. Doing so will remove dirt, debris, and other grime that can accumulate on the surface of your vehicle over time.
To start, you must purchase a mild car wash soap or detergent to clean an RV’s exterior. You can then use a sponge or a soft cloth to gently scrub the surface of your vehicle in small circles until it is free from dirt and grime.
Once done, rinse off any remaining soap with water and dry off the vehicle’s exterior with a clean microfiber cloth. Afterward, you can apply wax to the surface of your car using an applicator pad or cloth to protect it from further damage due to sun exposure or harsh weather conditions.
Schedule Regular Maintenance Checkups for Your Vehicle’s Exterior
In addition to regularly washing and waxing your RV’s exterior, it is essential that you also schedule regular maintenance checkups for its exterior as well.
During these checkups, inspect all panels of your vehicle’s exterior for any signs of rust or corrosion, which could be caused by extreme weather conditions such as snow, rain, or hail.
If these signs are present, you should take immediate action to prevent further damage from occurring, such as using special paints formulated for automotive applications specifically designed for protection against corrosion and rust accumulation on vehicles’ surfaces, such as epoxy paints.
Additionally, clean out any accumulated dirt or grime within tight spaces such as under door handles or around windows, where dirt buildup accumulates before advancing across larger surfaces of the vehicle’s bodywork over time.
Repair Any Cracks and Holes in The Surface Immediately
If you find any cracks or holes in your RV’s paint job during regular check-ups, it is essential to fix them right away. Start by cleaning the area with a soft brush and fill in any gaps with automotive-grade filler material, not wood putty.
After that, use sandpaper to smooth out any rough edges and then apply primer and coats of paint depending on how deep each crack is. This will help keep the original color tone of your RV’s paint job.
Can I use a Wet Roller to Paint?
It is undoubtedly possible to paint with a wet roller. Wetting the roller cover before use helps prime it to absorb more paint and makes it easier to clean afterward. To wet your roller cover, fill a spray bottle with water and spin the roller while spraying until it’s noticeably wet.
Additionally, you may want to invest in a plastic bag or storage container specifically designed for keeping wet rollers moist between jobs.
Can I Paint with a Foam Roller?
It is possible to paint using a foam roller. It’s a great budget-friendly option, and it works especially well if you want a smooth, glossy finish. Make sure to start on a clean surface cleaned with Lacquer Thinners and let the Thinners dry before painting.
You should apply the paint just like usual and repeat it, but press the roller lightly this time. Foam rollers are good when you don’t need to keep using the identical roller or when you want something smooth; they absorb liquids quickly and spread evenly.
Is Painting with a Roller Easy?
Painting with a roller is a great way to give your walls a fresh look. You’ll need the right tools, like good quality rollers and frames, and make sure you protect yourself by wearing goggles.
Make sure to get paint from the bucket instead of directly from the can, and be careful not to saturate the brush or roller too much. Quickly run it over the ridged part of the paint tray so that it spins. If you do this correctly, you’ll get great results.
Do You have to Sand RV Walls Before Painting?
Painting your RV walls can give them a new look. You don’t usually need to sand the walls first, but if you patched any areas, then sand those before painting. Sanding lightly can help the primer and paint stick better. Use a sanding sponge or fine-grit sandpaper for the best results.
Wear gloves and safety glasses to protect yourself from dust when doing this task. It depends on the condition of the walls and what type of paint you use – if in doubt, ask a professional painter for advice.
Transform Your RV with a Roller
After completing your paint job, regular maintenance, such as washing and waxing your RV’s exterior surface, will help maintain the look you achieved.
Additionally, scheduling regular maintenance checkups for your vehicle will help keep your RV looking pristine for years to come. You can easily paint an RV with a roller with the right supplies and step-by-step instructions.

