Last Updated on June 11, 2023
For any RV owners who love camping, having an awning is a valuable accessory. Not only does it provide shade and protection from the sun, but it can also help to keep the interior of your RV cool on hot days.
You can enjoy the fresh air and beautiful scenery while relaxing under your awning. It can also add a touch of style and personality to your rig and can be a pleasant way to meet new friends while on the road.
There is no way to avoid the fact that leaves will fall from the trees and stain your awning when you camp under them.
This is why you need to know how to remove leaf stains from RV awning. We will demonstrate some simple procedures for removing those pesky leaf stains.
How to Remove Leaf Stains from RV Awning? Step By Step Instructions
In the event that you discover leaf stains on your awning, it is imperative that you remove them immediately.
If the stains are left to sit, they will become more difficult to remove and may even permanently damage the awning fabric.
The tannins present in the leaves can cause tough stains. As long as you take action promptly, it is not difficult to remove the leaf stain from an awning. Follow these steps to get rid of leaf stains on your RV’s awning:
Step 01: Gather the Necessary Supplies
When embarking on any project, collecting the necessary materials and equipment is always important before starting work.
This simple step can save a lot of time and frustration later on. You will need the following materials to complete this project:
1. Awning Cleaner: You will require a cleaner that is intended for awning cleaning. Choose a premium RV awning cleaner that is gentle and will not damage the awning material. Doing so will make certain your awning lasts for a long time.
2. Mild Soap: If you do not have an awning cleaner on hand, you can use mild soap. This soap can provide effective cleaning power while being gentle on the awning fabric.
3. Long-Handled Soft Bristle Brush: A soft brush with a long handle will help to reach all the nooks and crannies of the awning. You should select a brush that is not likely to damage the awning’s material.
4. Garden Hose: It is necessary to use a garden hose with a spray nozzle attached in order to rinse the awning cleaner or soap from the awning fabric.
5. Towels: It is always advisable to have some towels on hand to dry the awning after cleaning. The purpose of this is to prevent water stains from forming within the fabric of the awning.
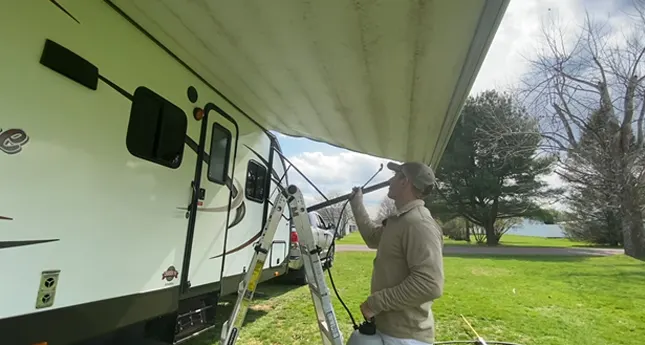
6. Ladder: In order to reach the top of the awning, you will need a ladder. Ensure that you choose a ladder that is tall enough and that can be positioned on a solid, level surface.
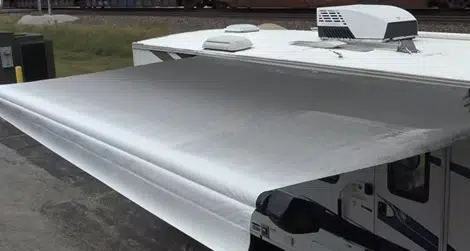
Step 02: Open the Awning
Before you can start cleaning your awning, you need to open it up. This will give you access to the entire surface area and allow you to clean RV awning more thoroughly.
In addition, opening the awning can prevent any water or cleaning solutions from damaging the fabric. If you have an automatic awning, make sure to read the instructions carefully before opening it.
Step 03: Position the Ladder
You are informed that when you open the awning, it will be extended full length and you cannot reach the top. Therefore, it is necessary to use a ladder to access the awning’s top.
Before starting work, be sure to position the ladder on a level, solid surface. Doing so will minimize accidents from occurring.
Step 04: Inspect the Awning
Once the awning is open, take a few minutes to inspect it. Look for any areas that seem to be particularly dirty or stained. These areas will need to be given special attention during the cleaning process.
Step 05: Wet the Awning
Wetting the awning before cleaning it is important for several reasons. This will assist in loosening any dirt or debris that may be clinging to the fabric. By doing so, it will be easier to brush or scrub the awning clean.
Second, it will also reduce the risk of damaging the fabric. When dry, awnings can be quite brittle and susceptible to tearing.
However, the fabric is more flexible and less likely to rip or tear during cleaning when properly hydrated. Finally, it will also help prevent mold or mildew growth.
By keeping the fabric moist, you create an environment that is inhospitable to these harmful fungi. We recommend that you wet the awning prior to washing for all these reasons.
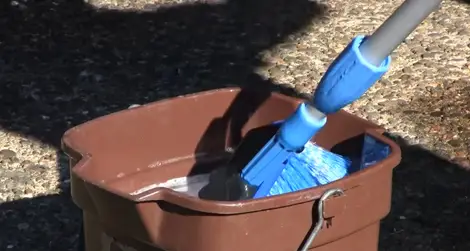
Step 06: Prepare the Cleaning Solution
Now that the awning is wet, it is time to get the cleaning solution ready. If you are using the best RV awning cleaner, you should mix the solution with water in a bucket before cleaning the awning because the cleaning solution must be diluted in order to be effective.
The awning fabric may be damaged if the solution is too concentrated. In addition, combining the solution beforehand ensures that all ingredients are evenly distributed, which helps prevent streaking and spots.
Mixing the solution ahead of time saves time and effort when it comes time to clean the awning. You can ensure that your awning is cleaned safely and effectively by taking these simple steps.
Be sure to follow the instructions on the packaging of your awning cleaner in order to ensure that you are using it correctly.
You can also clean your awning with dish soap in the absence of an awning cleaner. This household cleaner is gentle enough to use on awnings and it will effectively remove dirt and debris. Simply mix the soap with water and proceed to the next step.
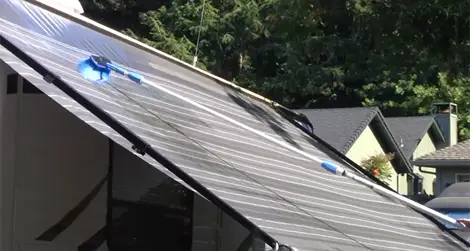
Step 07: Apply the Cleaning Solution
It’s time to spray the cleaning agent on the awning now that it’s ready. To spray the solution onto the awning, you may employ a garden hose equipped with a sprayer attachment.
If you are using a garden hose, be sure to hold it close to the awning surface so that the water pressure is not too strong. You don’t want to damage the fabric by spraying it with too much force.
Another option for distributing the cleaning fluid is to use a pump sprayer. Pump sprayers are designed to apply solutions evenly and with just the right amount of pressure.
This makes them ideal for cleaning awnings. Just remember to read the directions carefully before you use them. The cleaner should be applied to the awning, paying attention to all of the stained areas.
Step 08: Wait for the Solution to Work
Once the cleaner has been applied, it is important to let it sit for a few minutes so that it can work its magic. The length of time you should wait will depend on the severity of the stains.
You may only need to wait for 5 minutes for light stains or so. However, the more stubborn stains may require waiting for up to thirty minutes. Be patient and allow the detergent to do its job.
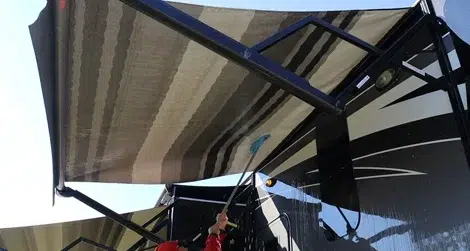
Step 09: Scrub the Awning
After waiting for the prescribed amount of time, it is time to scrub the awning with a brush. You will want to use a soft-bristled brush so that you don’t damage the fabric.
Brushes with synthetic bristles are a good choice because the awning’s fabric will remain relatively undamaged. Start by scrubbing the stained areas of the awning and then work your way outwards. Be sure to scrub in a circular motion to loosen any stubborn dirt or debris.
Step 10: Rinse the Awning
As soon as you have finished cleaning the awning, rinse it thoroughly. You can use a garden hose for this purpose.
Set the hose’s setting to a gentle level and place the hose near the awning. Ensure that the awning has been thoroughly rinsed to remove all of the cleaning solutions.
Step 11: Dry the Awning
In addition to rinsing the awning, you should dry it as soon as possible. If the awning is left wet, it could develop mildew or mold growth.
To dry the awning, it is recommended that you use a towel or a cloth. Take a long stick that has a flat and wide head, and drape the towel over it.
Gently glide the towel over the awning fabric, being sure to remove as much moisture as possible. You will have to wait for the awning to dry completely before using it again.
These are the steps that you need to follow so that you can effectively remove leaf stains from your awning.
In order to achieve the best results, it is crucial that you utilize the correct cleaning solution and follow instructions carefully. By taking these steps, you can keep your awning looking its best for a long time.
Different Types of RV Awnings
When you are trying to determine what to do in order to eliminate leaf stains from RV awnings, it is necessary to know the kind of awning you have.
There are many different types of awnings on the market, and each type is made from different materials. Below, we will discuss the most common types of awnings.
1. Acrylic Awnings
Acrylic fabric is used for such awnings. Despite its synthetic composition, this fabric resists UV rays, mildew, and fading.
This fabric awning is also easy to maintain and durable. Due to these properties, acrylic awnings are ideally suited for use in areas that receive direct sunlight or are exposed to the elements.
An important characteristic of these awnings is their breathability, which allows air to circulate and keeps you cool during warm weather.
A wide variety of colors and patterns are available for these types of awnings so that they can match the style of your RV parts.
In addition to its ability to repel water, this makes it an excellent choice for rainy weather. Furthermore, it dries quickly, so you do not have to worry about it becoming moldy or mildew.
There are some limitations to this kind of awning. It is not waterproof, so you need to take it down during heavy rains. There is also a possibility of it being stretched.
2. Vinyl Awnings
The material used for this awning is vinyl, which is a synthetic plastic. It has the advantage of being durable and easy to maintain.
A vinyl awning is available in many different colors and styles, making it a popular choice for many RVers. One major advantage of such an awning is that it is completely waterproof. Furthermore, it is easy to clean with only a hose and some soap.
It is also resistant to fading in direct sunlight. Moreover, it is scratch-resistant, which means it cannot be easily damaged.
If it is not properly dried, there is a possibility of mildew stains and mold developing. In addition, it attracts more dirt and dust than any other type of awning.
3. Fixed Awnings
This type of awning is permanently mounted to the RV. It is ideal for anyone who wants the convenience of not having to set up or take down their awning every time they camp.
Generally, there are two types of fixed awnings: manual and automatic. The former requires you to set it up manually, while the latter can be opened and closed with the push of a button.
4. Slide Out Awnings
There is a sturdy metal frame attached to a durable fabric that is used to create slide-out awnings. The awning can be extended or retracted, depending on your needs.
These awnings are easy to install and disassemble. In addition, it is available in a wide range of colors and styles to match the look of your RV.
5. Aluminum Awnings
RVers prefer them because they are relatively lightweight and easy to install. These awnings also provide good protection against the elements, including both sun and rain.
When choosing this type of awning for your RV, be sure to select one that is specifically designed for RVs. This will ensure that it fits properly and that the mounting brackets are compatible with your RV.
6. Roller Awnings
A roller awning is a type of awning that uses a rolling mechanism to open and close. It is typically made from heavy-duty fabric, such as canvas, that is stretched over an aluminum frame.
When the awning is not in use, it can be rolled up into the frame, which makes it very compact and easy to store.
Roller awnings are popular because they are very easy to operate, and they can provide a lot of shade and protection against the sun and rain.
Most roller awnings also have an easy-to-use crank that makes it even easier to open and close them.
7. Patio Awnings
It is a good idea to have a patio awning at your campsite to provide shade. Several sizes are available, so you can choose one that fits the available space. Patio awnings can either be attached to the side of your RV or freestanding.
If you choose a freestanding awning, be sure to anchor it securely so that it does not blow away in the wind. Patio fabric awnings are usually made from canvas or vinyl and can be either manual or automatic.
Frequently Asked Questions:
There are a few questions that are commonly asked about cleaning RV awnings. The following are some of the most frequently asked questions with answers.
1. How Often Should I Clean My RV’s Awning?
It is recommended that you wash your awning at least once a month. This will help to prevent the build-up of dirt and debris. If you live in an area with a lot of trees, you may need to clean your awning more often.
2. Can I Use Bleach to Wash an RV Awning?
You should not use bleach to take care of your RV’s awning. Bleach is a harsh chemical that can rot the fabric of the awning. So, it is best to avoid using it.
3. How Much Wind Can an Awning Take?
Most awnings can handle winds up to 20-25 mph. However, it is always best to check the manufacturer’s instructions to be sure.
4. How Long Does an RV Awning Last?
RV awnings typically last for about 5 to 15 years. However, this will depend on how often you use the awning and how well you take care of it. You can prolong the lifespan of your awning by following the appropriate cleaning and maintenance procedures.
Conclusion
Cleaning your RV’s awning on a regular basis is important if you want to keep it looking its best. We hope that you fully understand the steps on how to remove leaf stains from RV awning.
It is now possible to easily clean your awning, and your awning will be like new in a short period of time.
Follow the steps carefully, and be sure to use the correct cleaning solutions to avoid damaging your awning. This will allow you to continue enjoying your awning for a long time.

