
Last Updated on September 19, 2023
As a newcomer to the RV world, it’s important to understand the essential maintenance tasks that come with owning one. Neglecting these tasks can lead to serious damage to your vehicle and an unpleasant experience. Among these tasks is cleaning out your RV’s holding tanks.
This is where the tank flush comes in, a critical step in properly maintaining your RV’s wastewater system. However, before you get started, it’s important to know that there are three primary types of tank flush systems for RVs: built-in systems, aftermarket attachments, and portable devices.
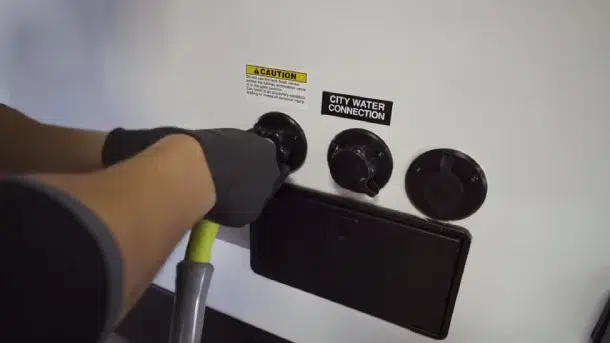
Among them, the built-in system is the most common. It’s easy to use, too. Just attach the water hose to the inlet and turn on the water supply. Then, open the valve and allow it to work its magic. We’ll go over each type of tank flush and share how to use it.
How to Use Tank Flush On RV? 3 Methods To Get Started
Don’t settle for subpar tank flushing in your RV. There are three top options for tank flush systems, each with distinct advantages. Optimize your maintenance routine by selecting the best system for your vehicle. Learn more now.
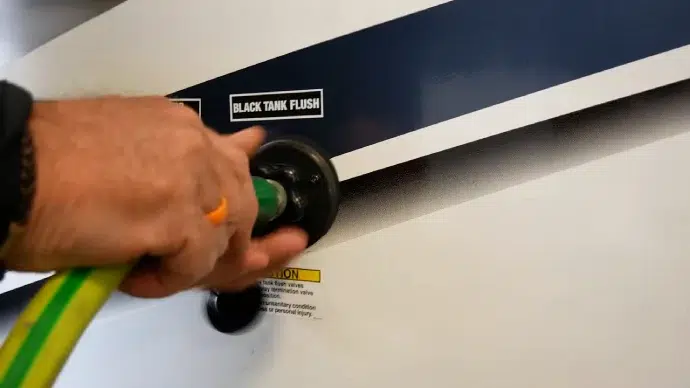
#1. Use a Built-in Tank Flush System
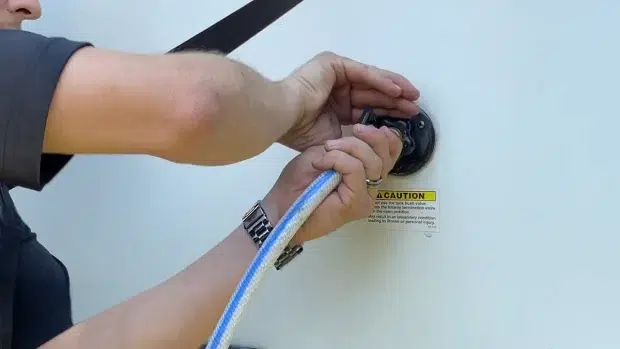
To use the built-in tank flush system, connect a water hose to the designated inlet on your RV. Ensure the hose is long enough to reach your water source and rated for drinking water. Turn on the water supply and then turn on the tank flush valve located near the inlet.
The system will begin flushing out your holding tanks with high-pressure water. It’s important to monitor progress and keep an eye on the level of water in your tanks. Once the water runs clear, you can turn off the valve and disconnect the hose.
It’s recommended that you use this type of tank flush regularly to prevent buildup in your holding tanks. Regular cleaning can also help prolong the life of your RV’s plumbing system.
#2. Use an Aftermarket Tank Flush Attachment
An aftermarket tank flush attachment is a great option for those who don’t have a built-in system. This type of system usually comes with multiple attachments, allowing you to customize the flow and pressure depending on your needs.
Choosing the right attachment for your RV’s make and model is crucial. Various options are available on the market, so do some research or consult a professional to ensure you’re selecting the best fit for your needs.
Once you have your attachment, installation is typically straightforward and can be done with basic tools. Most attachments will come with instructions specific to that product; however, here are some general steps:
- Locate the access point for your RV’s black water tank.
- Remove the cap covering this access point.
- Attach the flushing attachment to this opening.
- Ensure that all connections are tight and secure.
- Connect a hose from a clean water source to the flushing attachment.
It’s important to note that not all RVs may be compatible with aftermarket tank flush attachments due to differences in plumbing systems or other factors. If you’re unsure about whether an attachment will work with your RV or how to install it properly, consult with a professional before proceeding.
#3. Use a Portable Tank Flushing Device
Portable tank flushing devices are an excellent option for RV owners who want to maintain their tanks on the go. These devices are compact, easy to use, and can save you time and money in the long run.
To use a portable tank flushing device effectively, follow these steps:
- Fill the device with clean water: Before using your portable tank flushing device, ensure it is filled with clean water. Use a bucket or hose to fill it.
- Connect the device to your RV’s sewer hose: Once the device is filled with water, connect it to your RV’s sewer hose using an adapter or connector.
- Turn on the water supply: Open the valve on your RV’s fresh water supply to allow water to flow into the flushing device.
- Insert the flushing wand into your RV’s tank: Flush the toilet or sink drain of your RV with the flushing wand.
- Turn on the flushing device: Turn on the flushing device and let it run for several minutes until all debris and waste have been flushed out of your tanks.
- Repeat as necessary: Depending on how dirty your tanks are, you may need to repeat this process several times until all debris has been removed.
- Empty and clean your portable tank flushing device: After using it, empty any remaining water and clean it thoroughly before storing it.
How to Maintain Your RV Tanks with a Tank Flush?
Maintaining your RV’s tanks is vital for an excellent camping trip. One crucial step is using a tank flush system correctly. Check out these tips to guarantee your tanks remain in top condition:
1. Regular Use of a Tank Flush System: Regularly using a tank flush system is crucial for maintaining your RV’s tanks. You should use the flush system after every trip, especially when camping without sewer connections.
2. Use the Right Cleaning Solution: Cleaning your RV’s holding tank is necessary to maintain its cleanliness and functioning. However, not all cleaning solutions are the same. Choosing the appropriate one for your tank’s type is crucial to avoid damaging them, which can be costly.
3. Be Patient with the Cleaning Process: Cleaning time varies depending on the tank’s dirtiness and can take time. Being patient is key. Allow enough time for the water to run clear before finishing.
4. Don’t Forget About the Sensors: The sensors in your RV’s tanks are essential for accurately monitoring tank levels. However, residue buildup can cause inaccurate readings and sensor malfunctions over time. Prevent this issue by using a sensor cleaner regularly.
5. Schedule Regular Maintenance Checks: Don’t just rely on flush systems and cleaning solutions to maintain your RV’s tanks. Ensure your plumbing system is functioning properly and catch any issues before they become major problems by hiring a professional technician to inspect it.
How long should you run your RV’s black tank flush?
Experts recommend flushing the tank for at least 2-3 minutes to ensure all debris is removed. As the process may take longer than three minutes, using a clear 90-degree connector can be an incredibly helpful tool to monitor the water flow visually.
Regularly flushing your black tank will prevent unpleasant odors and clogs and save you from costly and time-consuming repairs. Trust us; a little extra effort will go a long way in keeping your RV smelling fresh and clean for all your trips.
When should you flush my RV black tank?
It is recommended that RV black tanks are flushed and cleaned every 4-6 weeks or at least once every two months to ensure proper sanitation and avoid any plumbing issues. Neglecting to clean the tank regularly can lead to the buildup of solids and bacteria, resulting in unpleasant odors and potentially damaging the system.
Additionally, not properly maintaining the black water holding tank can lead to costly repairs and replacing the tank. Using a thorough, multi-step cleaning process and following recommended dosages when using chemical cleaners is crucial.
Is it OK to put bleach in an RV black tank?
Taking care of your RV’s sewage system is essential for a smooth and successful road trip. However, it is important to note that not all cleaning products are created equal. While it may be tempting to pour bleach or antifreeze down your black tank, these substances can pose serious risks to your rubber seals and the environment.
Instead, it is recommended to rely on designated RV tank cleaning products and follow the manufacturer’s instructions to ensure your system remains in good condition. You can avoid costly repairs and worry-free travel by being mindful of the products you use and taking care of your RV sewage system.
Keep Your Tanks Clean with Tank Flushes
If you’re an RVer, then you know just how important it is to keep your sanitation system in good working order. That’s where a tank flush comes in. By thoroughly cleaning out your holding tanks, you can avoid nasty odors and clogs that can quickly put a damper on your travels.
And with so many different tank flush systems available, from built-in models to portable devices, it’s easy to find one that suits your needs. But don’t forget to schedule regular maintenance check-ups to ensure that everything stays in good working order.
A tank flush is just one of many steps you can take for your RV’s plumbing system and enjoy your travels to the fullest.

