Last Updated on April 20, 2023
When you first notice a small leak in your RV awning, it may not seem like a big deal. If you do not repair it sooner, the tiny hole can quickly grow into much bigger problems in the future.
Aside from damaging the fabric of your awning, leaks may also lead to the growth of unwanted fungus, which is unsightly and adverse to your health.
Due to this, you should educate yourself on how to stop awning from leaking and take action as soon as you detect an awning leak.
This will result in your awning remaining in good condition for an extended period of time and allowing you to enjoy your outdoor camping trips when it rains. We will now discuss the process of repairing an awning leak.
How to Stop Awning from Leaking? Definitive Guide
Having discussed the reasons behind an awning’s tendency to leak, we will now move on to the procedures involved in fixing a leaking awning. By taking action as early as possible, you can minimize the possibility of water damage occurring in the future.
Repairing a leaky awning is not as difficult as you may think. In most cases, the issue can be fixed with a few simple tools and materials. In this section, we will outline the steps that you need to follow in order to repair a leaking awning.
Step 01: Identify the Leak’s Location
Before you start troubleshooting the problem of leaking awnings, you need to inspect the awning to identify the source of the leak. Depending on the type of awning you have, there are several places where water can leak through.
Be aware of any obvious signs of damage around the awning. If you see any cracks or holes, these are likely to be the cause of the leak. Alternatively, if the awning fabric is stained or discolored, this may also indicate a leak.
Once you have identified the general area where the leak is coming from, you can begin to narrow down the precise location of the leak by using a hose to test different areas of the awning.
Simply turn the hose on to a moderate setting and direct the stream of water at various component areas. If you see water dripping through, then you have found the source. When you have located the leak, mark the area with a piece of tape so that you can easily find it again.
Step 02: Clean the Area Around the Leak
Upon discovering the leak’s location, it is time to perform an action. You should begin by thoroughly cleaning the affected area. This will give you a clear surface to work with and will also eliminate any buildup of dirt that could potentially clog up the repair.
It is imperative to carefully rinse off any contaminants, dust, or pollen using a garden hose. Next, use mild soap and a soft brush to thoroughly clean the surfaces. Once the area is clean, rinse it with clean water and allow it to dry completely. You are ready to proceed with the next step after the area has dried.
Step 03: Repair the Leak
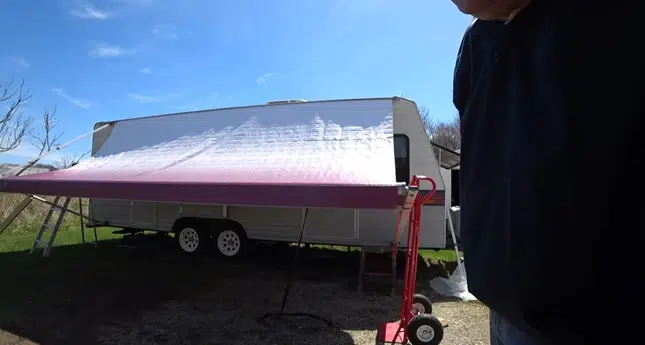
With the surrounding area of the leak cleansed, it’s time to focus on the leak itself. The type of repair that you will need to perform will be determined by the size and spot of the leak. Detach the awning from the caravan.
To remove the nuts and bolts holding the awning in place, you will need a screwdriver and wrench. Lay the awning on a flat surface once you have removed it in order to visually inspect the leak. Make sure you extend the awning completely before attempting to repair it.
If the leak is small and located near the edge of the awning, you may be able to simply seal it with a clear silicone sealant or the seam sealer. Begin by applying the sealant around the perimeter of the leak.
Then, use your finger to smooth it out and create a watertight seal. Allow the sealant to dry for the amount of time indicated on its package. Once it is dry, test the repair by spraying the area with a hose.
Upon successfully sealing a leak, you will see water beading up on the sealant’s surface. You may need to apply a second layer of sealant if the sealant does not appear to be holding.
For larger leaks, or when the sealant fails to hold, you would need to patch the hole with awning fabric. First, cut a square of fabric that is slightly larger than the hole.
Then, use a brush to apply a layer of clear silicone to the edge of the hole. Next, place the fabric over the hole and press it into place. After the fabric has been positioned, make sure that any wrinkles or bubbles are smoothed out with your fingers.
Finally, apply another layer of seam sealant over the top of the fabric. Ensure that the sealant is allowed to dry within the duration specified by the manufacturer.
Over the sealant, you can add a layer of butyl tape for additional reinforcement. Test the repaired area by spraying it with a hose once the repairs have been completed.
Step 04: Reattach the Awning
Assuming you have completed the repairing task, it is now time to reattach the awning. Begin by aligning the awning with the mounting brackets on your RV. Once you have the awning positioned correctly, use the bolts or screws that come with your awning to secure it in place.
Be sure to tighten them until they are snug, but don’t over tighten them, as this could strip the threads. Once the awning is securely attached, open it up and inspect your work to make sure there are no more leaks. If everything looks good, you’re ready to hit the road.
Why Do Awnings Leak?

Before we delve too deep into repairing leaky awnings, let us first understand the reasons why an awning may start leaking in the first place.
In this way, you will gain a deeper comprehension of the issue and be able to take preventative measures in order to ensure that your awning does not leak in the future. Below is a list of some of the most common causes for which an awning might begin leaking:
1. Wear and Tear
Over time, awnings can develop leaks due to wear and tear. The fabric may become stretched or torn, allowing water to seep through. The seams may also come apart, and the grommets that hold the fabric in place may become loose or damaged.
Aside from the aluminum frame, the awning’s fabric can also be bent or warped, making it difficult to lay flat. As a result, even a small amount of rainfall can cause an awning to leak.
2. Improper Installation
If an awning is not installed level or plumb, water will pool on the fabric and eventually cause leaks. The seams and edges of awnings must also be properly sealed to prevent water from penetrating.
Poor sealing can allow water to penetrate, leading to leaks. A poor installation is one of the leading causes of awnings leaks, but you can help prevent this problem by paying attention to detail during the installation process.
3. Poor Maintenance
Inadequate maintenance is often the cause of leaks. Without proper cleaning and maintenance, the fabric can get dirty faster, which makes it more susceptible to damage from heavy wind and rain. The fabric can also be affected by mold and mildew, which causes it to rot and break down over time.
As such, it is important to clean your awning regularly and inspect it periodically to ensure that there is no damage. You can prolong the life of your awning by taking proper care of it and preventing water leaks from occurring.
4. Storm Damage
High winds can tear holes in the fabric or dislodge fasteners, and heavy rain can saturate the fabric and cause it to sag. In the event that the fabric is damaged, it’s only a matter of time before the water starts to trickle through.
If you suspect that your awning has been damaged by a storm, inspect it carefully for holes or other signs of wear. If you find any damage, it’s best to have the awning repaired or replaced as soon as possible to prevent further water damage.
5. Improper Storage
Unless an awning is stored properly, it can develop leaks. For instance, if the awning is stored wet, the fabric can mildew and rot. Storing the awning while it is still damp can cause the fabric to stretch.
As such, it’s important to allow the awning to dry completely before folding it up for storage. Also, you should also inspect the awning carefully for signs of damage before storing it away.
Frequently Asked Question:
There are many questions that people have regarding awnings, and we will attempt to answer the most common ones below:
1. How Often Should I Inspect My RV Awning?
You should inspect your RV awning regularly for wear and tear, as well as possible damage from weather or other hazards. At a minimum, you should take a close look at your awning at least once a month and more often if you use it frequently.
During your inspection, check the fabric for any signs of rips, tears, or fraying, and look for any looseness in the awning’s frame. Also, make sure that all the hardware is secure and free of rust or corrosion.
If you notice any problems, be sure to have them repaired promptly to avoid further damage. By taking good care of the awning, you can help ensure that it will provide years of trouble-free use.
2. Can I Clean My RV Awning With A Pressure Washer?
As long as you take care not to damage the awning fabric, you can clean your RV awning with a pressure washer. Use a medium or low-pressure setting and hold the nozzle about two feet from the awning.
Move the nozzle in a side-to-side motion as you work your way down the length of the awning. Be sure to rinse the awning thoroughly afterward to remove any soap residue. You may also want to use a specialty RV awning cleaner to help loosen stubborn dirt and grime.
3. What is the Length of an Average RV Awning?
The average RV awning is about 14 to 15 feet long. However, there are awnings of all different sizes, from 10 feet to over 20 feet in length.
The size that you need will depend on the size of your RV and how much coverage you want. If you have a large RV, or if you plan on using your awning for entertaining, then you may want to consider a longer size.
Conversely, if you have a smaller RV or only need occasional shade, then a shorter awning may be sufficient. Ultimately, the best way to determine the right size for your needs is to speak with an expert or consult the manufacturer’s specifications for your RV.
4. Do RV Awnings Come With Lights?
Some RV awnings are equipped with lights built into the frame, but not all of them do. If your awning doesn’t have lights, you can easily add them yourself. There are a variety of different types of RV awning lights available, so you can choose the ones that best suit your needs.
Many RVers prefer LED lights because they are energy-efficient and long-lasting. Whatever type of light you choose, be sure to follow the manufacturer’s instructions carefully to avoid damaging your awning.
Conclusion
Upon reading this article, we hope that you have gained a better understanding of how to stop awning from leaking. Although it may seem like a tedious undertaking, if you take your time and follow the instructions carefully, it is a relatively easy process.
By taking the time to properly repair your awning, you can avoid more costly damage down the road and ensure that it provides a long period of trouble-free use.
Do not forget to inspect your awning for wear and tear on a regular basis. This will enable you to identify any problems early and prevent them from worsening. You will be able to enjoy your RV with no worries once you have reattached the awning and checked for leaks.

